
Soft Sourdough Sandwich Bread Recipe
As an Amazon Associate and member of other affiliate programs we earn a small commission from qualifying purchases through our affiliate link. For more information read our Entire Affiliate Disclosure.
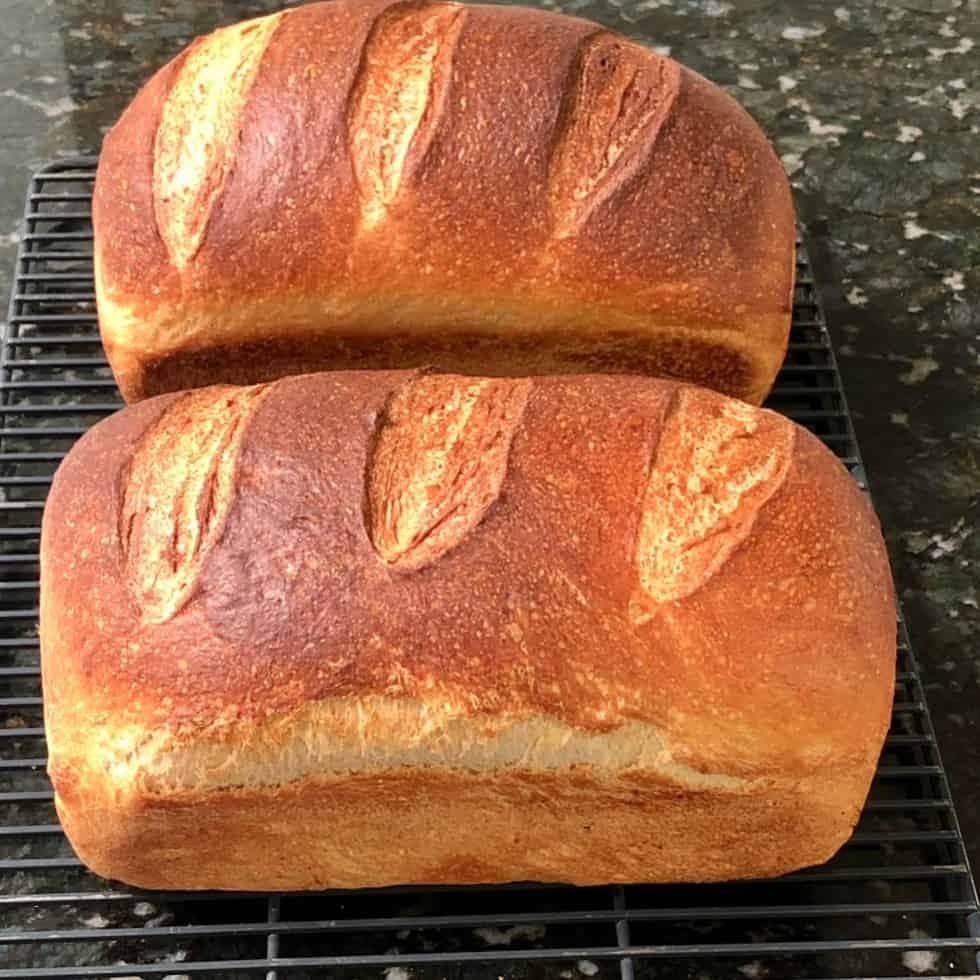
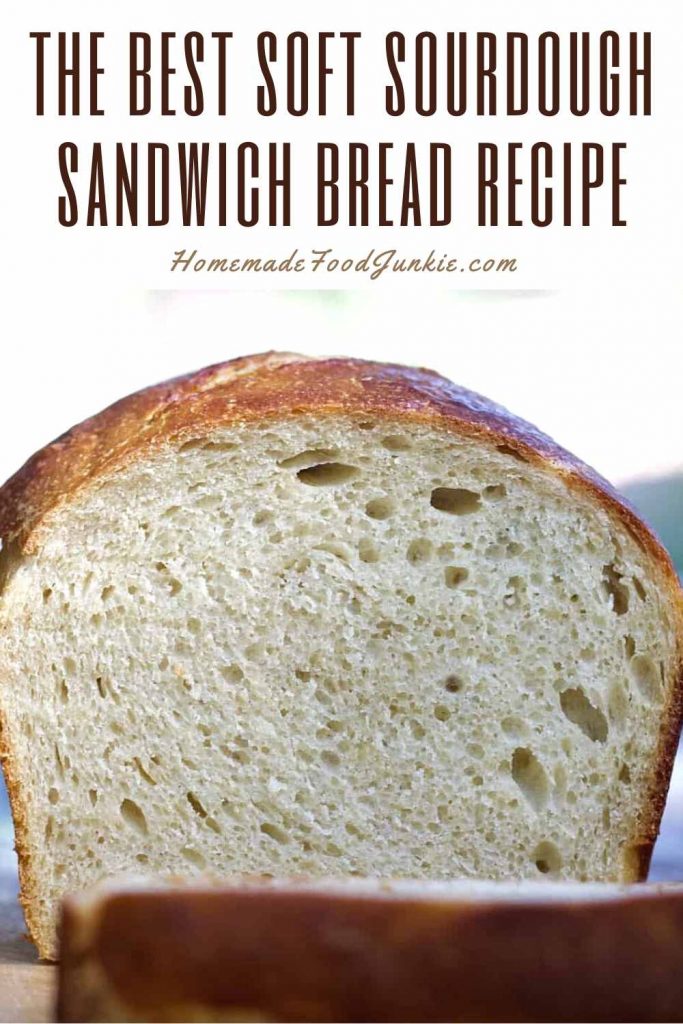
Bake this beautiful soft white sourdough sandwich bread recipe for your favorite sandwiches.
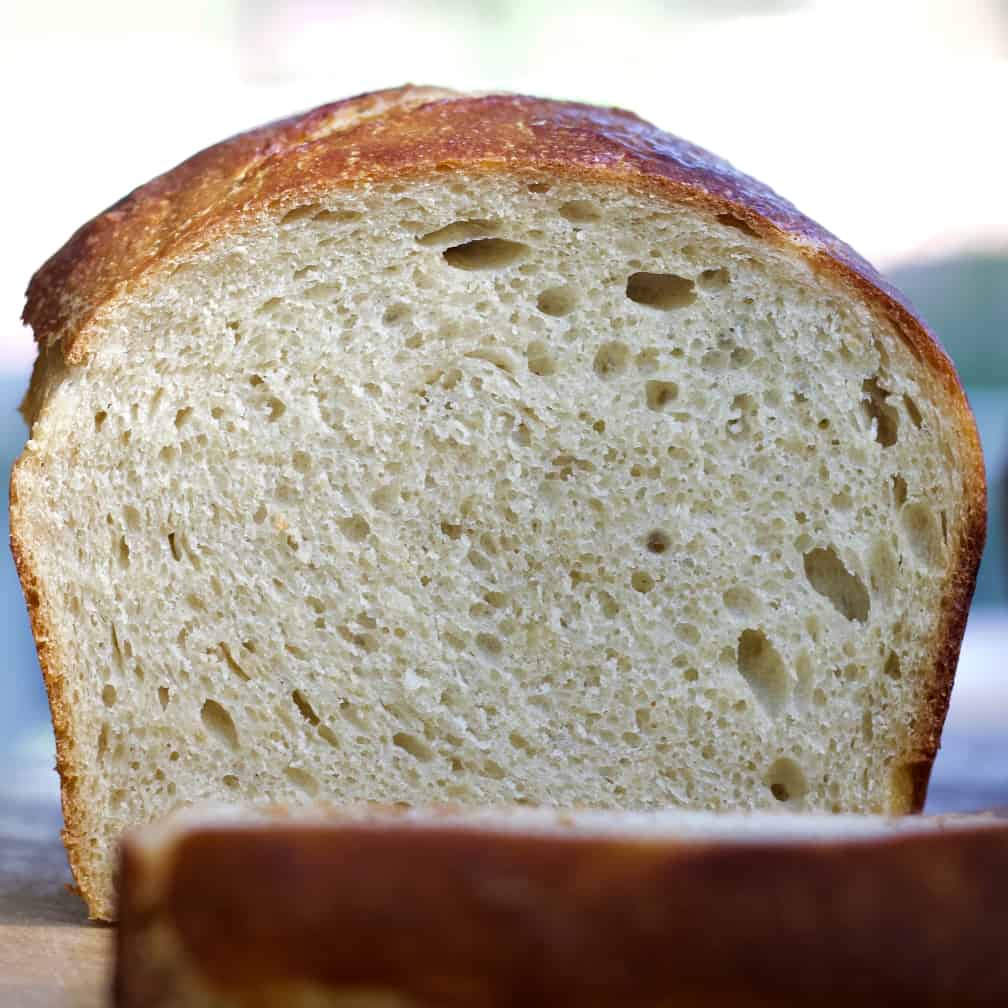
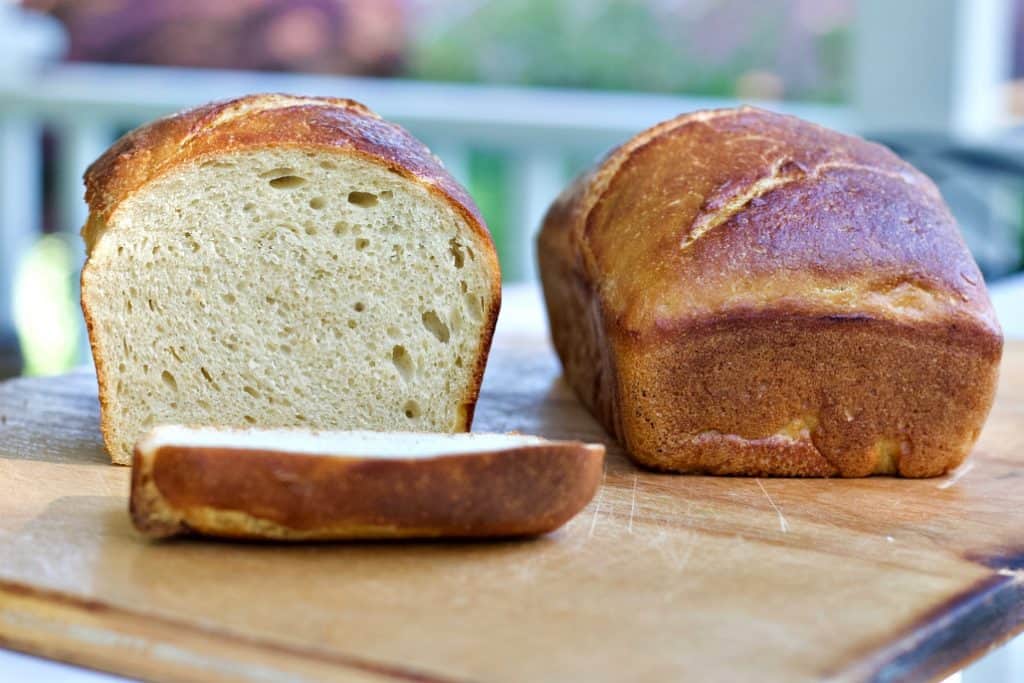
Soft Sourdough Sandwich bread is an easy sourdough bread recipe to make. This sourdough recipe is formed into soft and fluffy loaves that are perfect for sliced bread. Make this sourdough sandwich bread once a week to always have yummy sandwich bread on hand.
This dough has delicious sweet flavor and a soft and fluffy texture. We have a few tips and tricks in this post for making the best sourdough sandwich bread ever!
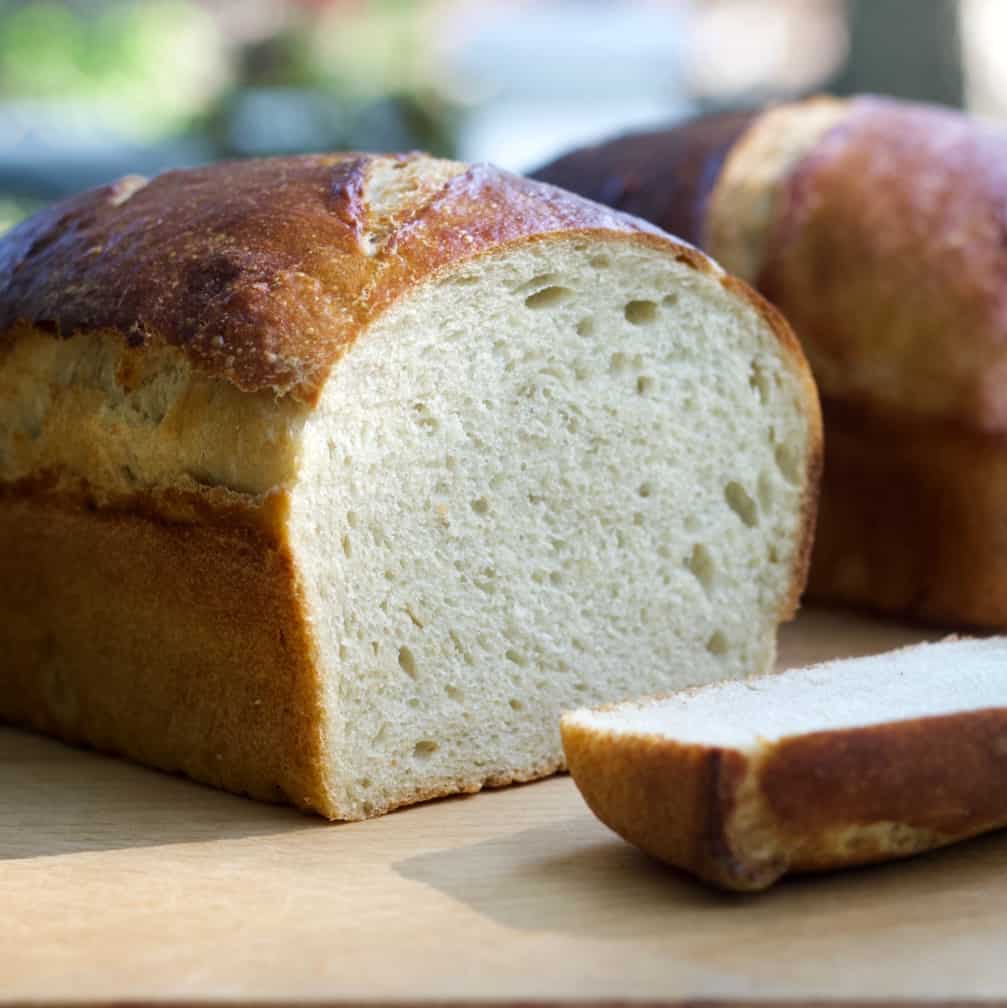
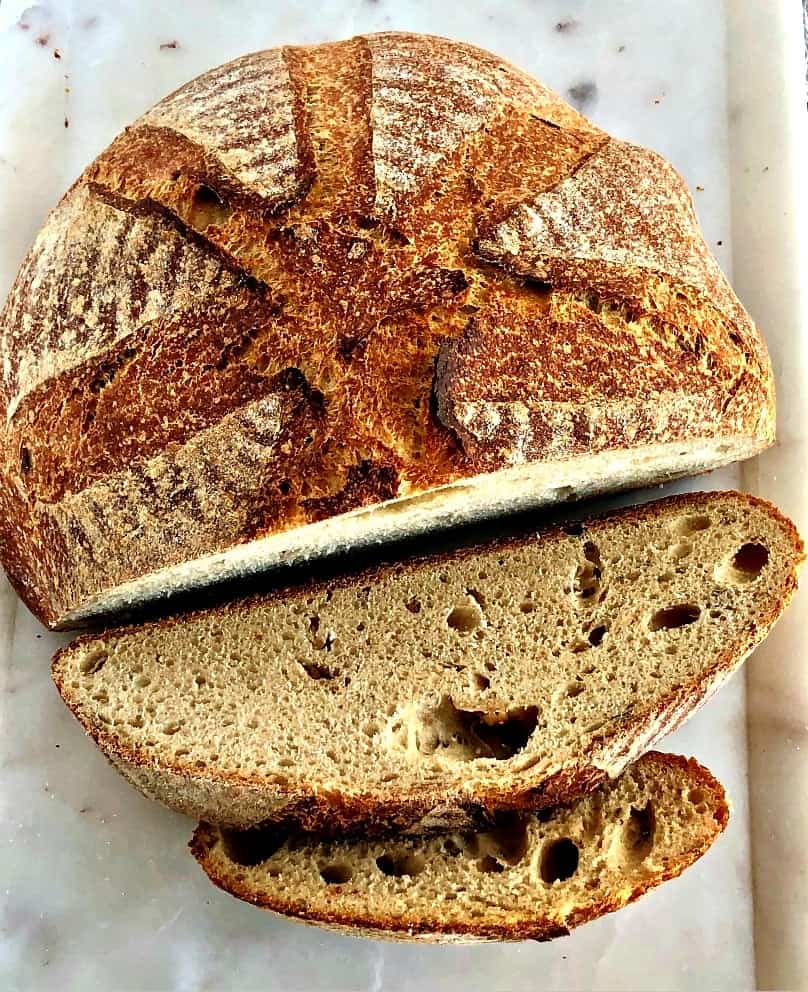
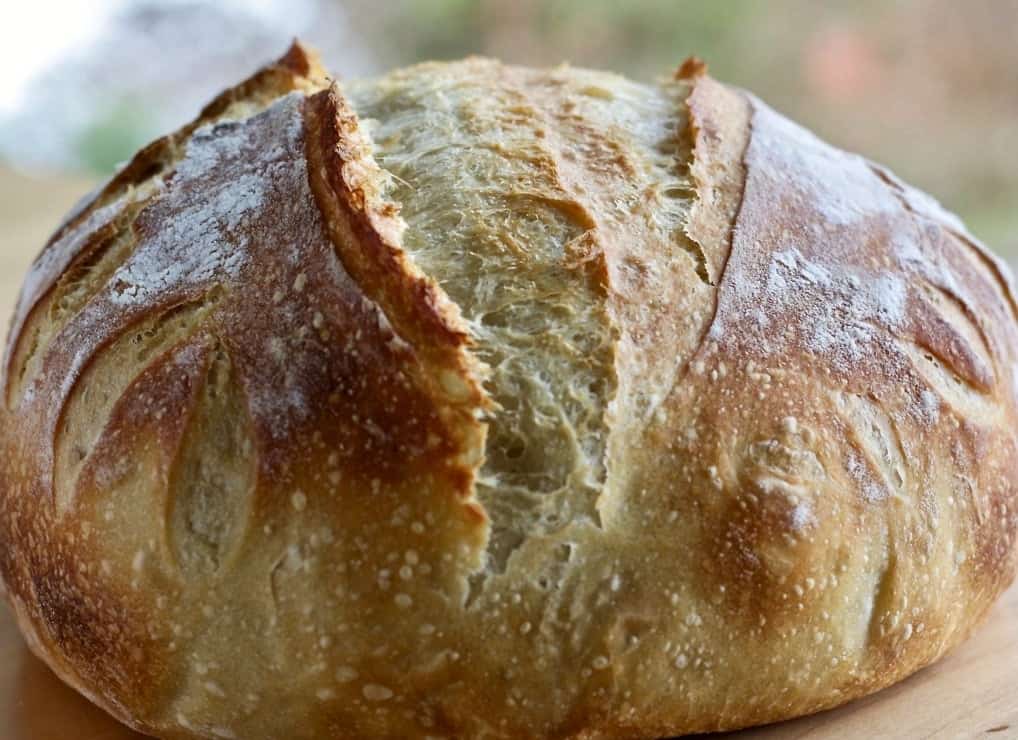
Sourdough artisan breads are famous for their crusty crusts and soft holy crumb. Perfect for dipping in soups and making paninis or crostinis. Who doesn’t love that shattery crust with a steak or plate of lasagna?
However, When you want a soft squishable sandwich with Mayo or a piece of buttery toast? Eat THIS sourdough sandwich bread.
More Sourdough Bread Recipes:
See our complete sourdough bread recipe tutorial and step by step guide for Beginners in our Artisan Sourdough Bread Recipe. Find all of our sourdough Bread Recipes here.
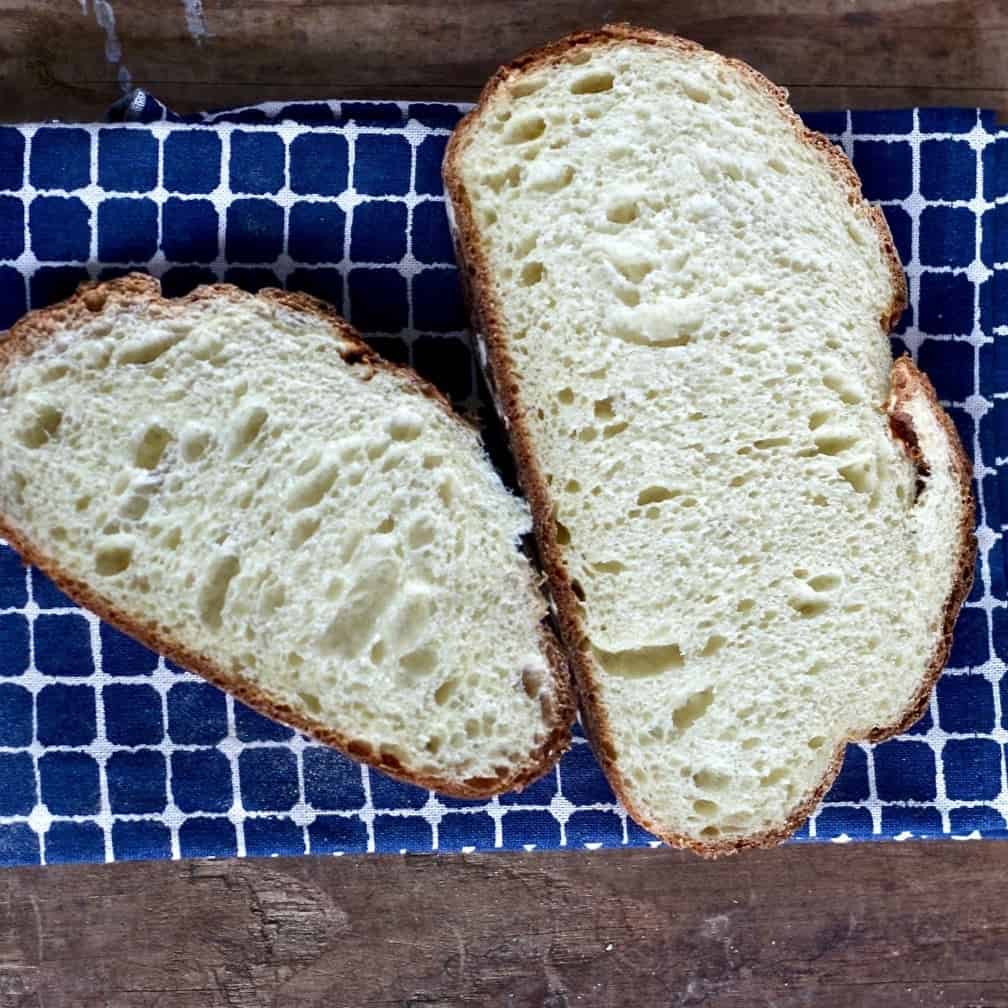
How long does Homemade Sourdough Bread Last?
This bread will last about a week when stored in a proper airtight container. Homemade sandwich bread will mold quicker than store-bought bread. This is because homemade bread does not contain the preservatives that you will find in store-bought bread. Keep that in mind when making homemade sourdough bread. Store it properly to avoid a moldy and stale loaf of bread. This recipe makes two 1000 gram loaves of soft sandwich bread.
Is Sourdough Bread good for Sandwiches?
Regular Sourdough bread is great for sandwiches. Many restaurants use sourdough bread to make grilled cheese sandwiches, turkey, toasted sandwiches etc. A regular loaf of sourdough bread has a different shape than sandwich bread. It usually produces long and narrow pieces of bread. A sourdough sandwich bread will be shaped into a traditional bread loaf shape. This makes it easier to toast the sourdough bread in a toaster.
Soft sourdough sandwich bread is great for peanut butter and jelly sandwiches, turkey, or traditionally shaped sandwiches. The great thing about this bread is it is really easy to work with and store.
Why is my Sourdough Sandwich Bread not Rising?
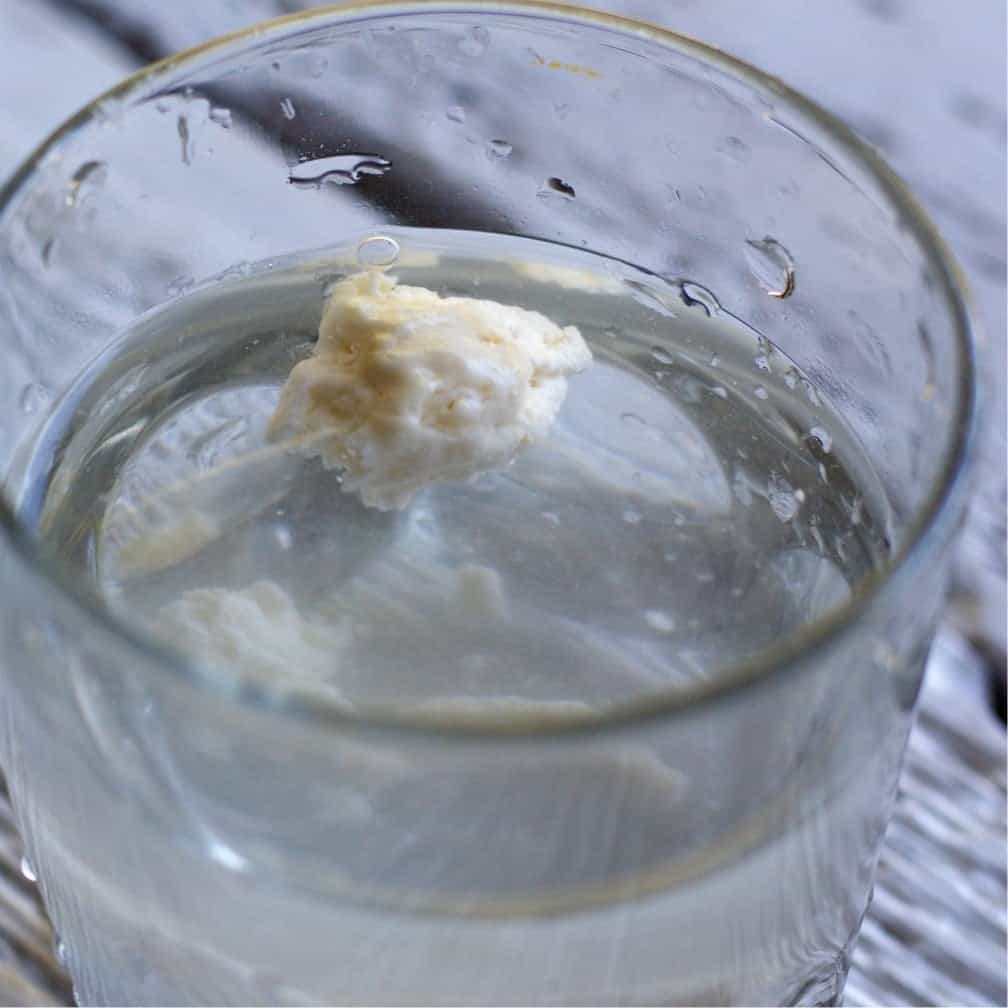
Sourdough Sandwich Bread not rising is usually due to a weak or inactive starter. Always ensure that your starter can pass the float test before using it to bake. It can be tempting to make the bread early before the starter is ready. Always wait until your starter can float in a cup of water before baking. There is no way to save a loaf of bread that turns out flat. It is worth it to properly prepare the starter for the best loaf of bread.
Do I need to score Sourdough Sandwich Bread?
There is no need to score a loaf of sourdough sandwich bread. This bread will rise and ferment without scoring it on top. If you wish to score the sourdough sandwich bread, you can do a gentle slice down the center of the loaf prior to baking. However, there is no need to score this type of sourdough bread. It will bake and rise just fine without going through the scoring process.
Watch our video tutorial to see all the techniques I use to make this bread recipe.
Sasha’s Soft Sourdough Sandwich Bread Recipe:
Sasha, our master baker contributor, created this sourdough recipe for her hubby. He wanted a soft white squishable bread with a soft crust. We all agree this bread makes great sandwiches.
Sasha’s family is incredibly lucky. And so are we. She is sharing her soft sandwich bread recipe with us so we all can benefit from her expertise.
Sasha also shared her Sourdough Milk and Honey Sandwich bread with us in case you missed it. Thank you Sasha!
Tips on making the Sourdough Sandwich Loaf:
This is a white bread recipe. However, you can mix whole wheat flour up to 50-50 with your white bread flour and still get good results.
- Begin with an active fed sourdough starter for best results. You do NOT need active dry yeast for this recipe.
- WATCH our video tutorial for ALL the techniques used in this bread dough making process. If you don’t know a term or technique the video will teach you.
- Good Flour is critical to the outcome of any homemade bread recipe. Use a fresh high protein bread flour (at least 5% protein).
How to Make a Soft Sourdough Sandwich Bread Loaf:
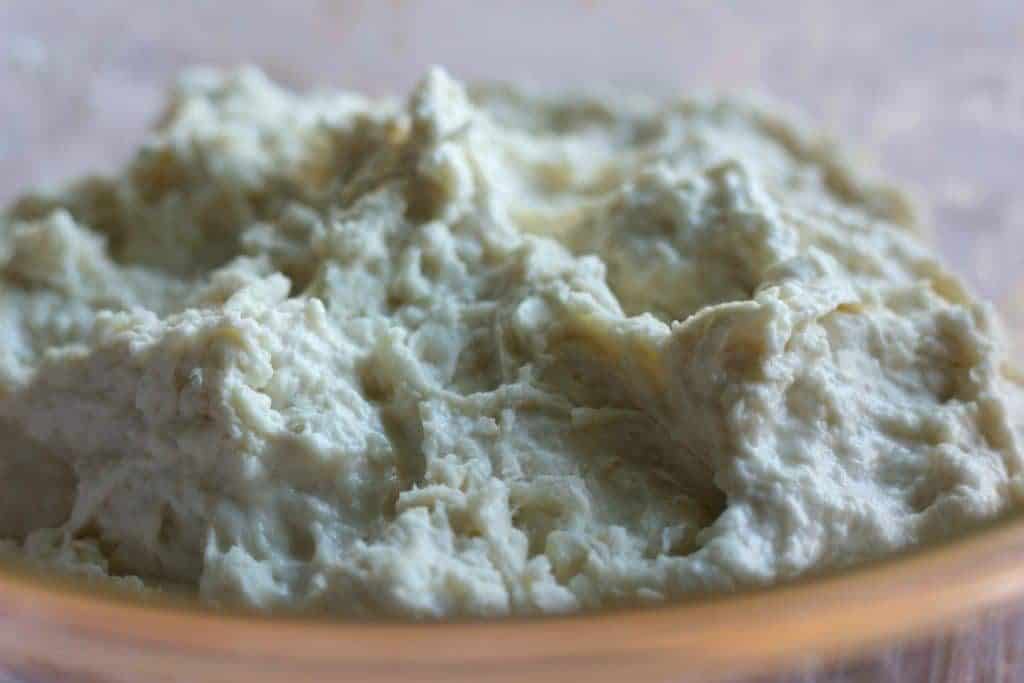
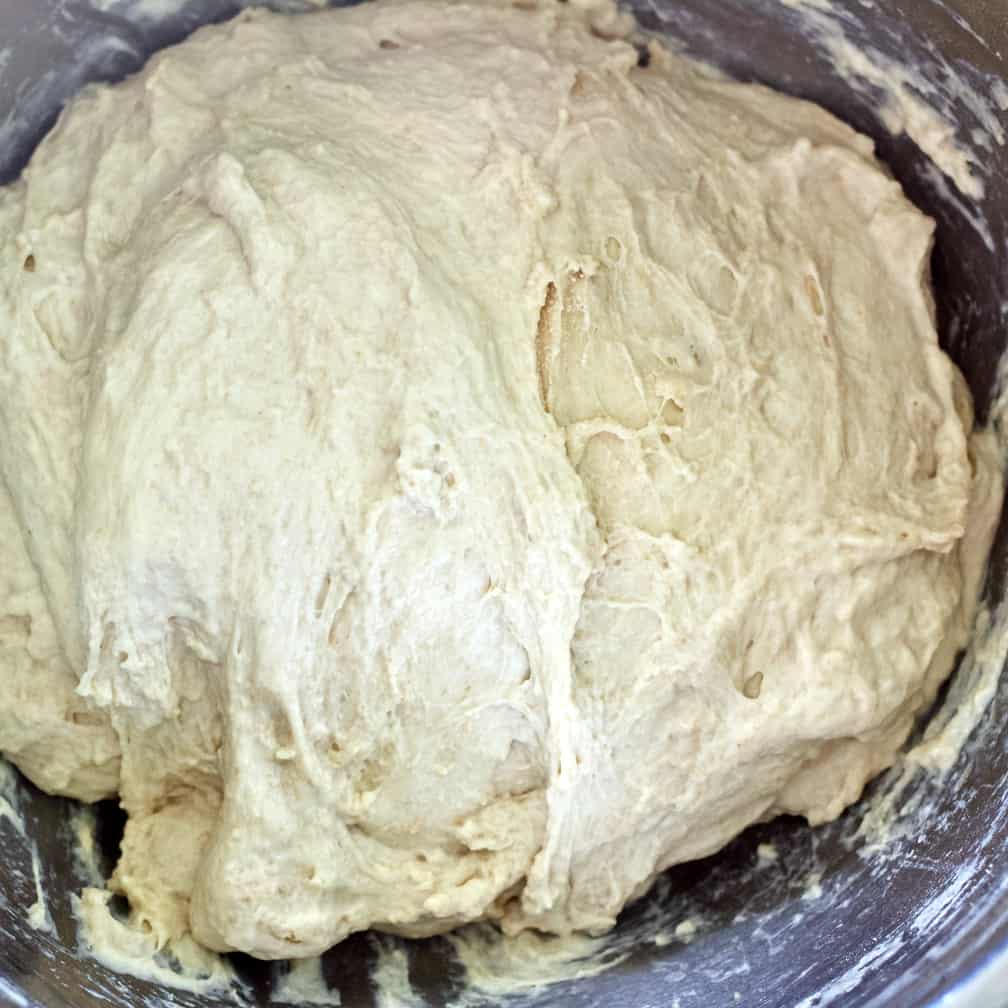
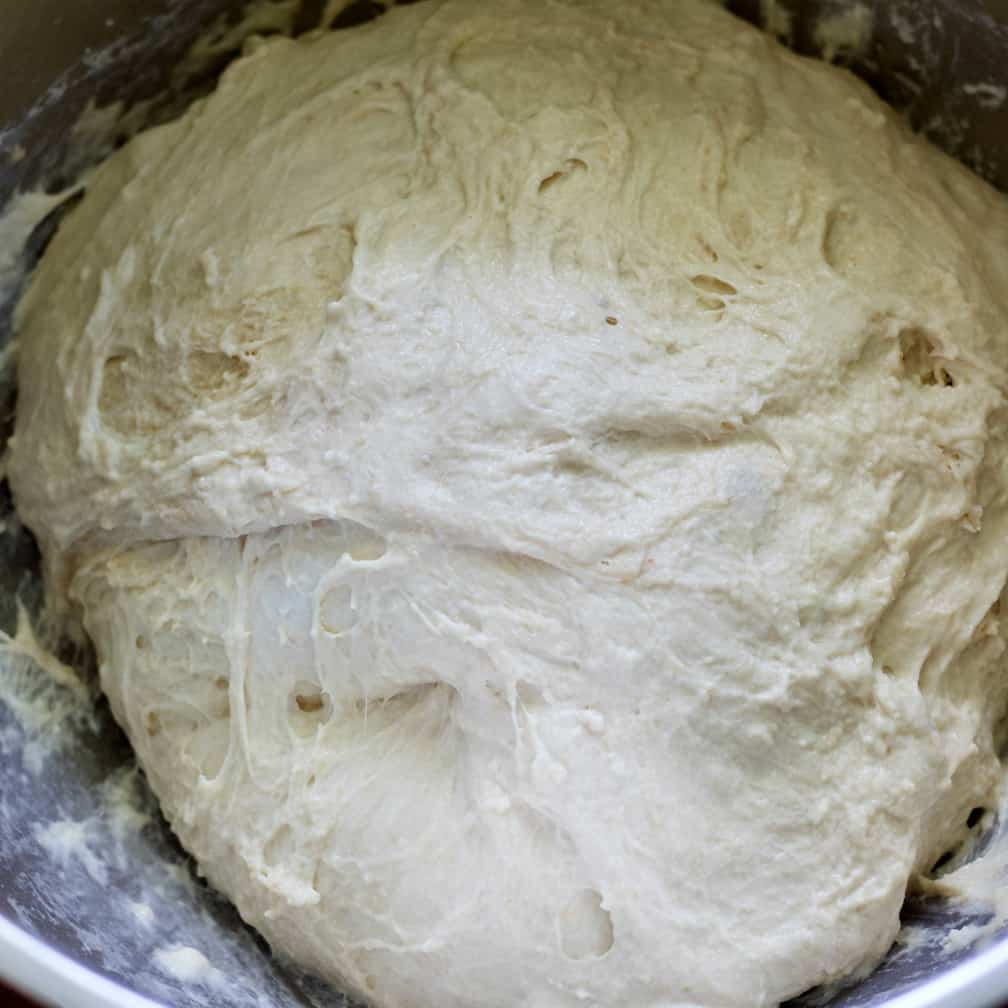
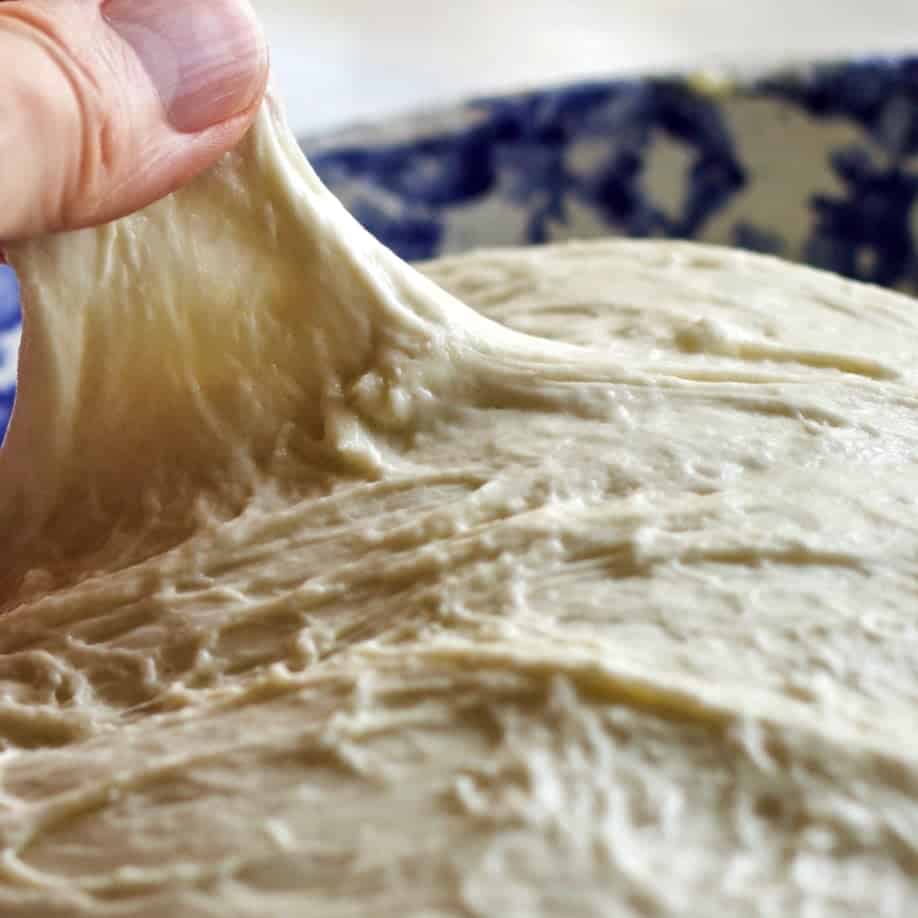
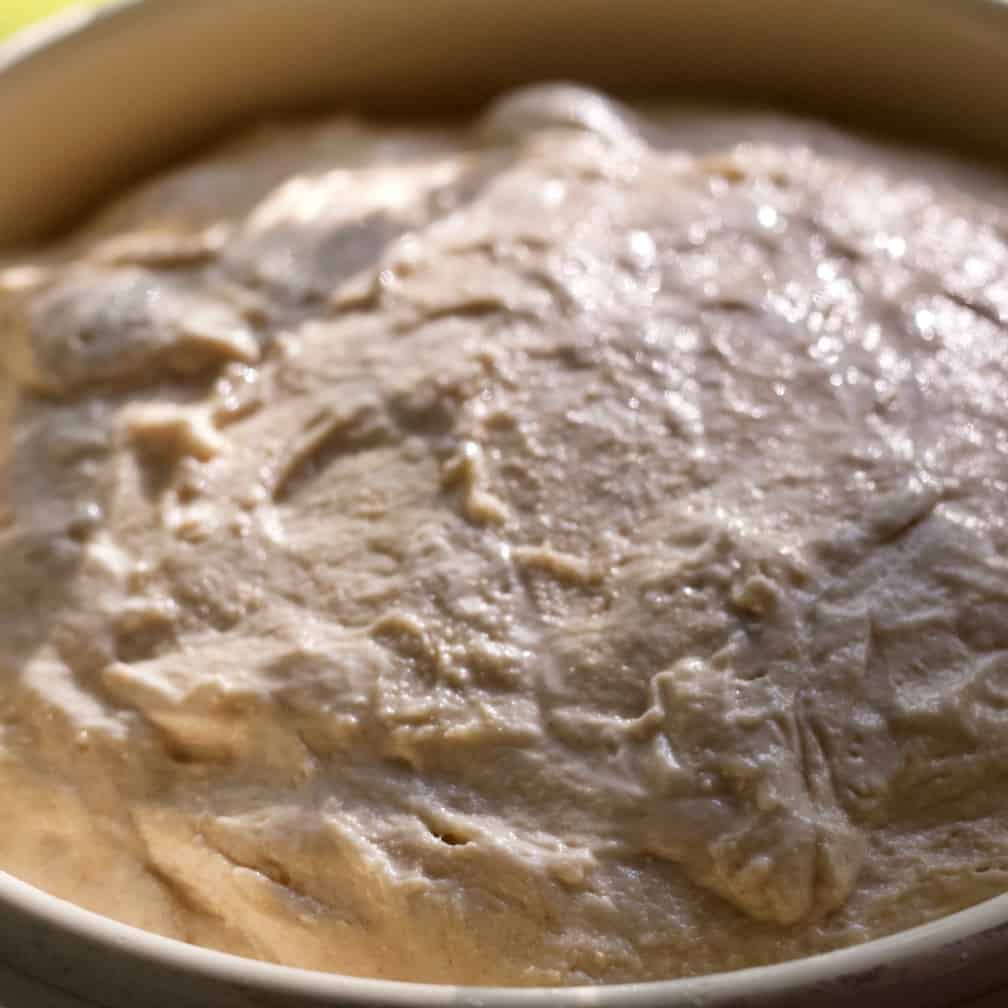
Here is a quick visual walkthrough of this recipe. The complete recipe is in our Printable Recipe Card. But here are the main points.
Sometimes a picture really helps. AND don’t miss our video tutorial (playing in the sidebar) if you need further examples of the techniques.
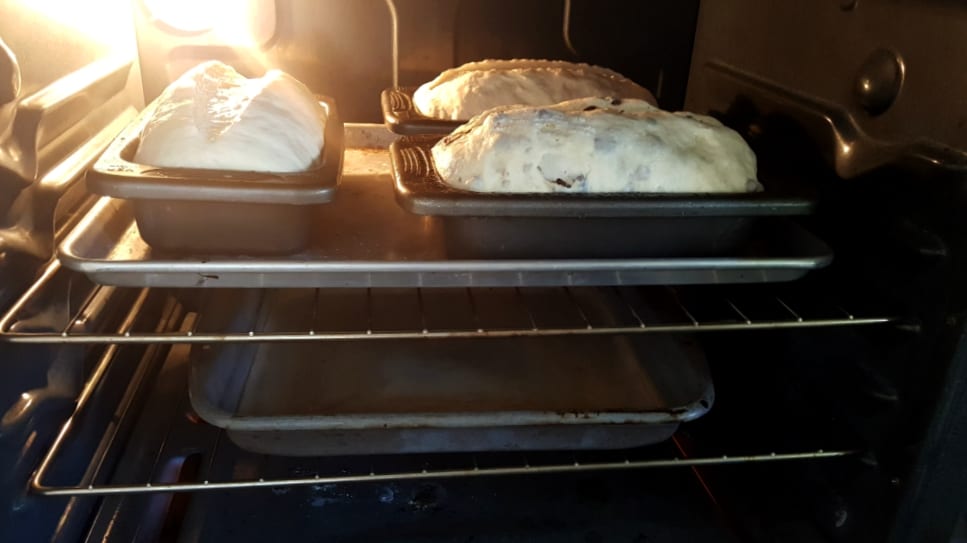
Cinnamon Swirl Bread Variation and Soft Cinnamon Sourdough Rolls:
Look at the bread baking in the oven (pictured above). The one closest to the front sideways is This soft sourdough bread made as Cinnamon Raisin Bread.
You will find This Complete recipe post for Sourdough Cinnamon Raisin bread has LOTS of tips. A complete walkthrough and guide for incorporating the plumped raisins, layering the cinnamon filling and forming the loaves.
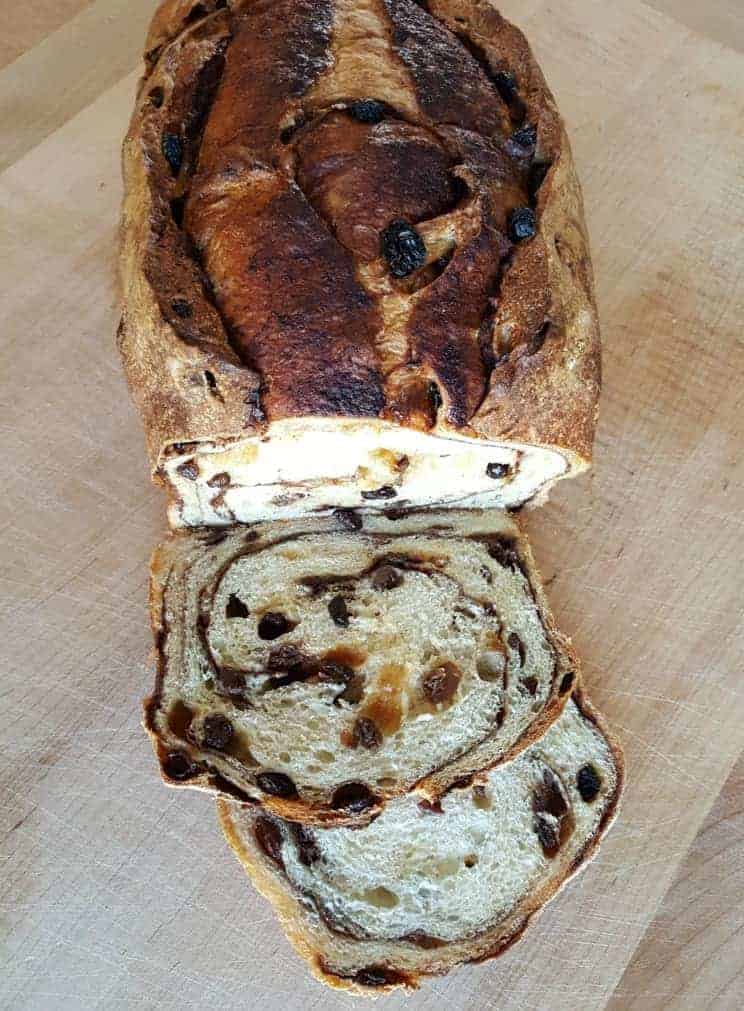
Soft sourdough made as cinnamon raisin swirl bread is pretty darn amazing breakfast food. Give it a try.
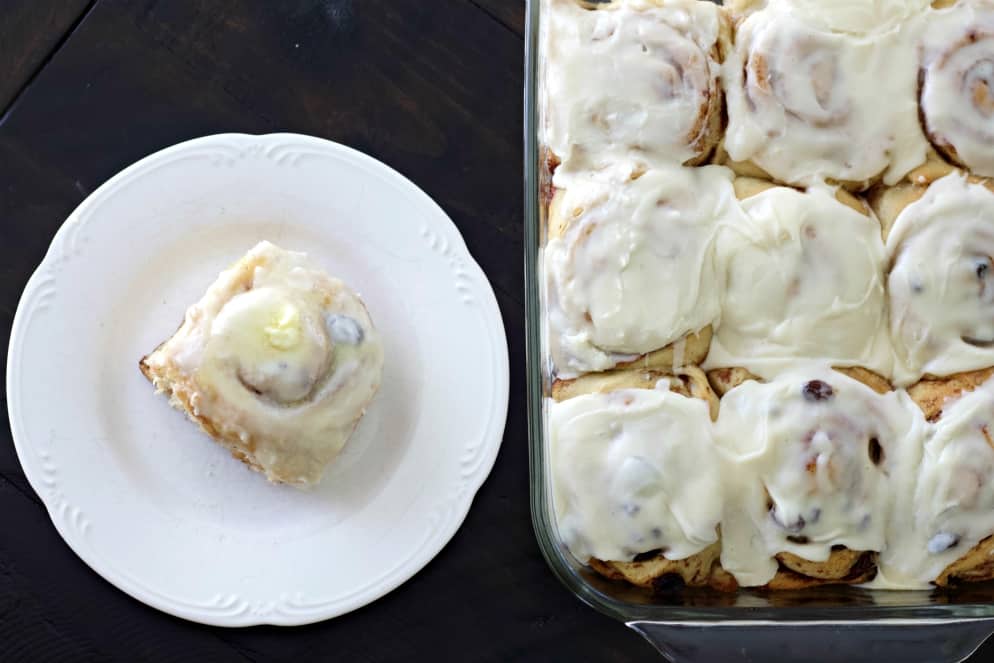
Also make these Soft Sourdough Cinnamon Rolls from this bread dough recipe. They are absolutely scrumptious!
How to Shape A loaf of Bread:
You can bake this recipe in boules. However it is much easier to eat as sandwiches and toast when baked in pans.
Here’s how to shape the dough for baking in bread pans. I use two 9 x 5 inch bread loaf pans for this recipe.
Prepare the dough for Shaping:
- Remove Dough From Fridge and allow to come to room temperature. This will take about 2 hours.
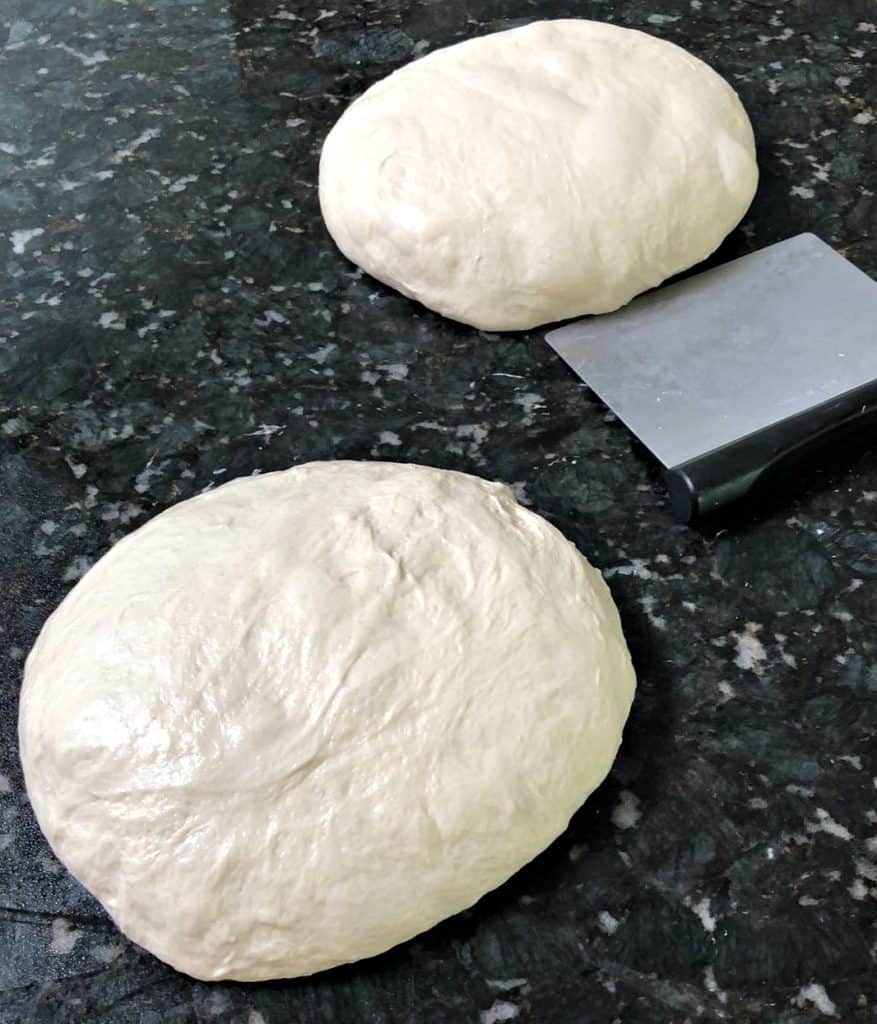
- Divide and shape the dough into two 1000 gram balls of dough.
- Bench Rest the balls loosely covered about 60 minutes until very elastic.
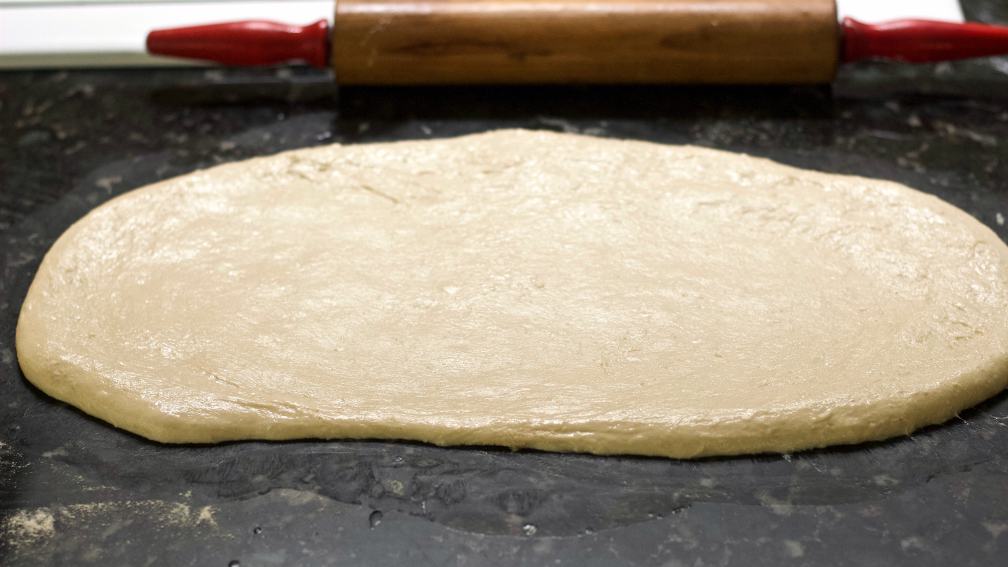
Shaping:
- Choose one dough ball. Set the other aside to be next.
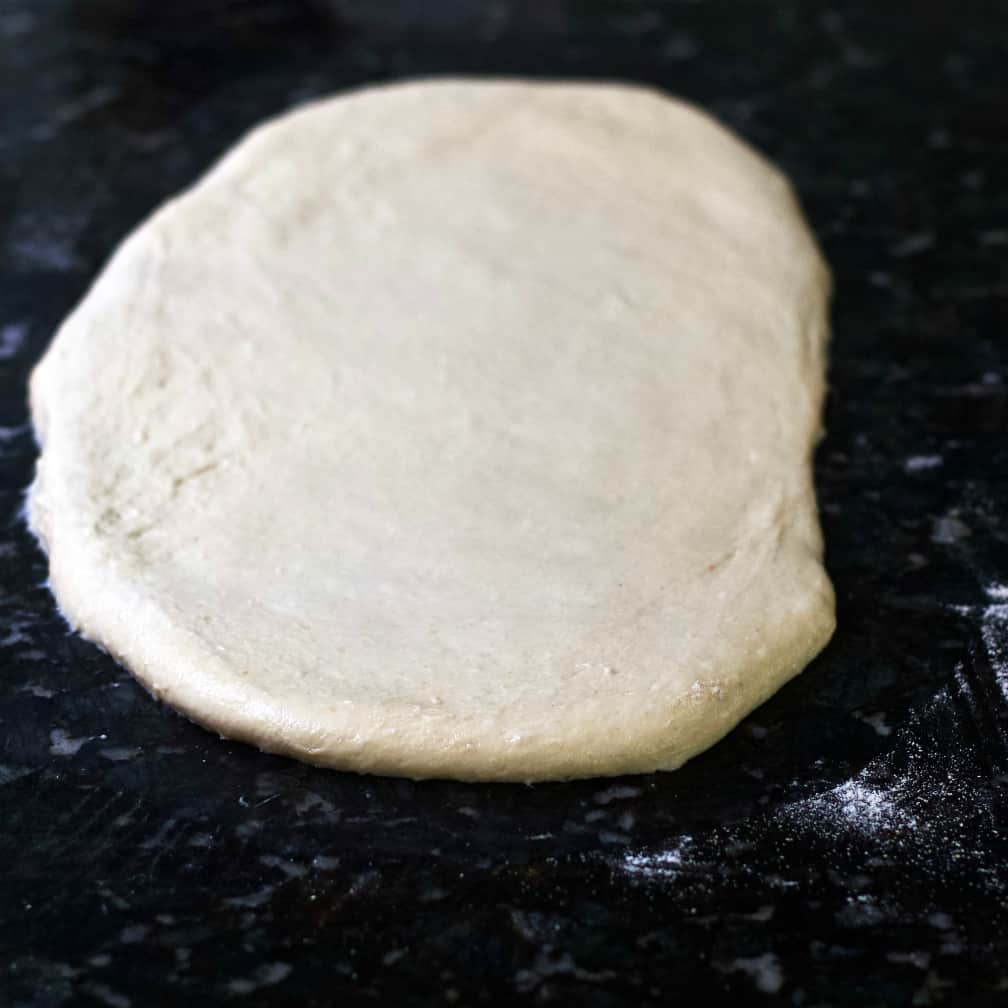
- Flatten the ball on a floured board with your rolling pin to degass. This may take several passes. (You will notice my bread does still have a few small holes. It needed more degassing)
- Shape the degassed dough into a rectangle and spritz with water.
- Bring the long edges into the center and form a closed seam.
- Fold the two front corners to the middle seam as shown below.
- Roll the dough tightly. tucking it as you roll to avoid air pockets.
- Pinch the ends of the loaf and flatten the seam.
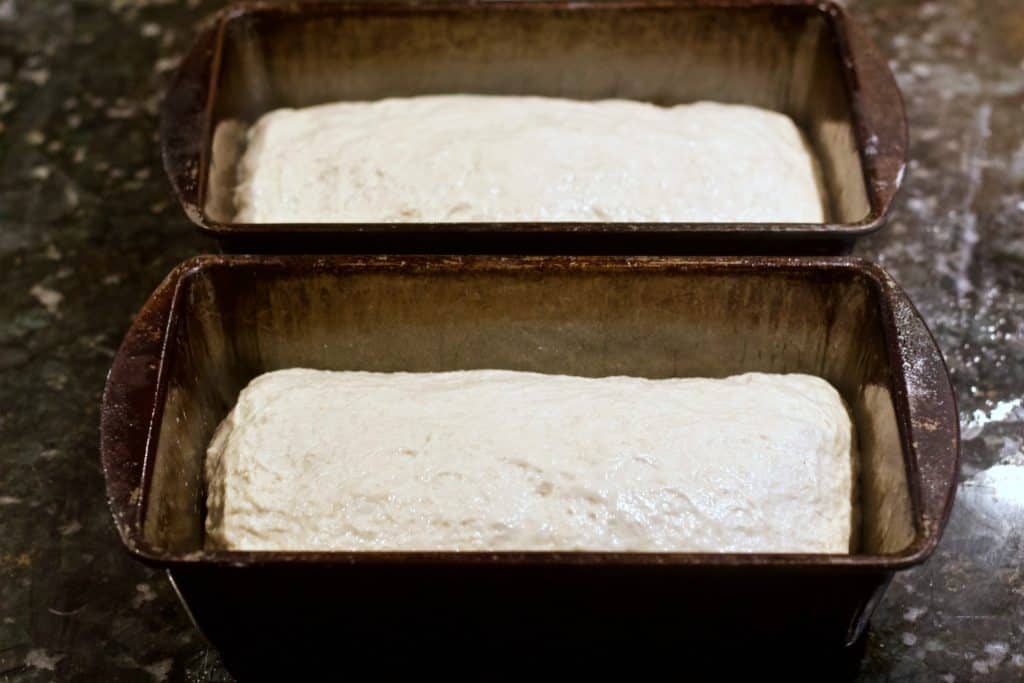
- Place the dough loaf into your OILED loaf pan.
- REPEAT with second dough ball. Continue with the recipe.
For more tips on shaping your bread read our sourdough shaping guide.
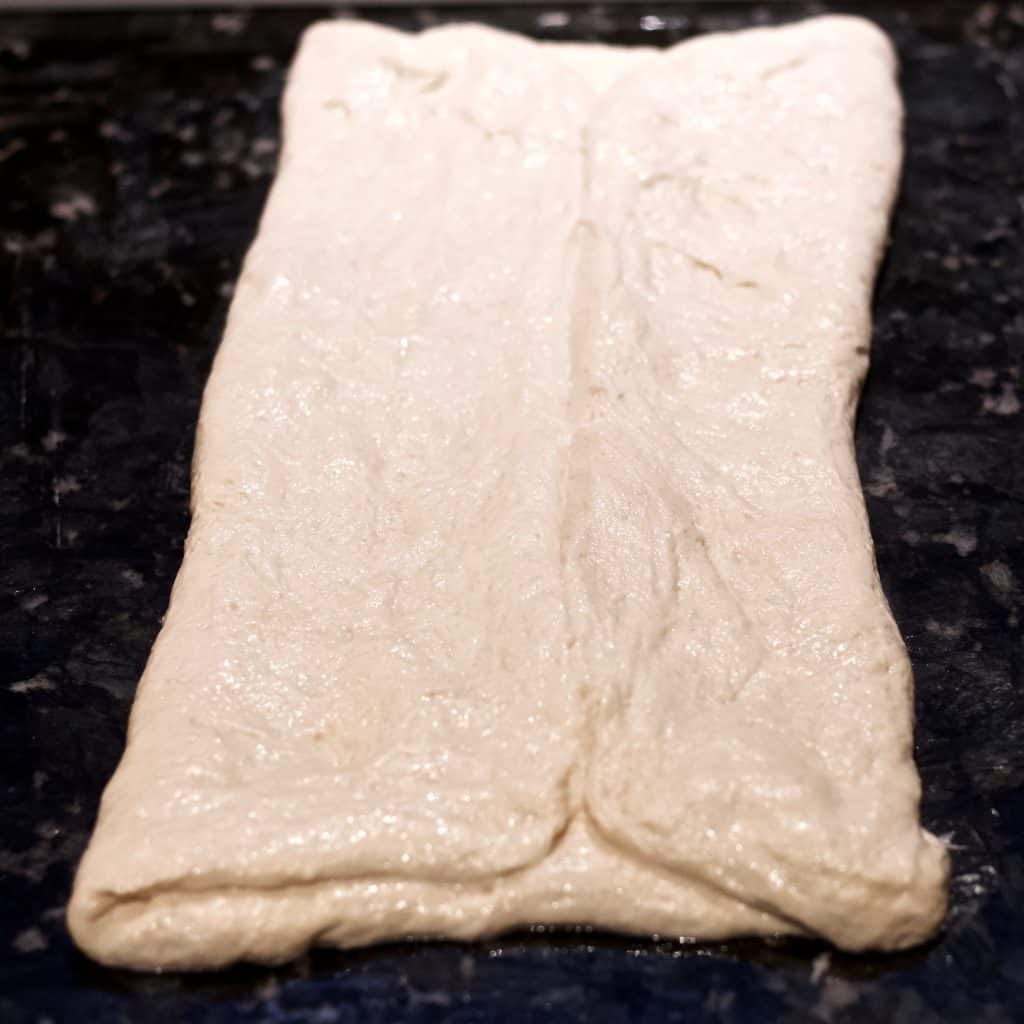
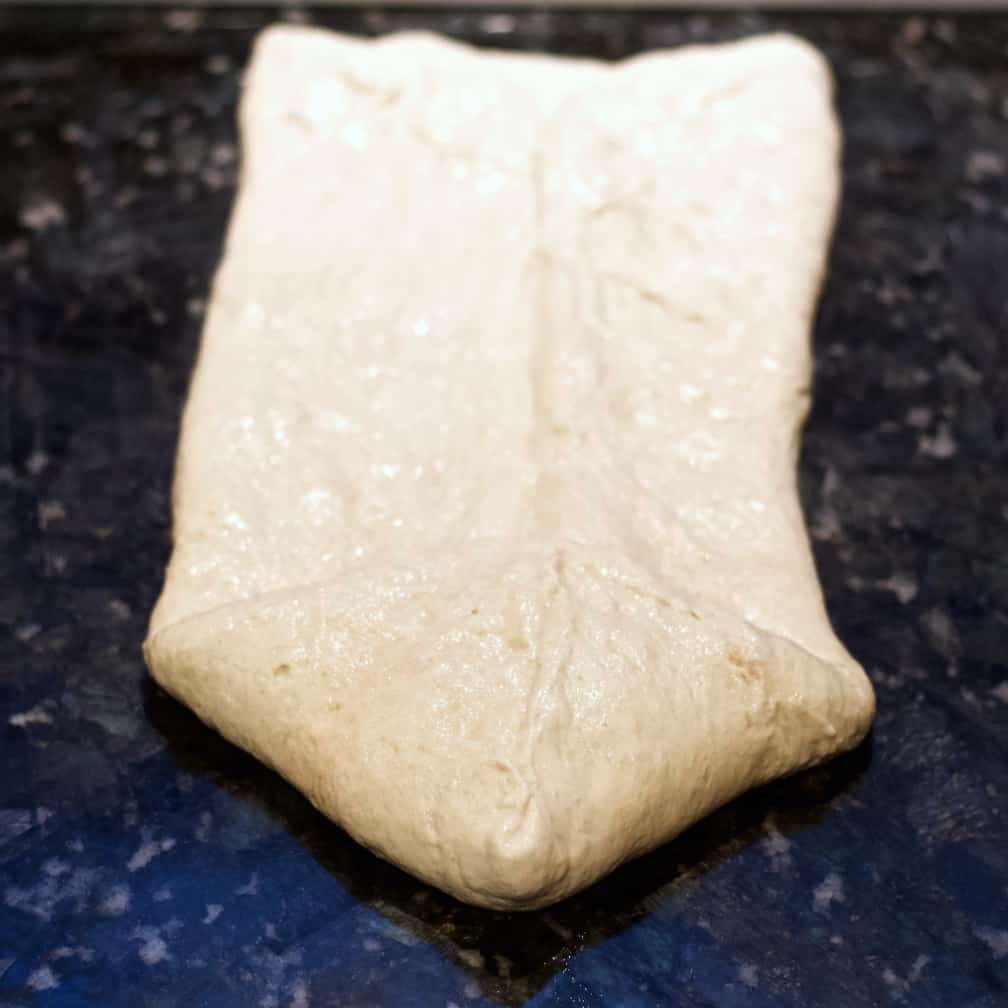
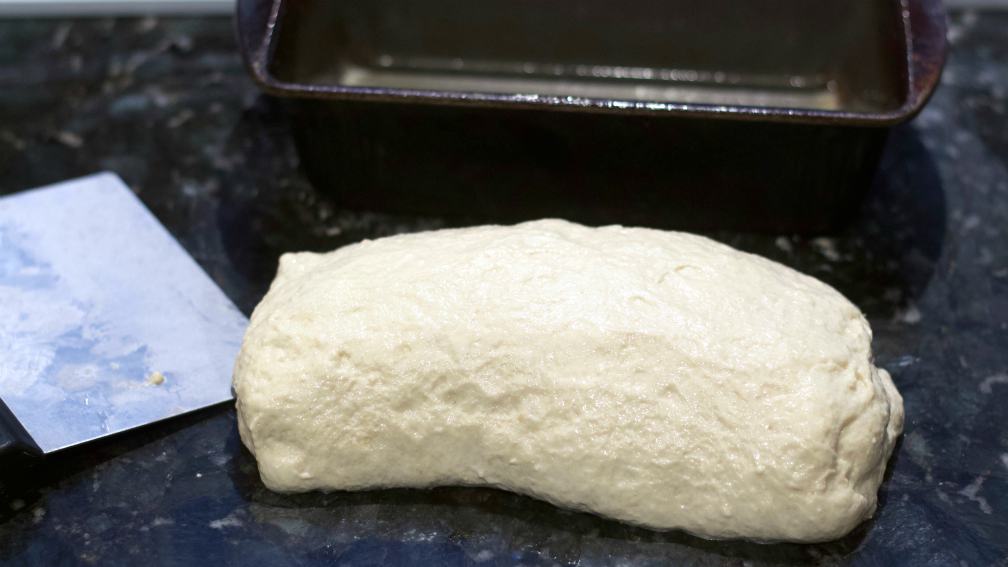
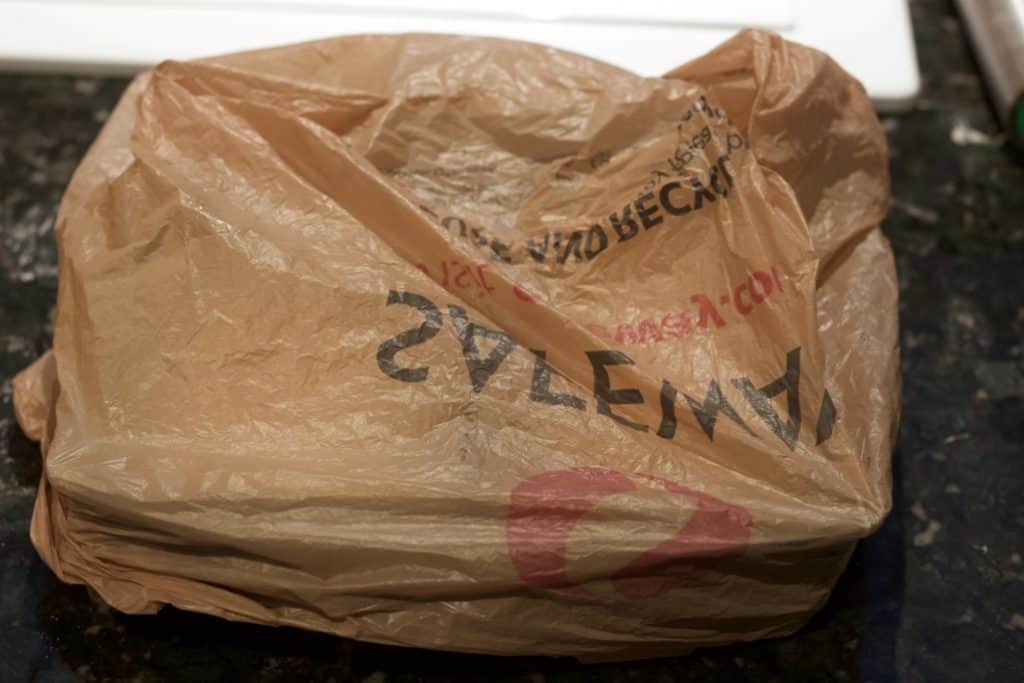
The final rise is done in the plastic bags as shown. Allow the dough to rise to the pan top or slightly above.
Now when the oven is thoroughly preheated, remove one loaf from the fridge, score it deeply and bake as directed with a water bath.
Your Printable Recipe Card:
Read the complete recipe and instructions below. If you print this recipe the pictures will not print. This is to save you ink and paper.
NEW! We now have a complete video recipe demonstration of this bread in the sidebar and the bottom of the printable recipe card.

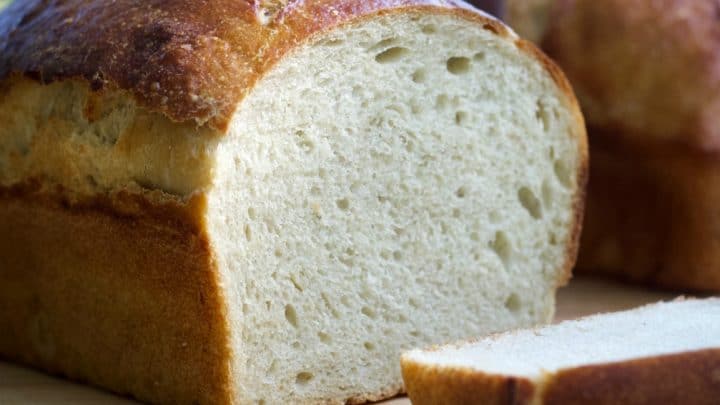
Soft Sourdough Sandwich Bread Recipe
Soft Sourdough Sandwich bread is the perfect soft squishy bread for toast and peanut butter sandwiches. You can also grill this bread for amazing grilled cheese sandwiches. The flavor is outstanding.
Ingredients
- 300 grams starter-freshly fed and active
- 650 grams warm water
- 50 grams honey
- 40 grams avocado oil
- 1000 grams White bread flour (high protein)
- 20 grams Salt
Instructions
MIXING:
- Begin with a very active recently fed starter. It should pass the float test.
- Set a large bowl on a digital food scale set to grams and press the tare button. The scale should read zero.
- Pour in the water to weight of 650 g. Press tare.
- Pour in 300 grams of starter. Press tare. The starter should form a floating mass on the water.
- Add the oil. Press tare
- Add the honey. Press tare.
- Whisk together the starter, oil, honey and water until they are mixed.
- Add the 1000 grams of flour.
- Mix the flour into the water/starter with a dough hook, spatula and your wet hands until you have a shaggy ball of dough.
AUTOLYSE: Technically our process is a fermentalyse, since we add the starter in with the flour and water initially.
- Rest dough 1 hour.
- Sprinkle salt across dough.
- spritz with water bottle and work in the salt with wet hands.
- Rest 30 mins
STRETCH AND FOLDS:
- Begin Stretch and Folds. You need 4 rounds of stretch and folds 30 mins apart. See video for technique.
LONG COLD RISE:
- Refrigerate overnight or up to 24 hours.
BENCH REST DOUGH:
- Remove from fridge and warm to room temperature. (ABOUT TWO HOURS)
- Divide the dough into two 1000 grams dough balls by weight.
- Bench rest 30 to 45 minutes until dough is elastic.
SHAPE AND FINAL RISE:
- Choose one dough ball. Set the other aside to be next.
- Flatten the ball on a floured board with your rolling pin to degass. This may take several passes. (You will notice my bread does still have a few small holes. It needed more degassing)
- Shape the degassed dough into a rectangle and spritz with water.
- Bring the long edges into the center and form a closed seam.
- Fold the two front corners to the middle seam as shown below.
- Roll the dough tightly. tucking it as you roll to avoid air pockets.
- Pinch the ends of the loaf and flatten the seam.
- Place the dough loaf into your OILED loaf pan.
REPEAT for second loaf.
- Let sit on counter 2 to 4 hours until the dough reaches to the top of the bread pans. For best oven spring chill two hours in the fridge covered.
BAKING PREP AND INSTRUCTIONS:
- Preheat oven and water bath(any pan half full of water. Set it on the shelf UNDER THE BREAD) to 400° F.
- Remove the loaves from the fridge and score them deeply. (I do three slashes diagonally accross the top).
- OPTIONAL: For a shiny loaf of baked bread, brush the dough with a beaten egg.
- Set the loaf pans in the middle of oven.
- Bake the loaves 15 minutes.
- Reduce the oven temp to 375 degrees F.
- Bake an additional 25 to 30 minutes.
- Using a digital thermometer check internal Temp of loaf. It is done at 200°. If you don't have a thermometer pop loaves out to test for hollow on bottom. Or thump the loaf. Does is have a hollow sound?
- Remove from oven and cool on racks to room temperature before cutting the bread.
Notes
- Measure the ingredients CAREFULLY for best results.
- THE SALT: I use Himalayan salt. All salt works. However, they have different volumes by weight. So you need to be careful. Weighing helps get it right.
- THE OIL: Avocado oil is recommended for best health. Use any neutral flavor oil you prefer.
- THE FLOUR: Use any high protein (On the label 12 % protein or 5 grams protein) organic white bread flour. You can make this loaf with 50/50 white and WHITE whole wheat.
- The loaf will stay soft and have a great nutty flavor. Using 100 percent whole wheat or Hard red whole wheat will give you a different result. The recipe may need some adjusting. I suggest you stick with 100 percent white or 50/50.
- 2 2/3 Cups -300 grams starter-freshly fed and active
- 2 3/4 Cups 650 grams warm water
- 2 3/8 Tablespoons -50 grams honey
- 3 Tablespoons- 40 grams avocado oil
- 8 Cups- 1000 grams White bread flour (high protein)
- 1 Tablespoon-20 grams Salt
Conversion CUPS to GRAMS:
I do NOT recommend volume measurements for best results with sourdough baking. There are differences in the starter and flours that make weighing by Scale a MUCH more reliable method. But if your not using a scale here are the approximate volume measurements of the ingredients.
Final NOTE:
The video in this post is for those unfamiliar with the techniques I use. It is actually demonstrating our Beginner Sourdough Artisan Bread Recipe. This soft sourdough sandwich bread process uses many of the same techniques.
Recommended Products
As an Amazon Associate and member of other affiliate programs, I earn from qualifying purchases.
-
 Fletchers' Mill Rolling Pin, Maple - 18 inch, Dough Roller, Perfect for Skilled Bakers, Home Chef's, Great for Bread, Pasta, Cookie Dough, Fondant, Pastry, Cookies, Pie, Pizza, MADE IN U.S.A.
 -
 Pyrex Glass Mixing Bowl Set (3-Piece)
 -
 USA Pan Bakeware Aluminized Steel Loaf Pan 1140LF 8.5 x 4.5 x 3 Inch, Small, Silver
Nutrition Information
Yield
24Serving Size
1 sliceAmount Per Serving Calories 171Total Fat 2gSaturated Fat 0gTrans Fat 0gUnsaturated Fat 2gCholesterol 0mgSodium 325mgCarbohydrates 32gFiber 1gSugar 2gProtein 5g
Sourdough Troubleshooting:
If your bread doesn’t turn out the way you expect, start with our comprehensive Sourdough Troubleshooting Guide
Or jump to the specific issue you’re seeing: Find all of our Sourdough Baking guides here.
- Bread turns out dense – Why Is My Sourdough Bread Dense?
- Dough spreads instead of rising – How to Shape Sourdough Bread
- Score won’t open – How to Score Sourdough Bread
- Crust is soft or pale – How Steam Baking Sourdough Affects Oven Spring and Crust
Follow Us:
We enjoy meeting you on our social networks. Follow us on Facebook, Pinterest, Instagram . Tag us with your pictures of our recipes and comment on how it went for you. We would love to see what you do with them.
We often like, comment and share your posts of our recipes on our daily Instagram stories.
Ask questions and rate the recipe in the comments section below. Please share what you did with this recipe. We are always looking for more and better ways to make homemade food. Other cooks love your ideas!
Recent Posts:
Contact Sasha over on Etsy if you want to buy sourdough starter. She has a well established starter just for you. She sells all over the US.
I’ve baked this bread twice now. It’s turned out great with 50/50 bread flour and wheat flour ratio.
I used half the dough to make rolls both times and it’s turned out beautifully.
Thanks for the great recipe! I’ll be using this on repeat.
Hi Aliah, Excellent! Thank you so much for the great review and rolls idea. If you want more to do with this recipe we have a cinnamon rolls recipe, cranberry walnut bread and our amazingly popular cinnamon raisin bread all built on this dough. Happy Baking!
LOVE this recipe… I make it pretty much every week now. 😁 I’m wondering if you have any suggestions on how to prevent the sides (or sometimes one side) from caving in when it’s cooling off, after I remove it from the pan. Am I taking it out too soon?
Hi Tammy, I hope you are using a digital thermometer to check the internal temperature of the loaf before removing it from the oven. HOWEVER, I am pretty sure the problem is too much water on the loaf either by the water sprayed on the loaf when the loaves are first put in the oven OR the steam in the oven.
Every oven is different in the amount of steam contained around the loaf or leaked out into the kitchen. I suggest your oven may be holding enough water around the loaves that they are not able to form correctly as they bake. Try reducing the amount of water (Or eliminating altogether) sprayed on the loaves at the beginning of the bake.
If you still have the problem you can reduce the steam in the oven (or try baking without it) and see if that helps. Hope this works for you!
Have been making sourdough bread for a while now but this is THE BEST recipe ever! I did switch honey for maple syrup because I have a little baby but it is fantastic. Today is day 4 since I made this bread; right now I’m eating sandwich with nutella and is as soft and delicious as it was the first day. Highly recommended. Wish I could post a picture.
Sylwia, Thanks so much for letting us know how much you love this bread. So do we.:) If you are on instagram we would love it if you tagged us with your picture of your homemade food junkie recipes. We love to see them and share out your results. Thanks for the great review. Happy Baking 🙂
what temperature is your kitchen please?
My kitchen is currently at 71.4 Degrees F. In summer is goes up a few degrees. I never have trouble with this recipe at those temps. Hope this helps. 🙂
This bread is awesome. Used with ghee and again with coconut oil, both worked just fine.
H, I would like to use Ghee instead of avocado oil and can I shape first then refrigerate overnight?
Hi Carmen, I have never used Ghee in this recipe but it should work just fine. Just do the counter rise as directed and then shape and refrigerate. Next morning you should be able to bake the loaves cold straight from the fridge. Best of luck. Let us know how it goes for you. And I’m curious about the flavor you get with Ghee.
Thanks. I always prefer to bake shaped loaves/ rolls right out of the fridge.
Love your recipes.
Carmen
Thank you Carmen. I’m so happy you enjoy our Homemade Food Junkie community. Happy Baking. 🙂
I left the dough on the counter after the stretch and fold step instead of putting it in the fridge overnight. Woke up to it overflowing over the sides of the bowl. What does this do to the dough. Is it over proofed? Is it salvageable?
Hi Jennifer, Yes it is most likely over proofed. Just form it for your bread pans and now stick the pans in your fridge for an hour or so while you preheat the oven and water bath.Then bake it.
You will get a less ideal result. probably denser with little to no rise. It will still be good bread otherwise. The flavor will be somewhat impacted by the extra fermentation as well. So please don’t judge the recipe by this experience.
The long cold rise really is the best way to make this bread but it has proven itself time after time in less than ideal situations. Please try this recipe as instructed. I think it will be much better then. Best of luck!
Definitely no reflection on the recipe. It has been my family’s go-to all quarantine and I have shared it with others who have had success. We love it! I just got busy and forgot to put it in the fridge last night.
Thank you for the super quick response. I’m glad the loaves can be somewhat salvaged. They are in the oven right now. Fingers crossed it comes out semi ok!
I’M so glad you know what your results usually are and should be. Shake it off and bake on. 🙂
Thankyou Diane.. i guess 1:1:1 proportions is the crucial bit! Understood?
If you have more questions please let us know.Happy Baking
Diane my starter rises well and peaks well but the floating rarely happens!
Hi Vanita,
Try feeding it 1:1:1 warm water, starter and flour the night before you wish to bake. If you have a good strong starter it does not have to float to make good bread. However, it can throw off the timing of the steps in this recipe if your starter is denser or looser and needs more time to process. If You get the starter to the float stage this recipe will work well when you follow it. If you are an experienced baker that knows the feel of the dough you can adjust the steps.
This is my favourite bread recipe now. I have used all white flour, and half whole wheat, both with equal great success. Next on the test list is rye flour. On the rise now is raisin spice (cinnamon, cardamom, ginger and nutmeg); I can’t wait!
Hi Joanne, I’m delighted to have your feedback. I have also made this recipe with 50/50 whole wheat/white flour and 100 % white. And what a yummy idea to mix in the raisins and spices. This recipe also makes great cinnamon rolls if you missed them you can find a good recipe here to turn this dough into a cinnamon raisin loaf.
The rye flour… If you have good luck with it PLEASE let us know. I have never used rye flour in this sourdough recipe. I would not replace more than half of the wheat flour with rye. Rye is VERY low gluten. It will be very sticky dough and not give a lot of rise on its own. This will make a denser bread. But the flavor will be very good I’m sure. Happy Baking!
Just baked these for the first time. They look lovely! I did change the method slightly to fit my family’s schedule better, so thought it worth a share here in case that helps some other bakers. I followed the recipe exactly (using weight measurements, unbleached all purpose flour, and starter at the right point of ripeness), but let the dough bulk rise on the counter for about 5 hours (including the stretch and folds) instead of the fridge. Then I divided the dough, bench rested it, shaped the loaves, let them rise in their tins (use oil to grease the tins, not butter if you’re rising them in the fridge because the butter hardens and the loaves don’t rise as well) on the counter for an hour and 10 minutes, and then covered them and put them in the fridge overnight to finish their final rise. As an aside, I have baked lots of sourdough loaves using this method, based on the Pain de die recipe from The Perfect Loaf blog, mostly because it just works better for my family’s schedule. This morning, after about 12 hours in the fridge, the loaves were risen to just a little under the rim of the pans, so I followed the baking instructions (almost) exactly, and baked them directly from the fridge. I did steam them for 5 additional minutes because they were not done rising after 15 minutes. I also think I could have pushed the final proof a bit further, so next time will try rising them on the counter for 30 minutes more before I put them in the fridge overnight. And maybe I will start out with a hotter oven at around 450 F for the first 15 minutes. Anyway, thanks for a great and flexible recipe (and also for the Milk and Honey loaf recipe from your site, which I bake often and have turned into delicious cinnamon swirl bread as well)!
Hi Elise, Thanks so much for sharing your experience, great reviews and baking expertise for our other sourdough bakers. It’s fantastic to know you’re enjoying working with our sourdough bread recipes and having great success. Happy Baking!
Would a 13x4x4 Pullmans Loaf pan work for this recipe if I didn’t divide in half?
Hu Jean, Yes it will. Further down the comments we had another baker use this size and it worked out great. Just be sure to check the center of the loaf with a digital thermometer to make sure it reaches 200 degrees F before finishing your bake. All the best!
Thank you so much Diane! 🙂
What happens if you put too much salt in this one? I grabbed the wrong container
Oh shoot! The bread should bake just fine. Might be a little salty tasting though!
Hi. I just cannot find the video??
Hi Vanita, Here is the You tube link for the video. It is for our beginner artisan loaf but the techniques are very similar to what we use in this loaf. I hope it helps. Please ask any questions you have. Happy Baking!
Thank you!
Ho Diane
Wondering how you prepare your starter for this recipe?
Hi Vanita, I feed my starter this way to prepare for bread baking: 100 grams starter to 100 grams warm water to 100 grams flour. I let it sit 8 to 12 hours until it doubles in size and a teaspoon floats on water. Hope this helps. Happy Baking!
Thank you…?perfect!
Yay! Enjoy. 🙂
Diane… would a 50 starter
100 water
100 flour be good as well?
Hi Vanita, Sorry it took me so long to answer. I just found this. The idea is to use a proportion of 1:1:1. So instead use 50 grams starter to 50 grams water to 50 grams flour. But I don’t think it will give you the 300 grams of starter the recipe calls for. even weights are what you need for the proper balance. Hope this helps!
Hi There! My biggest challenge in baking is timing the steps around my work schedule (now at home but online…)! So…two questions:
1) during the cold period, how long could the bread sit safely in the refrigerator? Could “overnight be as long as part way thru the next day?
2) At room temp, approx how long is the range of time in the pan for the dough to come up to the top? (I know that varies with room temp, but Im trying to, again, anticipate the timing of work and bake….
Hi Cathleen, The long cold rise is very flexible. The dough can sit in the fridge 4 hours (minimum) to 24 hours. Some of our bakers do omit the long cold rise and just use an extended bulk rise. I don’t recommend that because the longer slow development time really builds the dough ferment and the flavor is much better.
The time it takes to raise the dough to the pan top is around 2 to 4 hours temperature depending. Again you can rush this in a warm kitchen or oven but the crumb may suffer. For best oven rise do the final rise in the fridge for another hour or so while the oven preheats.
Best of luck with working from home. I like it but I know it does have its challenges. Happy Baking 🙂
ahhh…this is sooooo helpful! One more question about that last part….are you saying 2 -4 hours on the counter, then back in the fridge for the hour of oven preheat? Or the entire final rise in the frig, knowing that it will take the 2-4 hours + 1…???
I do the rise at room temperature (2 to 5 hours). Then I put the loaves in the fridge white the oven preheats(about an hour).
thank you????
Hi,
May I know is it possible to omit the honey in the recipe? Will the end result be affected if I don’t add any honey or sugar?
Regards,
Daphanie
Hi Daphanie Mar, You will notice a difference in the results. This dough texture and flavor benefits from the sweetener. However, You can still make a good bread with this recipe if you omit the dough.
I suggest If you want a bread that has NO sweetener and can be made as a sandwich loaf try our Beginner Artisan Sourdough loaf. It can be made as a boule with an open crumb OR you can degass the dough and form it for the bread pans and bake it with a water bath like this recipe. Just flour,water and salt in this recipe.
Please let us know what you do. Happy Baking!
What a great recipe. My loaves are perfect, creamy and delicious!!
Hi Kathryn, Thanks so much for the great review. Be sure to try this bread recipe as cinnamon rolls and cinnamon raisin bread too. This sourdough bread recipe is so versatile. Enjoy!
What a wonderful recipe. I have made the cinnamon swirl bread a few times and it always comes out wonderfully. Ovenspring of this dough is outstanding. Thanks (I was never able to find the video tutorial that you mention, several other other abut gardens, cupcakes and other things but could not find the one for this recipe, worked well anyway!)
Hi Gary, Thanks so much for the great feedback on this recipe and the cinnamon swirl bread. If you haven’t already found them you may also enjoy this recipe as sourdough cinnamon rolls.
I’m sorry the video didn’t show for you. In case you want to watch it I’m including the link to it on our youtube channel. However, if you have completed the recipe successfully if would just be if your curious. The video is not of this recipe but the techniques are similar. The video is for our artisan sourdough bread if you’re looking for a crusty loaf.
Thanks again for the great review. Happy Baking 🙂
To use 100% whole white wheat flour, just increase the water by 100g. Other than that, change nothing. It makes a really great loaf of whole wheat bread. Just the ~115g of all purpose flour from the starter is enough to make the dough structure just perfect. And if you do that and make it into the cinnamon raisin variation…. *chef’s kiss emoji*
Hi Mike, THANK YOU for sharing this. It’s great to have a whole wheat version of this recipe. I’ll give it a try for sure. 🙂
Hi i made this recipe using 100% malt flour protein content was 9.5% my bread came out perfect!!! Thank you
Hi Nana, That is amazing. Thanks for sharing your results with us.Happy Baking. 🙂
I’ made this recipe for the first time and divided it into one soft sour dough bread and one raisin cinnamon bread. I didn’t get the oven spring that I expected. When you say let rise to top of bread pan do you mean the crown of the dough or the sides of the dough. I thought that might be the problem. Any help would be appreciated. Thanks!
Hi Cyndi,
This is a tried and true recipe so let’s take it apart a bit for you to troubleshoot.
-First to answer your question: The dough should come up to the top of the loaf pan a little (crowning maybe 1/2 inch above the pan top. There is no reason to let the sides come all the way to the top or you will have too much top with a properly baked loaf.
Some Ideas for you:
The flour and starter are critical to a successful bake. Did you use a strong flour with about 12% protein (or 5 grams) on the label? I use King Arthurs all purpose flour with good results and also Montana brand all purpose flour works great. A low protein flour will not have the strength needed to give you the results you see pictured in this post.
If your starter is very young (less than a month) it may also not be quite strong enough to raise your loaves as you wish. Even when active, young starters can disappoint. If this is the case, Just keep feeding the starter and it will build strength and make you better bread in the future.
Did you weigh the ingredients? This is the best practice for sourdough baking. The starter and flours are all different by volume so weighing the ingredients will really help you get consistent results.
I’m assuming both loaves were lower than you expected. How was the crumb? Did you bake it exactly as the recipe describes? Did you use a digital thermometer to determine doneness?
BAKING TIPS:
-For BEST oven spring set the loaves in your fridge for 2 hours after the bread rises to the top of the pans.
-SCORE The chilled dough with Good Deep Scoring. I usually do three diagonal slashes an inch or so deep.
-Forming the loaves also has an impact on the rise. This takes practice. Forming the loaves Too Tightly can inhibit the rise somewhat.
-Bake the pans in a thoroughly preheated and steamy oven. I put the water bath in cold and then preheat the oven for at least 45 minutes. The oven should billow steam when the loaves go in. This helps the crust to stay soft as well.
Don’t give up. This is such a good bread recipe. You will get used to working with it and have great results.