
Delicious Soft Sourdough Cinnamon Bread
As an Amazon Associate and member of other affiliate programs we earn a small commission from qualifying purchases through our affiliate link. For more information read our Entire Affiliate Disclosure.
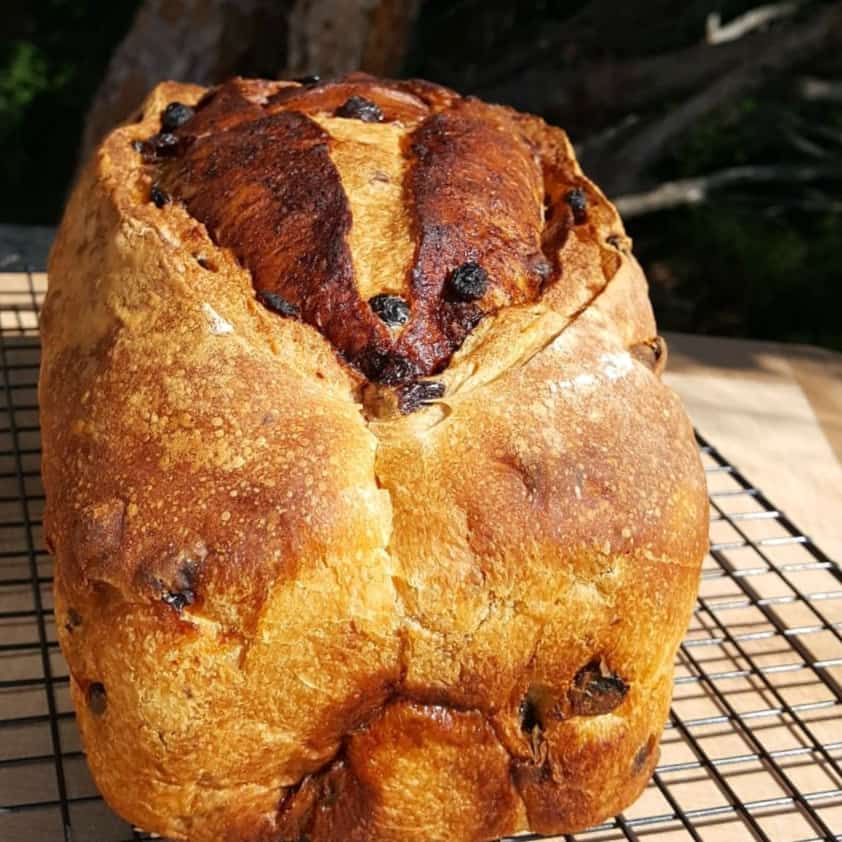
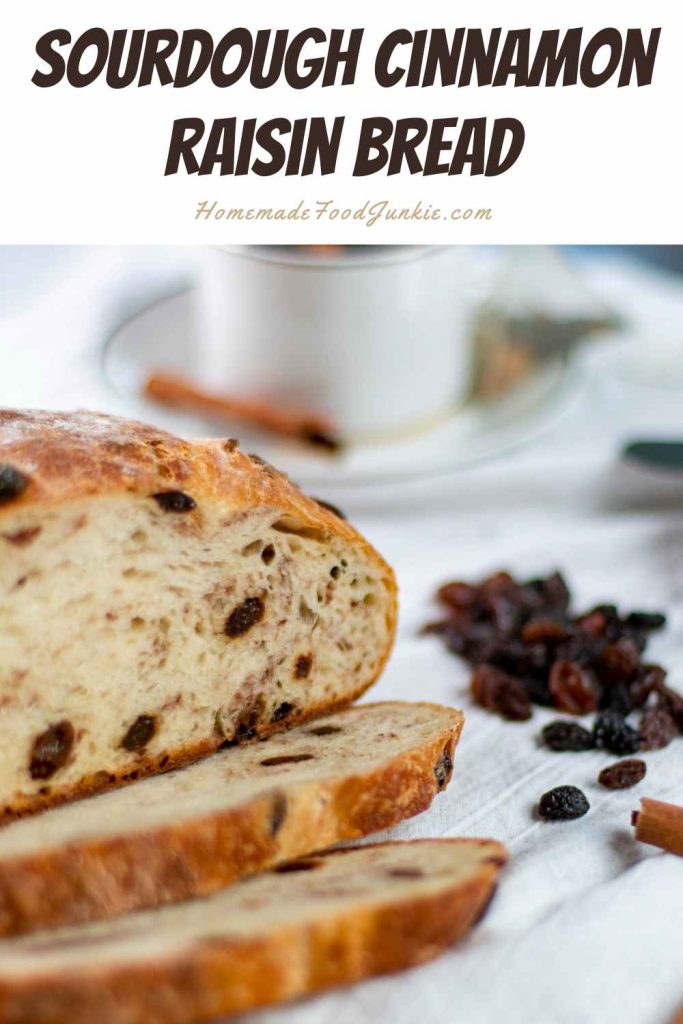
Soft Sourdough Cinnamon Bread with or without raisins, is a beautifully flavored and sliceable loaf. Your family will love this delicious breakfast bread. This loaf can stand alone as a moist, scrumptious slice or enjoy it toasted with butter or even peanut butter. It can also make an amazing French toast.
By incorporating honey and avocado oil into this traditional sourdough recipe, you will be able easily fold in your sugar cinnamon filling and prevent the crumb from falling apart. The honey and oil work together to build a soft, dense texture more like a sandwich bread.
We walk your through all of the steps needed to help you bake the best Sourdough Cinnamon Loaf in this post.
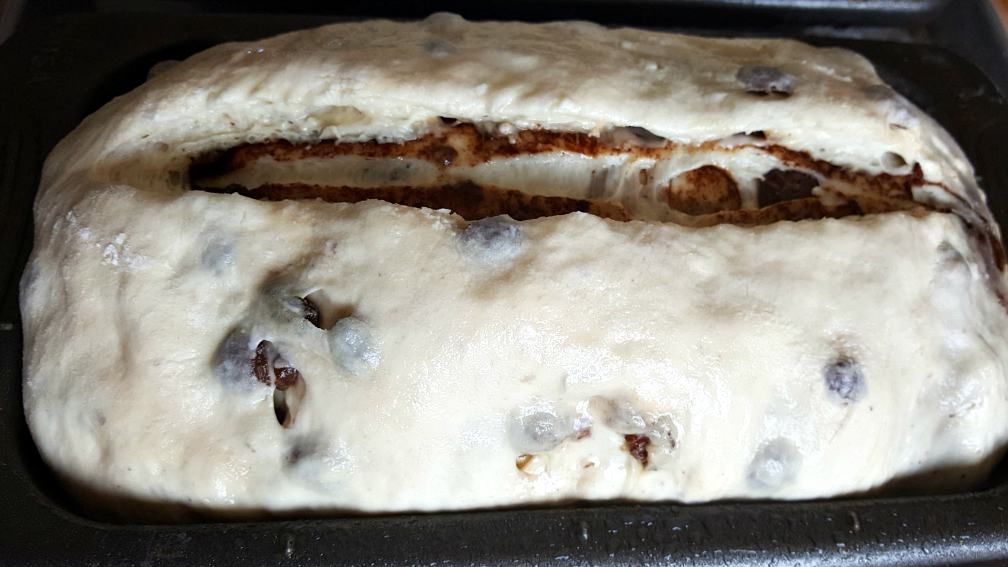
Originally, we made this no-knead sourdough cinnamon bread by dispersing the raisins throughout the dough during the stretch and fold stage as you see pictured above. This is a great method and we still highly recommend it and the post is built on these instructions.
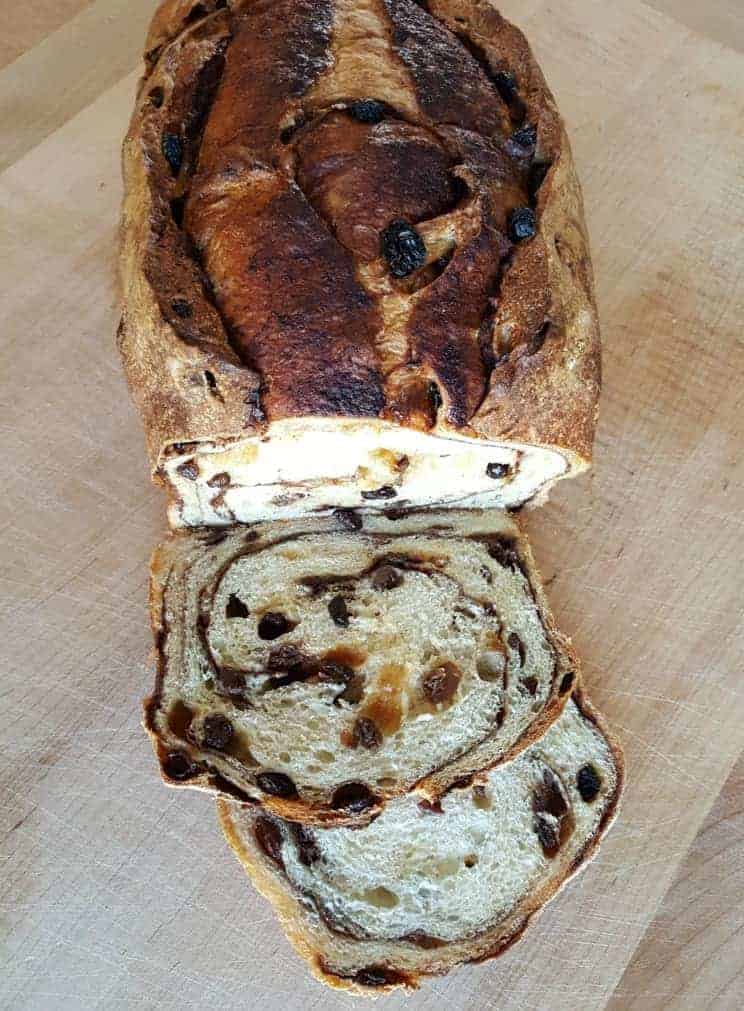
Over the years, we found this recipe also works well when the raisins are layered into the dough at the final shape of the dough into loaves. Our video uses that method. So please read the post and watch the video so you can see the two processes and decide how you want to make this sourdough cinnamon swirl bread recipe.
Putting the raisins into the rolled layers rather than dispersing them through the dough give you a sourdough cinnamon roll twist bread. It’s all good.
Our video tutorial guides you through the process with a clear visual that is easy to follow
This delicious bread recipe is another winner from our Master Baker Contributor Sasha Hunter. I asked Sasha if she had a good sourdough bread recipe for homemade cinnamon bread.
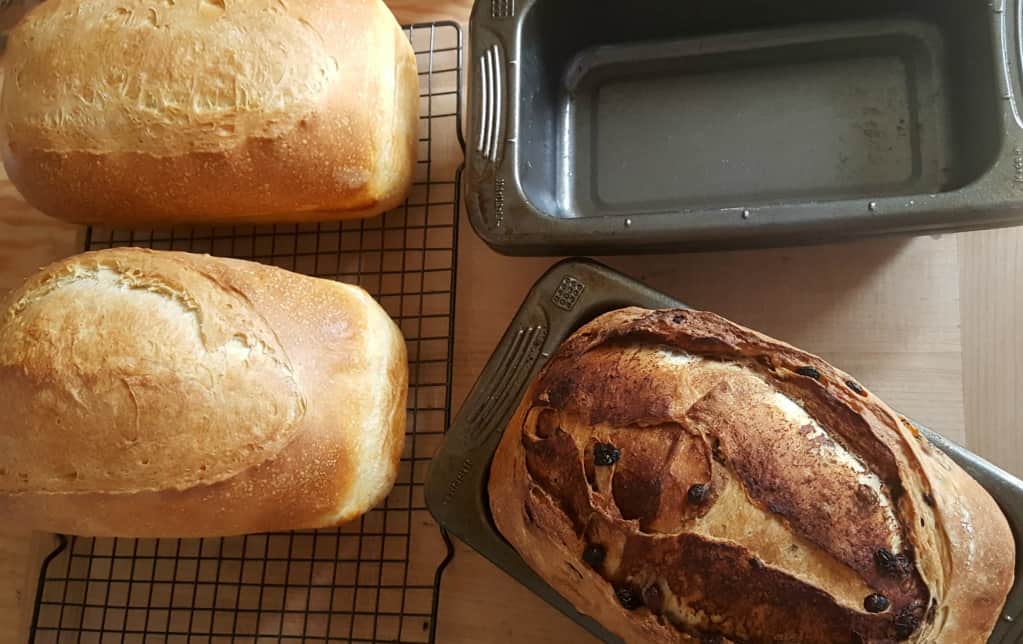
Sasha takes us through her entire baking process step by step. She shares her sure fire method of making homemade cinnamon bread with raisins. Tips and photos of every step are included, and the pictures you see are Sasha’s pictures while making this bread.
Soft Cinnamon Bread Recipe with raisins
If you need more help making the recipe jump over to the Soft Sourdough Recipe post. It has a lot of information in it for you.
We begin this cinnamon raisin version of the recipe at the second stretch and fold of the process.
If you want a single Cinnamon Raisin Loaf, divide the dough at this point. Continue the recipe for the Cinnamon Raisin Loaf with one half.
Or make the whole recipe and use half for this raisin bread. The other leave plain for a delicious soft Sourdough Sandwich Bread or Sourdough Cinnamon Rolls.
Watch Our video (on the sidebar and at the bottom of the printable recipe card). It shows you a different method for incorporating the raisins. It’s the easiest method if doing two different types of bread from a single batch.
Whole Wheat Cinnamon Bread Recipe
Use this recipe and replace the white flour up to 50% with a good white whole wheat bread flour. This will give you a slightly denser loaf than our sourdough white bread recipe.
If you want to make a 100 % whole wheat cinnamon bread use our Whole Wheat Sourdough Bread recipe with white whole wheat. You may want to add a bit of honey to the dough to make it sweeter for this recipe.
At the second stretch and fold start checking back to this recipe for the cinnamon raisin instructions.
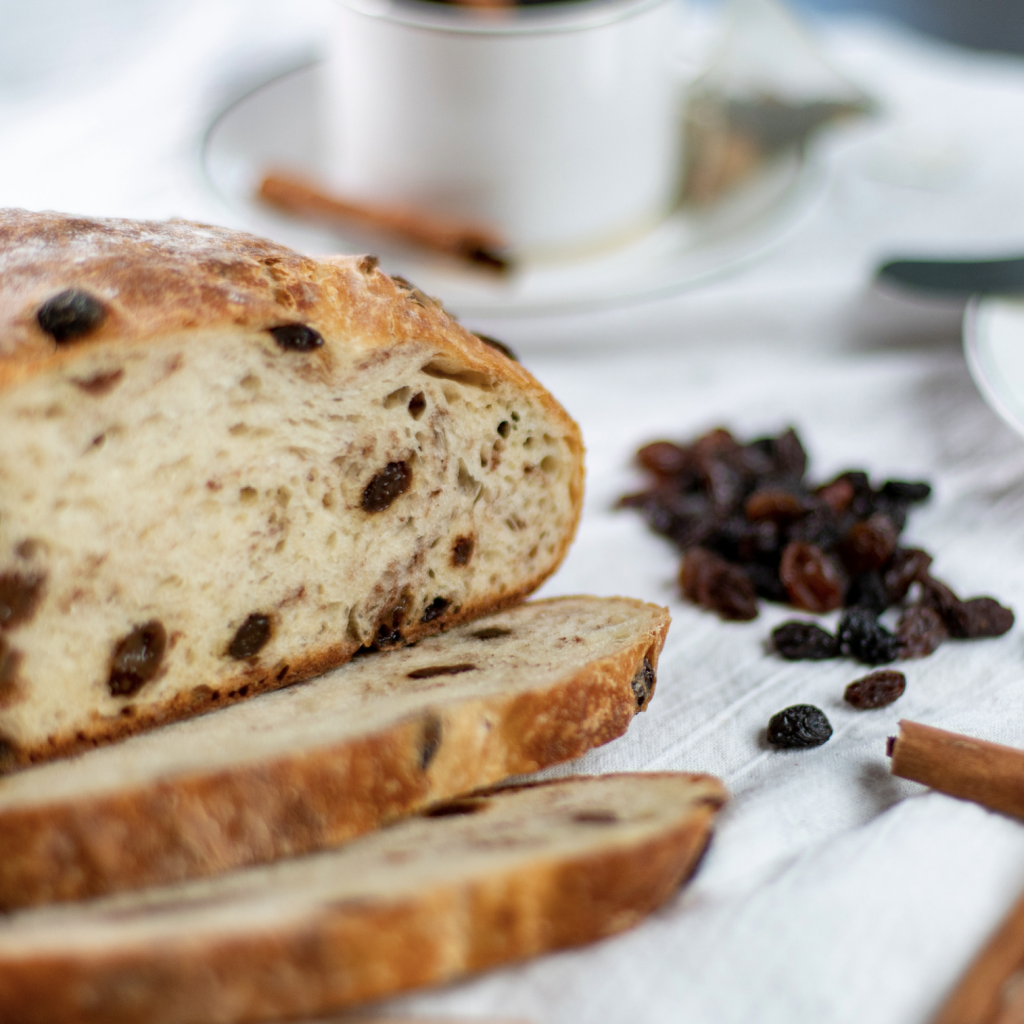
How to Make Cinnamon Raisin Sourdough Bread:
Here is the detail on how to make this no knead sourdough cinnamon bread with the raisins dispersed through the dough. To place the raisins into the rolled layers only use the method in the video.
Plump the raisins before the first stretch and fold. Mix 150 grams dry weight raisins to an equal weight of water. Allow them to soak until the raisin are completely plumped. Drain and set raisins aside until needed at the second stretch and fold.
Add the raisins into the dough at the second and third stretch and folds. Half of them in the second stretch and fold and the rest in the third.
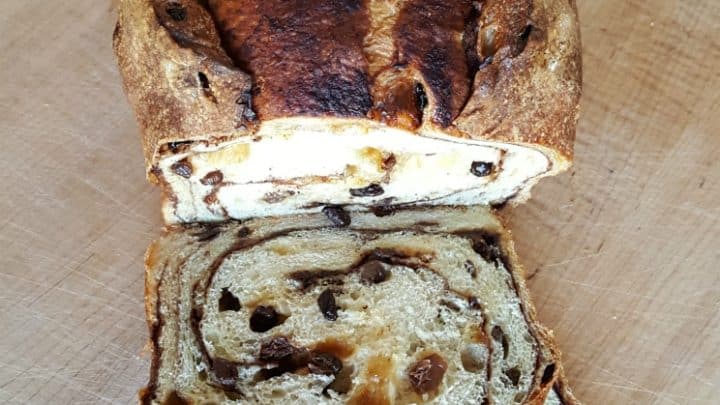
The plumped raisins are swirled with cinnamon sugar layer. The even distribution of raisins is preferable for little pops of raisin flavor while you eat this delicious bread.
You can also…Take your dough and dump the cinnamon / sugar mix and raisins on top; or chop and fold it all into your dough with your bench scraper.
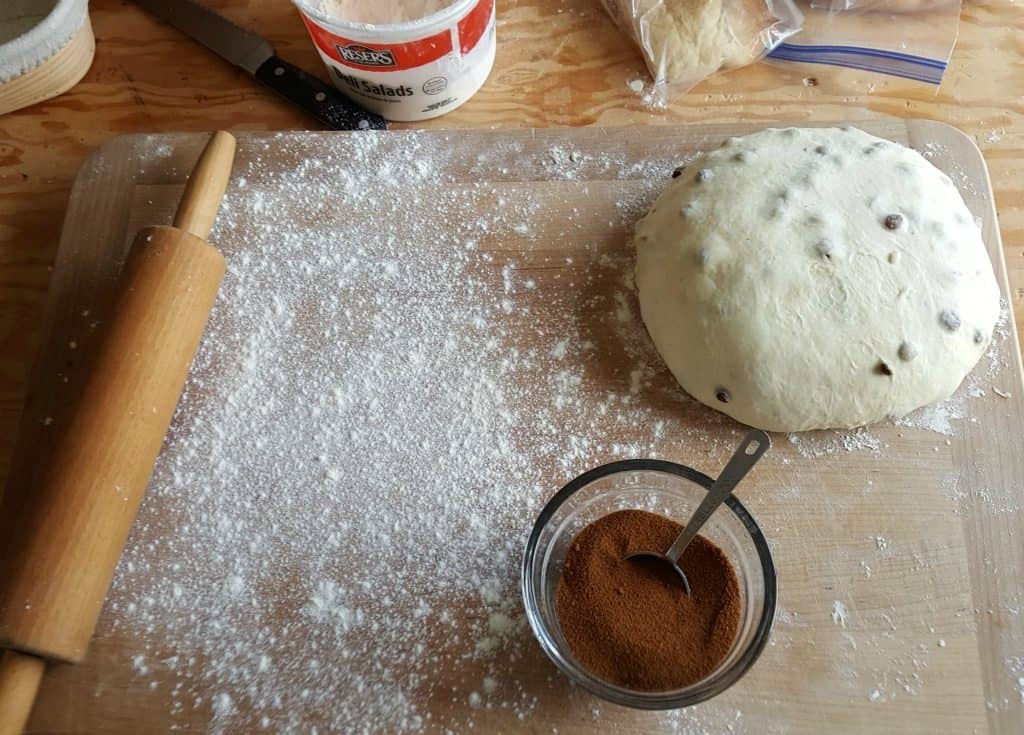
The Cinnamon Sugar Filling
Measurements for each loaf that you want to make into sourdough cinnamon bread are
- 1/2 cup light brown sugar or cane sugar as you prefer.
- 2 Tablespoons ground cinnamon.
This blend can be used as much or as little as your desire. Feel free to double the cinnamon layer or cut it down as your family prefers.
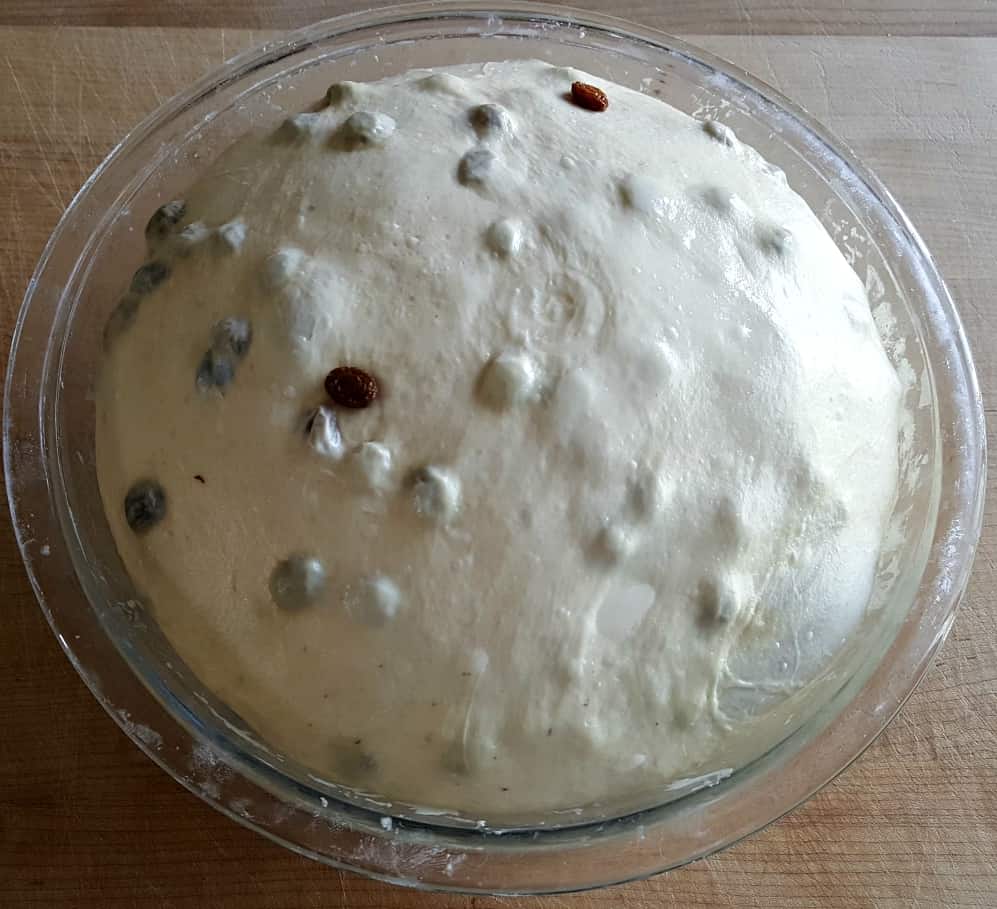
Preparing to form Sourdough Cinnamon Bread loaves
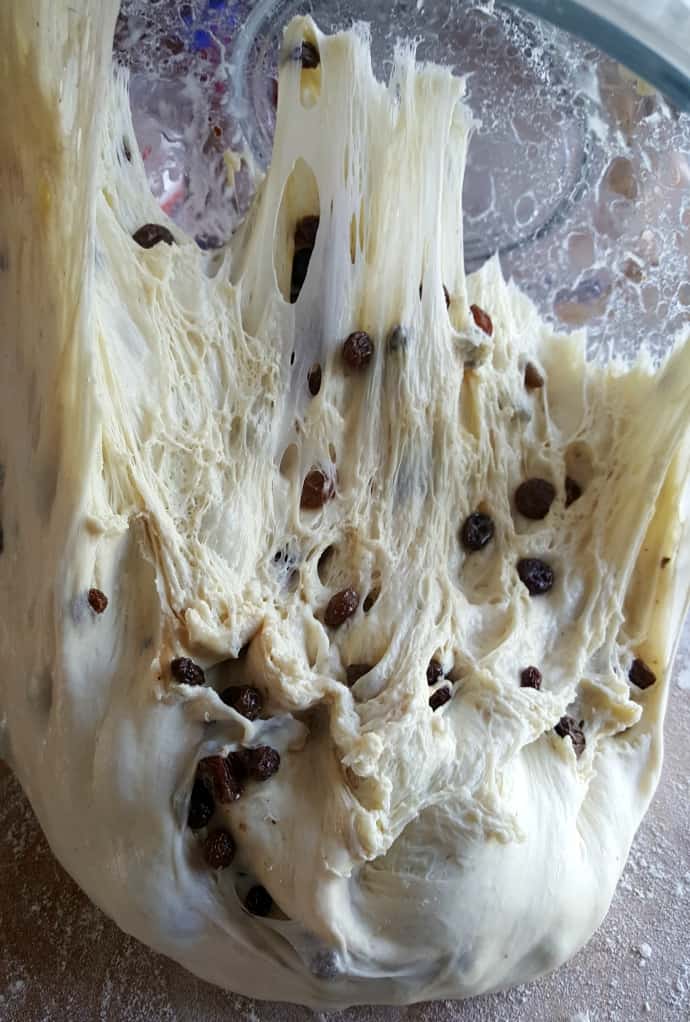
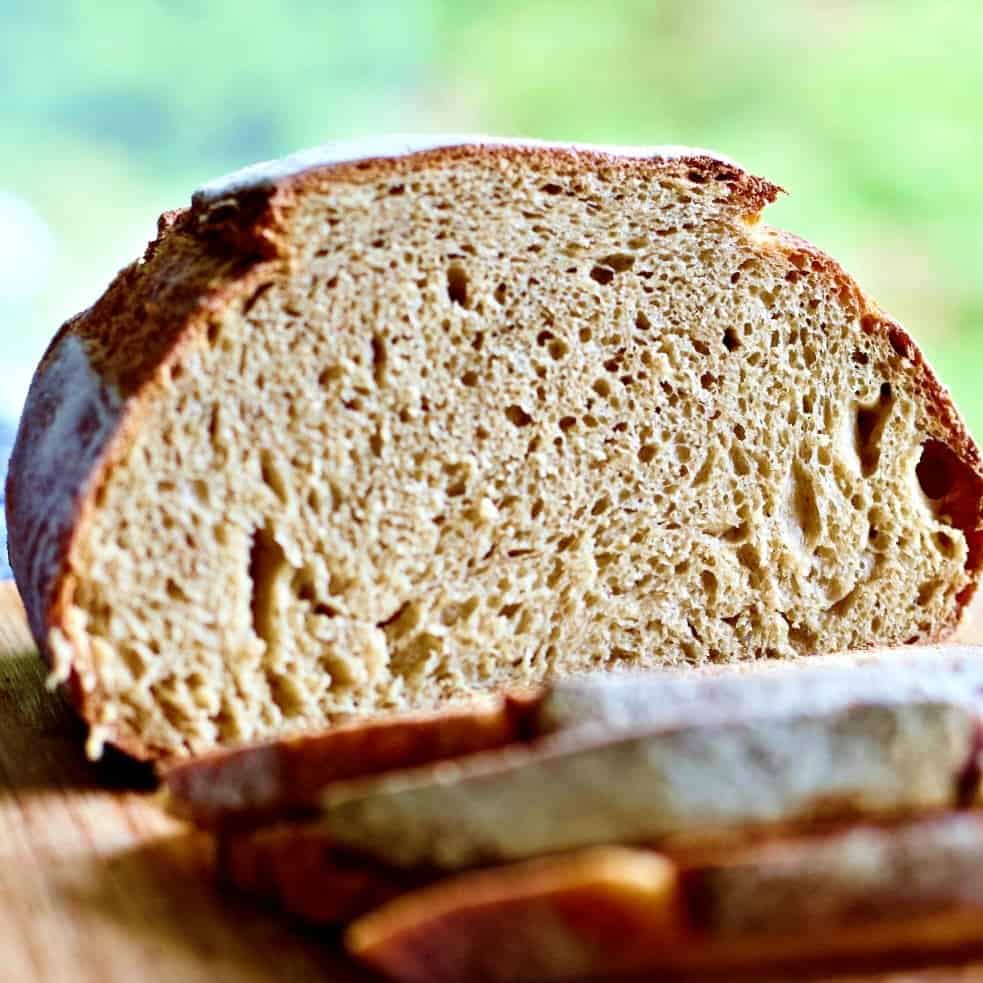
Look at the structure of this dough as it falls out of the bowl. This is what you are shooting for. The gluten is well developed.
Forming the loaves
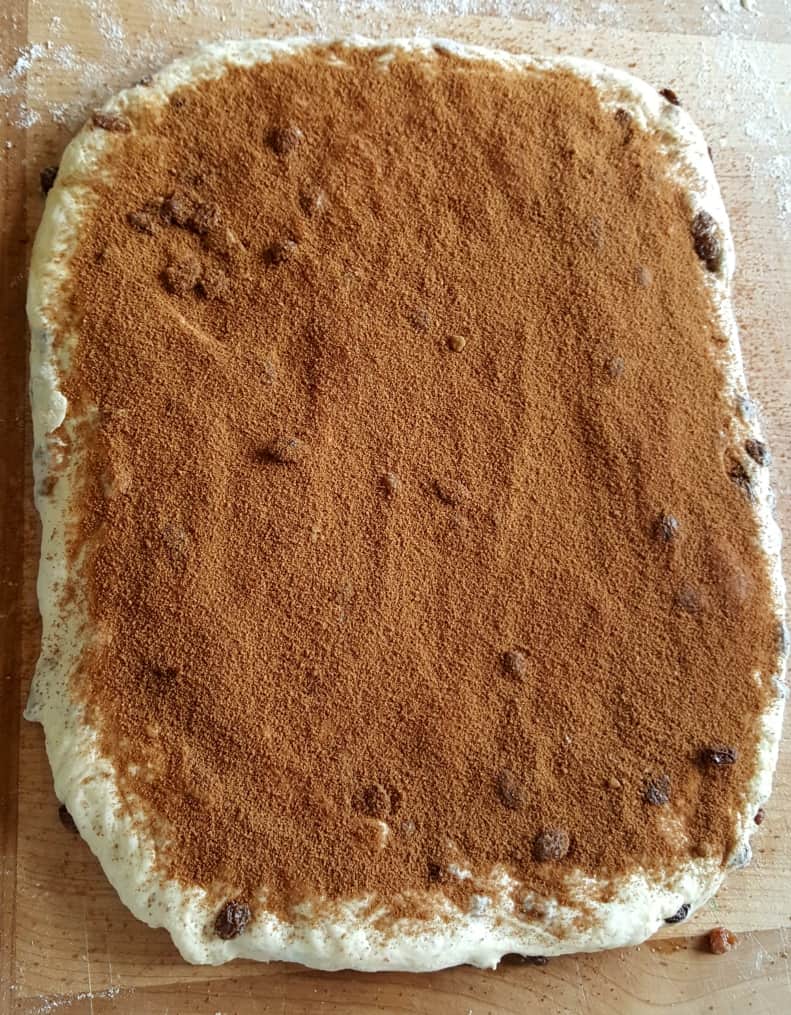
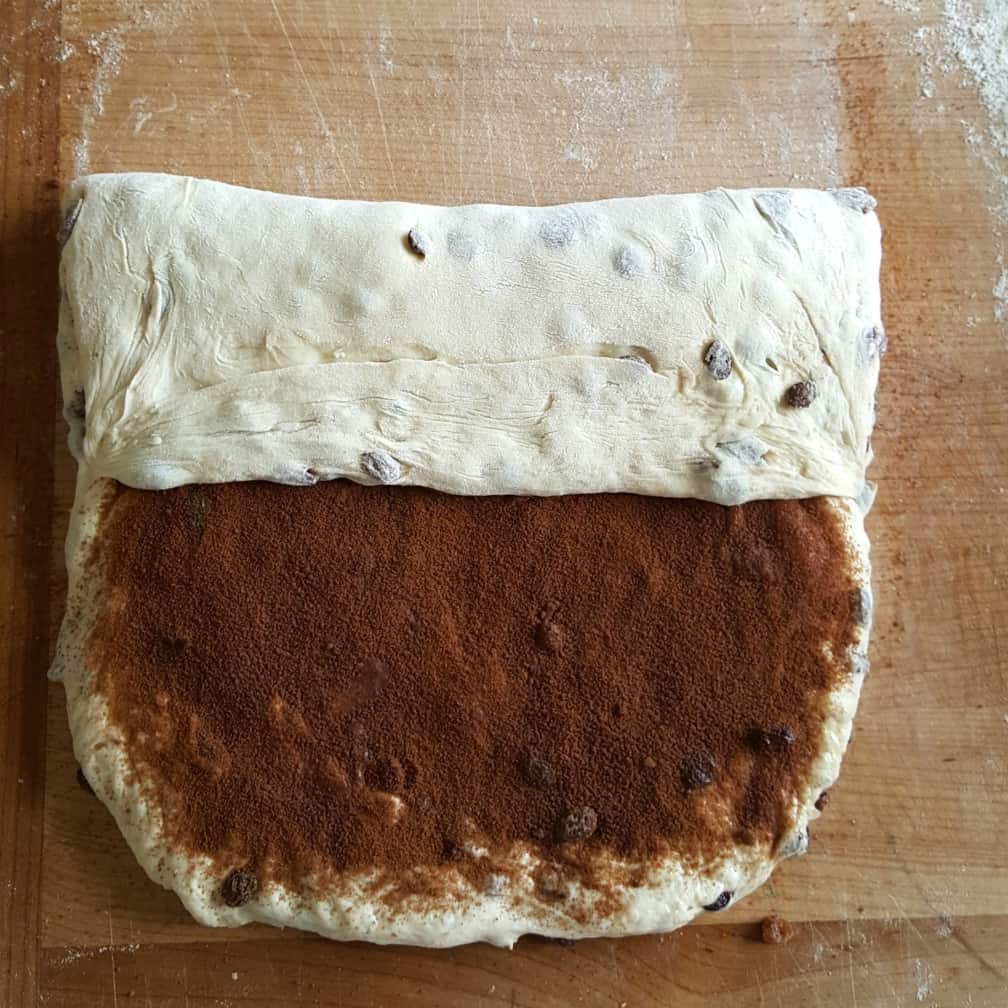
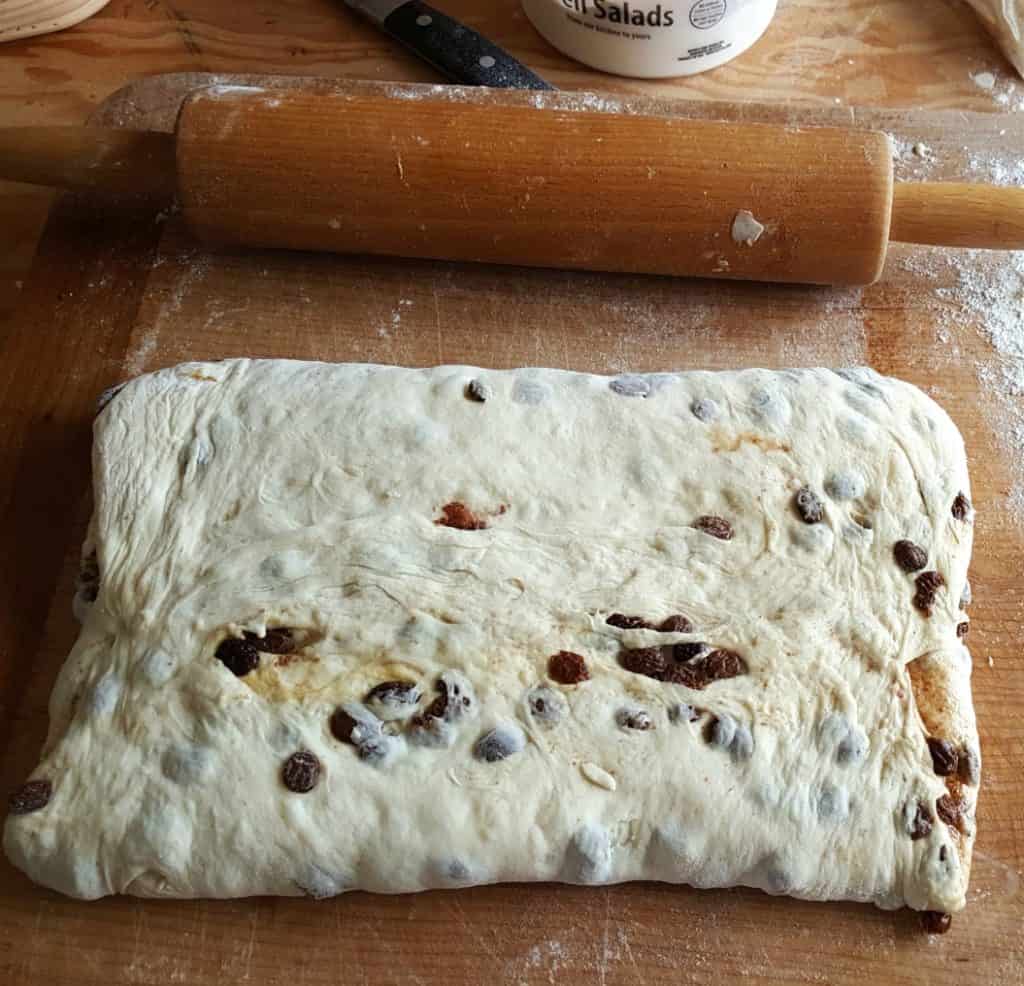
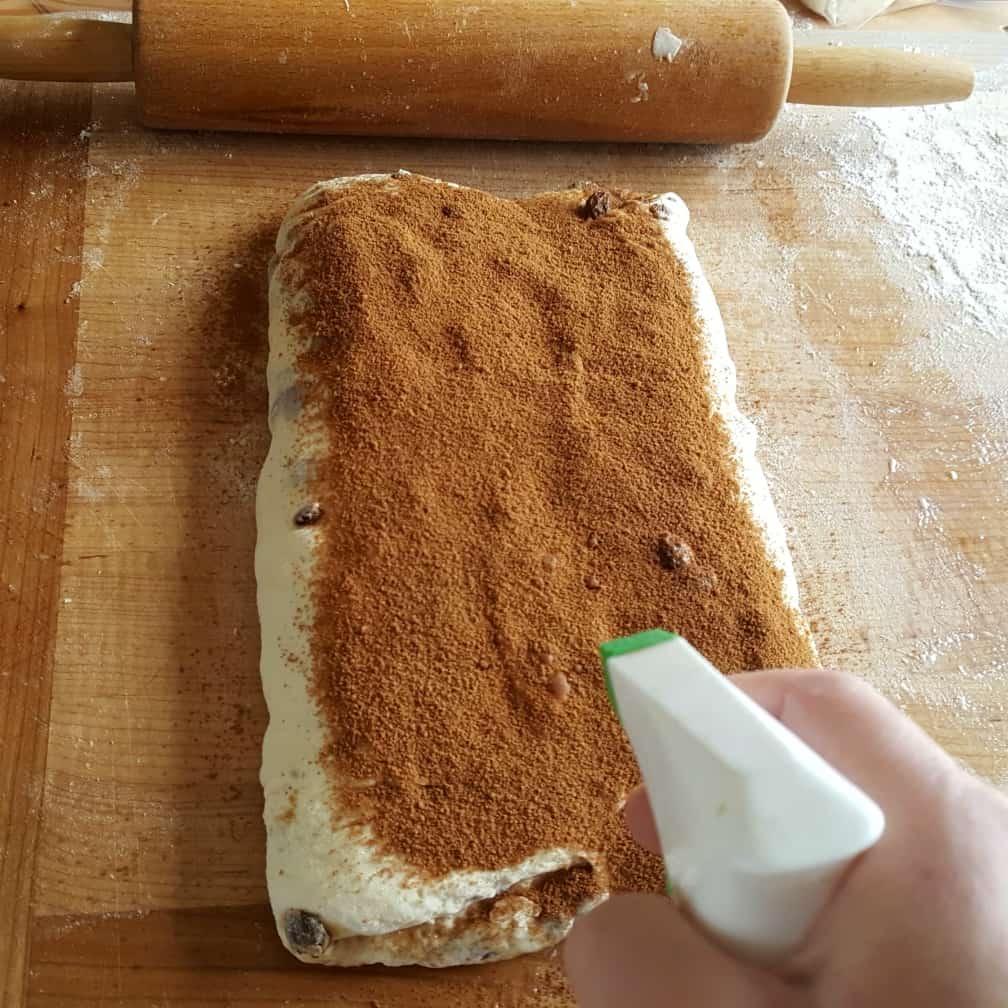
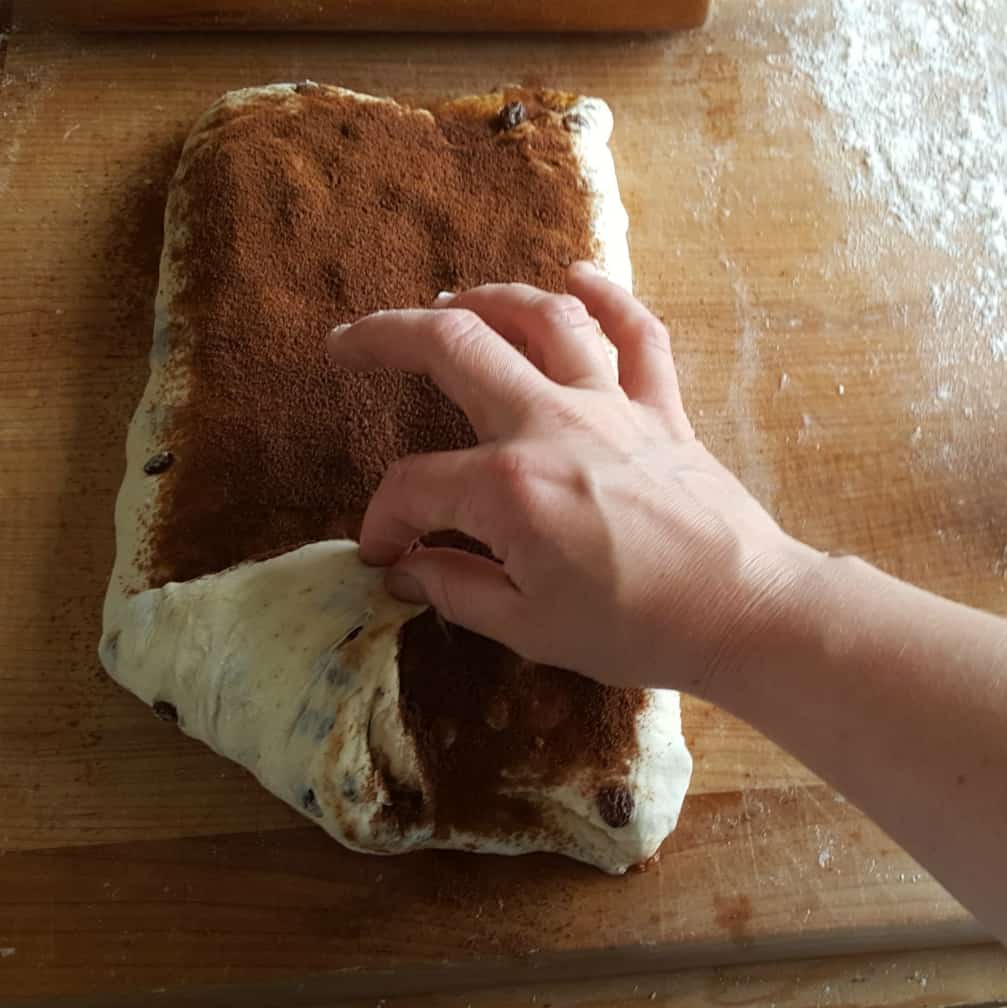
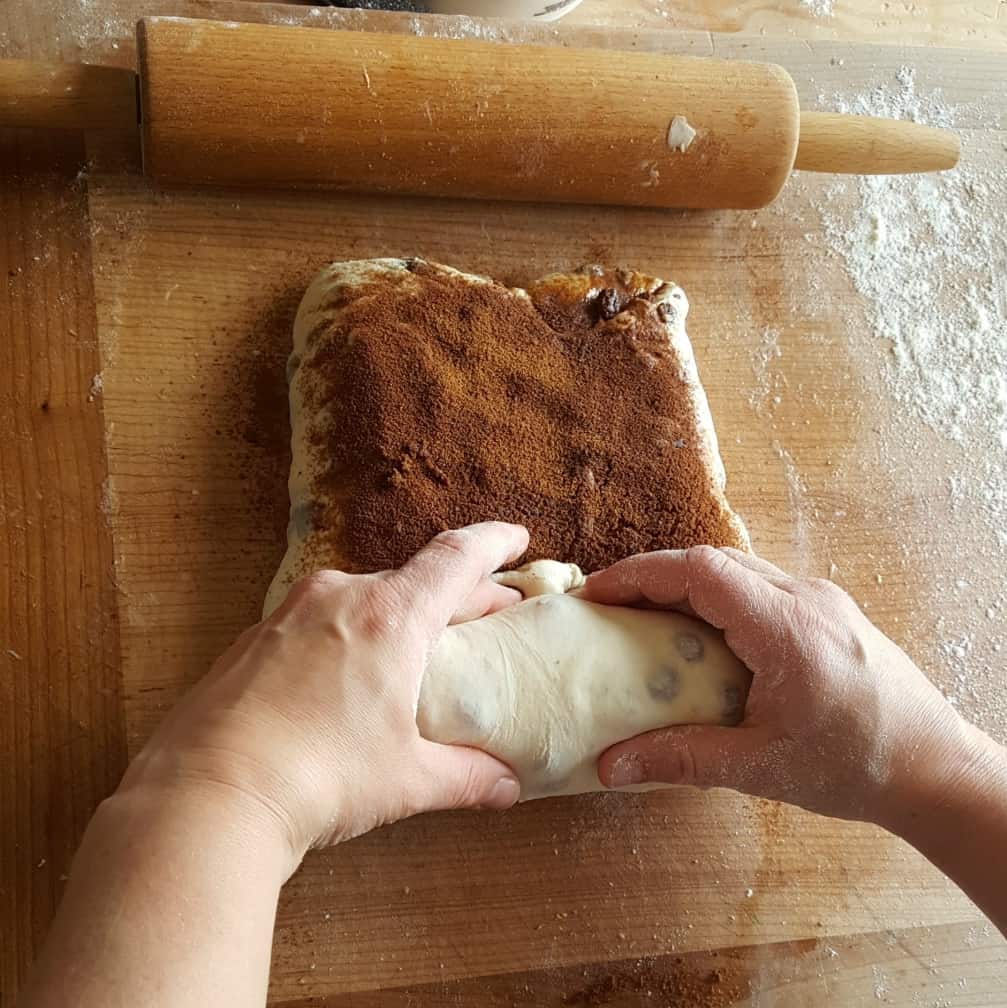
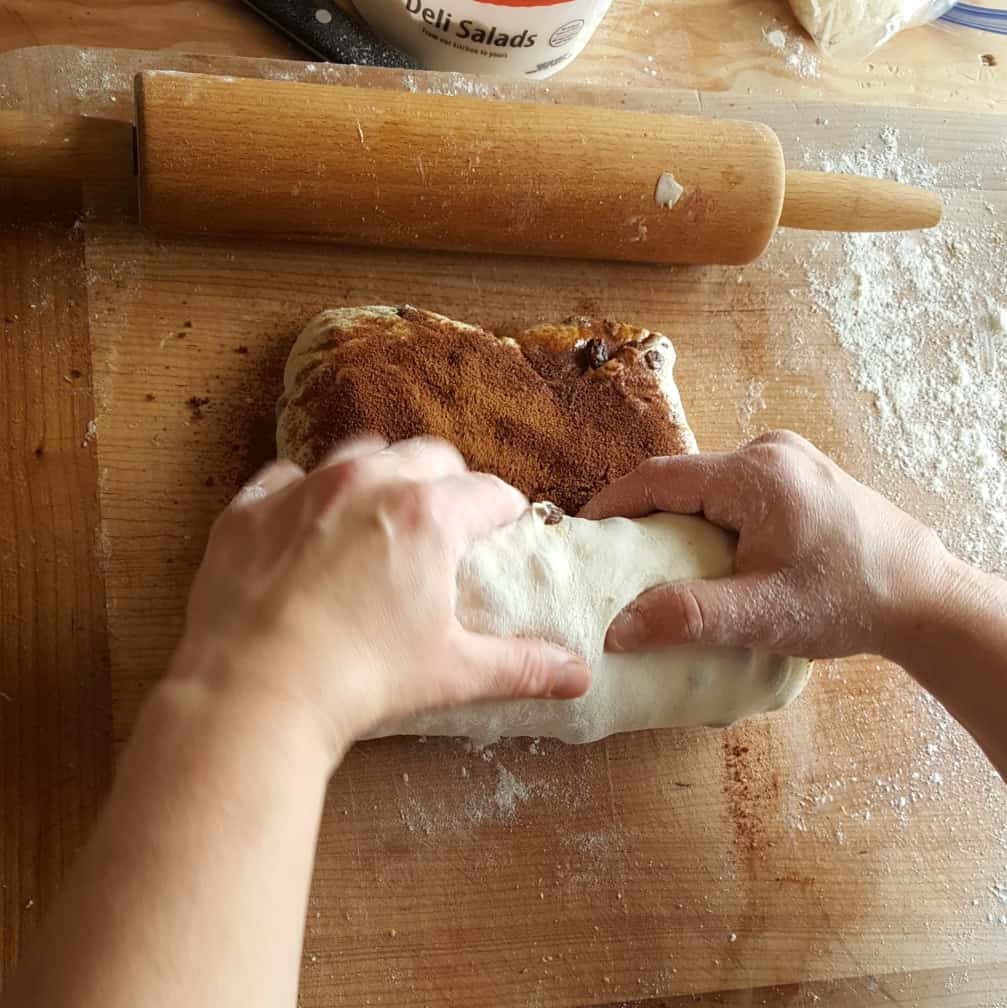
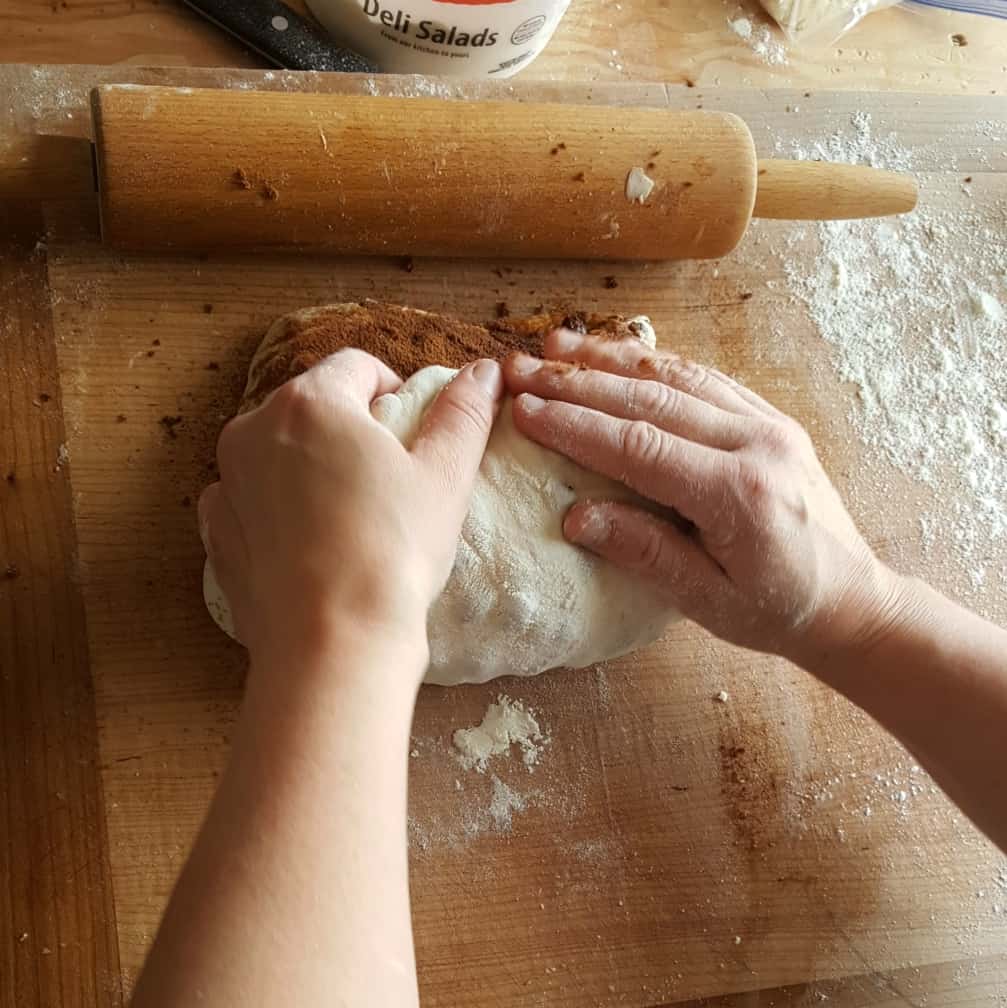
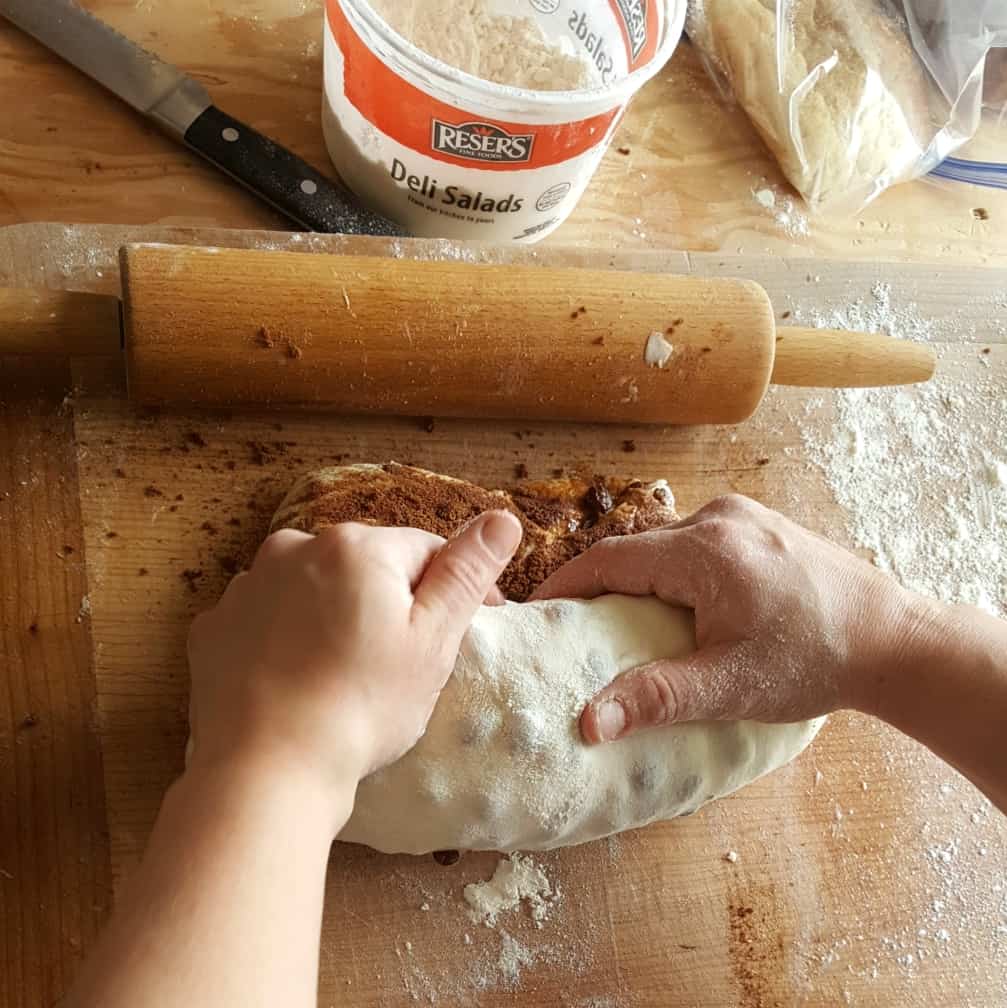
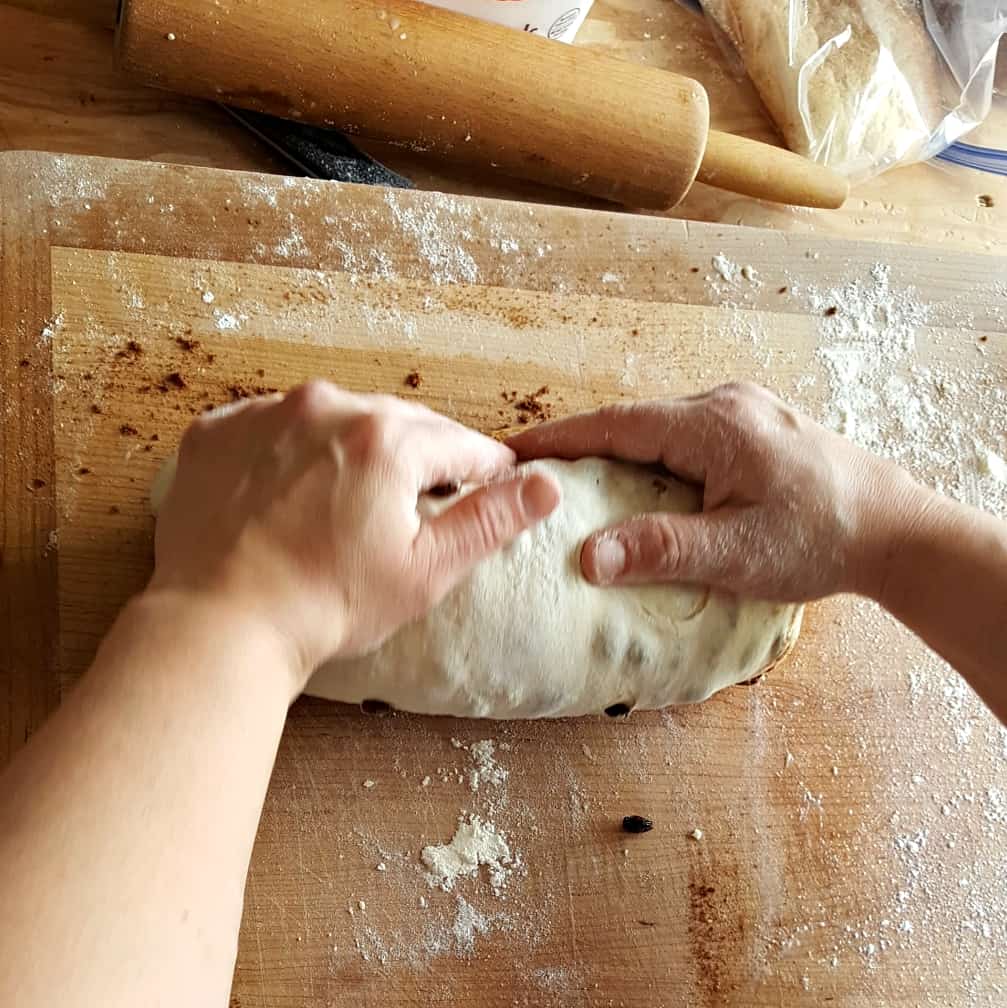
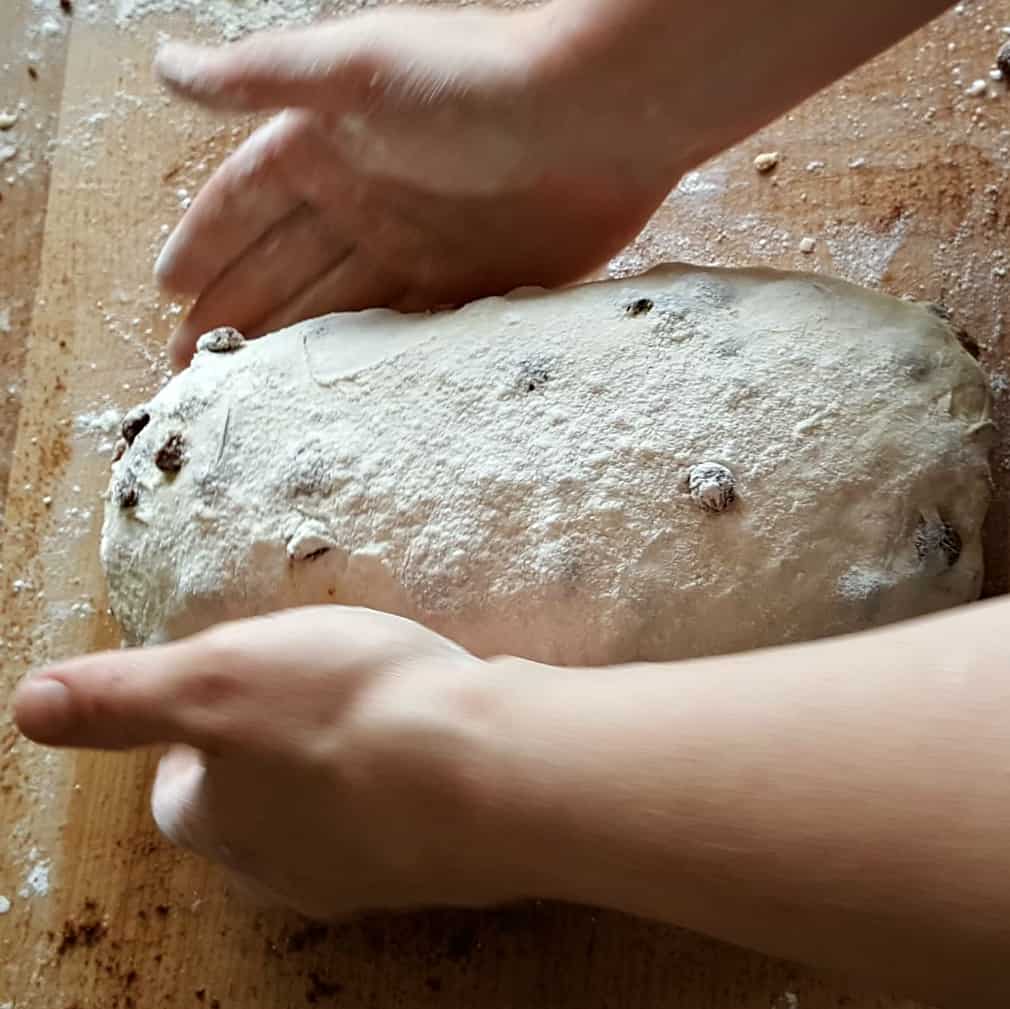
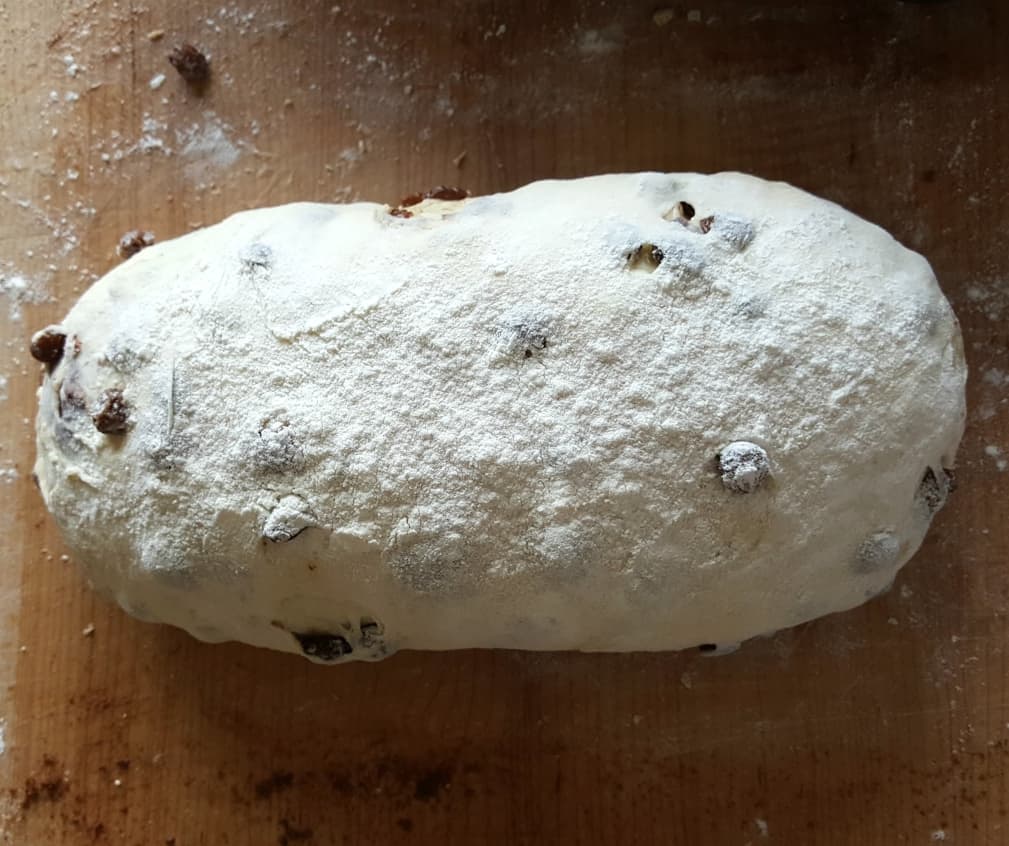
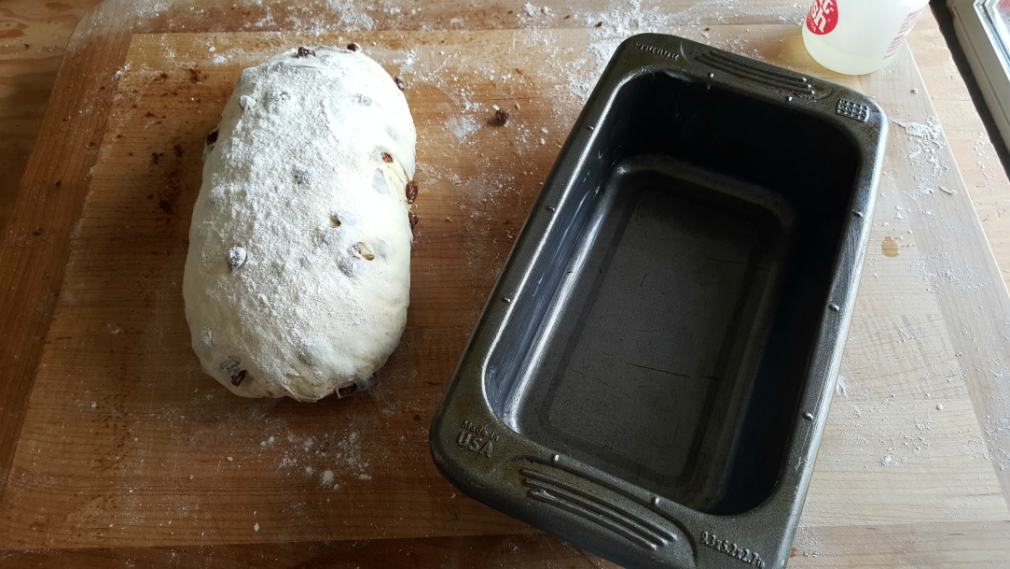
Here is a visual guide to show you how Sasha forms her loaves and adds in the cinnamon swirl layers.
NOTE: There are two layers of the cinnamon swirl. Sasha is using brown sugar in the process pictures below. You can also choose granulated cane sugar as you prefer.
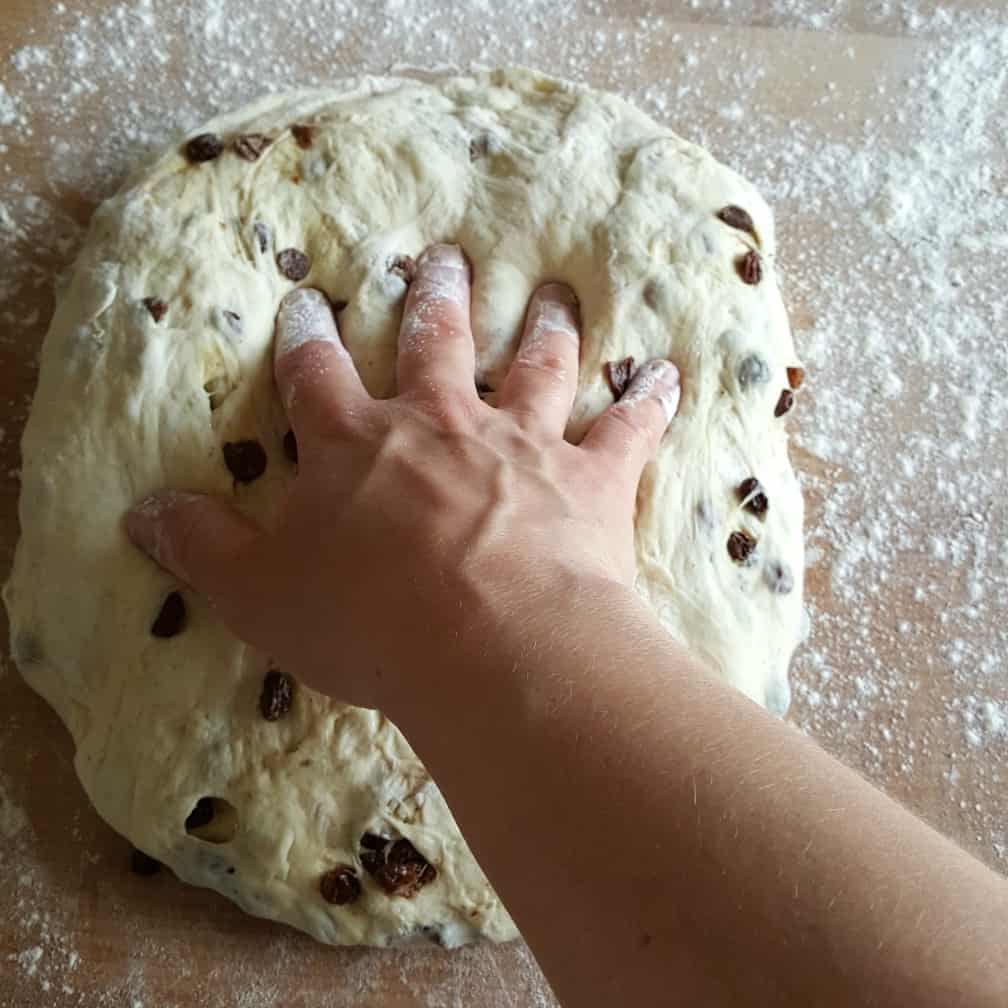
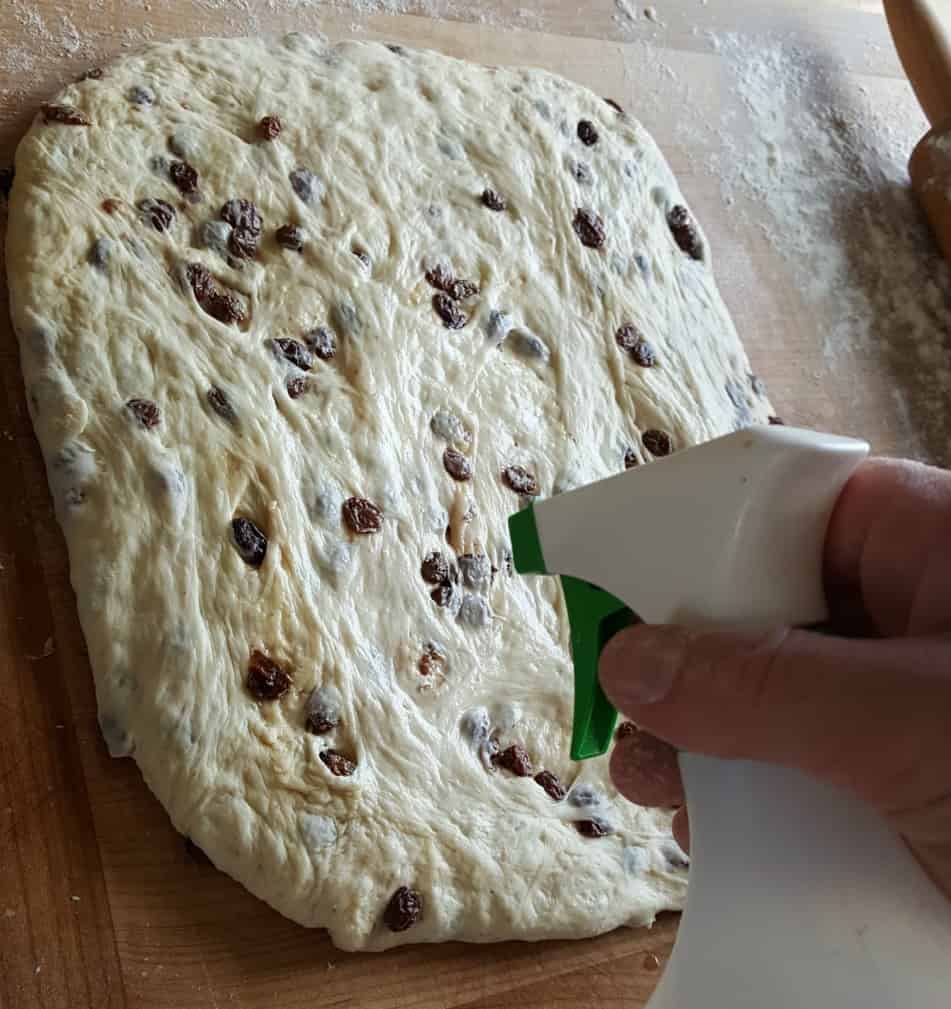
Rolling it up
The printable recipe card has all the instructions step by step. But the techniques Sasha uses is easiest to understand when you can see the process too. Watch our video for a complete recipe demonstration as well.
Your Printable Recipe Card:
Sourdough Cinnamon Bread with raisins
Beautifully swirled cinnamon bread with raisins begins with your bread recipe of choice. Her are the instructions for turning your bread recipe into a yummy cinnamon raisin bread.
Ingredients
Soft sourdough Sandwich bread dough (This makes two loaves of bread)
- 300 grams starter-freshly fed and active
- 650 grams warm water
- 50 grams honey
- 40 grams avocado oil
- 1000 grams White bread flour (high protein)
- 20 grams Salt
FOR EACH LOAF with Cinnamon and Raisin filling You will need:
- 2 Tablespoons cinnamon
- 1/2 Cup sugar- (either brown sugar or cane sugar works)
- 150 grams dried raisins
- 150 grams water
Instructions
MIXING:
- Begin with a very active recently fed starter. It should pass the float test.
- Set a large bowl on a digital food scale set to grams and press the tare button. The scale should read zero.
- Pour in the water to weight of 650 g. Press tare.
- Pour in 300 grams of starter. Press tare. The starter should form a floating mass on the water.
- Add the oil. Press tare
- Add the honey. Press tare.
- Whisk together the starter, oil, honey and water until they are mixed.
- Add the 1000 grams of flour.
- Mix the flour into the water/starter with a dough hook, spatula and your wet hands until you have a shaggy ball of dough.
AUTOLYSE: This step is often called an autolyse. However, Since the starter is included at this stage, it is technically a fermentolyse, where hydration and fermentation begin together.
- autolyse 1 hour.
- Sprinkle salt across dough.
- spritz with water bottle and work in the salt with wet hands.
- Rest 30 mins
STRETCH AND FOLDS:
- PREPARE RAISINS: Put the raisins in water and set aside for two hours. They will plump as they absorb water for a better finished baking result.
- NOTE: See video for an alternate method of adding raisins by layering them in at the final rise rather than dispersing them through the dough in the stretch and fold stage.
- Begin Stretch and Folds. You need 4 rounds of stretch and folds 30 mins apart. See video for technique.
- Do the first stretch and fold and set timer for 30 minutes.
- BEFORE the second stretch and fold cut the dough in half if you only want ONE loaf for cinnamon raisin bread. The other make as plain.
- IF DISPERSING THE RAISINS INTO THE DOUGH: Pour half of the plumped raisins into the bowl and stretch the dough over them.
- At the third stretch and fold pour in the remaining raisins and again stretch the dough to bring the raisins into the dough.
- At the Fourth stretch and fold all the raisins will be blended evenly throughout the dough.
- For more help with adding raisins to this bread dough please read the entire post and examine the photo gallery we include.
LONG COLD RISE:
- Refrigerate overnight or up to 36 hours.
BENCH REST DOUGH:
- Remove from fridge and warm to room temperature. (ABOUT TWO HOURS)
- ( If you have not yet divided the dough for loaves) Divide the dough into two equal dough balls by weight.
- Bench rest an hour until dough is elastic.
SHAPE AND FINAL RISE:
Both the video and our photo gallery included in this post will help show you the details of shaping and layering the cinnamon into the dough.
- De-gass dough with rolling pin and shape for pans as shown in post.
- Evenly sprinkle with Half the cinnamon sugar.
- Fold the outside edges of the dough to the center and close the seam.
- Sprinkle remaining cinnamon sugar on the top.
- Fold the FRONT corners of the rectangle to the center seam.
- Roll the dough up tucking it as you roll to keep the roll tight.
- Flatten the seam and pinch the ends.
- Place the formed dough loaf into your oiled bread pans.
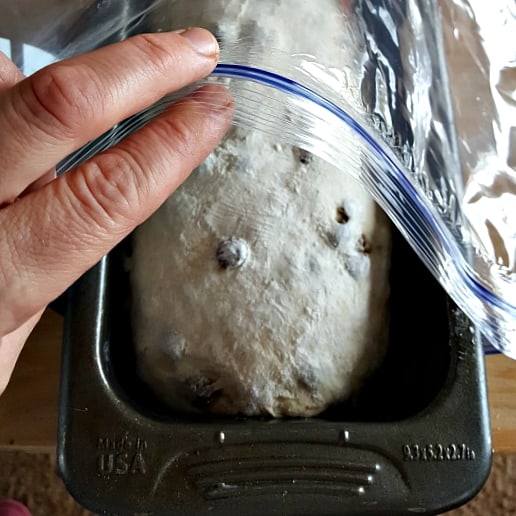
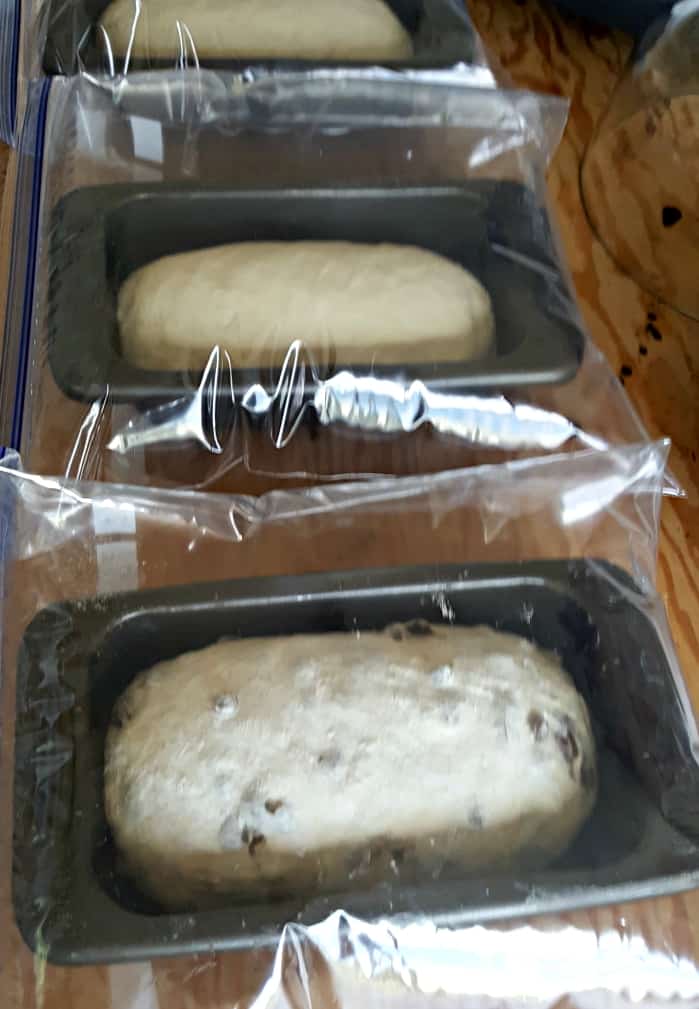
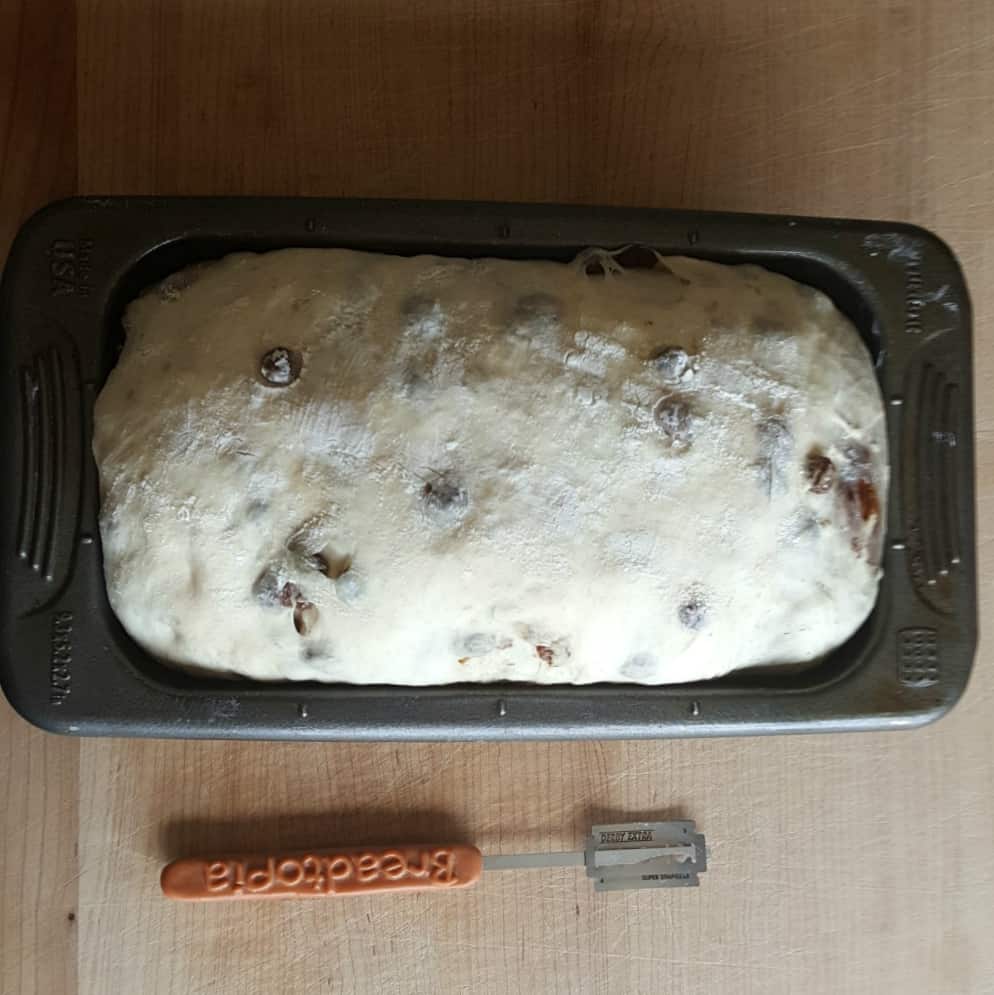
- let dough do a final rise in bread pans covered loosely with plastic until they reach the top of the loaf pans.
- Do an egg wash(optional) on top of the dough before baking.
- Score the dough with a sharp wet blade. Make one deep slash down the length of the loaf for best rise.
BAKING INSTRUCTIONS:
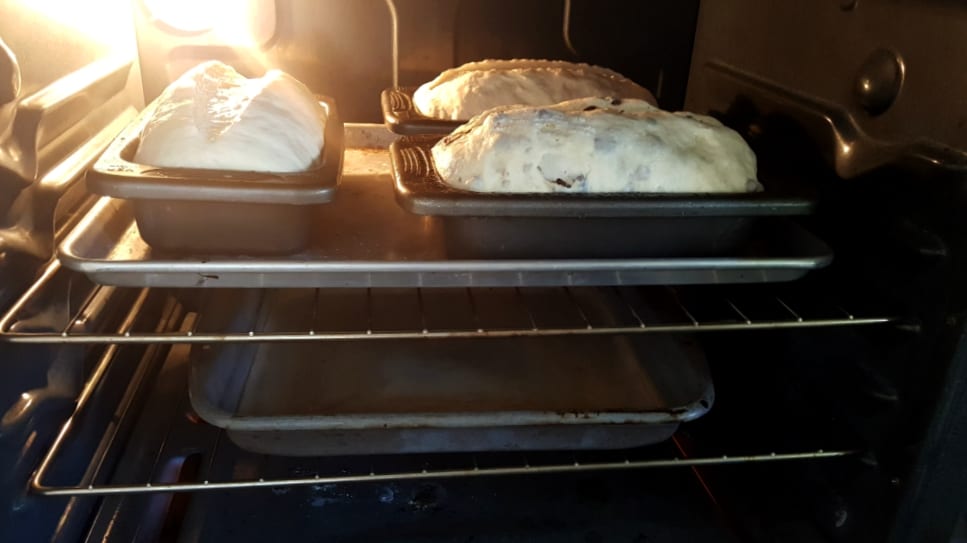
- Preheat oven with a pizza stone (or baking sheet) and broiler pan on oven shelf below at 400°.
- Loaf pans go on top of a sheet pan onto the stone(If you have one).
- Spritz loaves with water just before going into oven.
- Pour water about 1/2 inch deep in the broiler pan. This creates steam.
- Keep steamy for first 15 mins. Spray hot oven with water as you begin baking the loaves.
- After 15 mins turn oven down to 375°.
- Bake an additional 30-35 mins.
- Turn loaves for even browning.
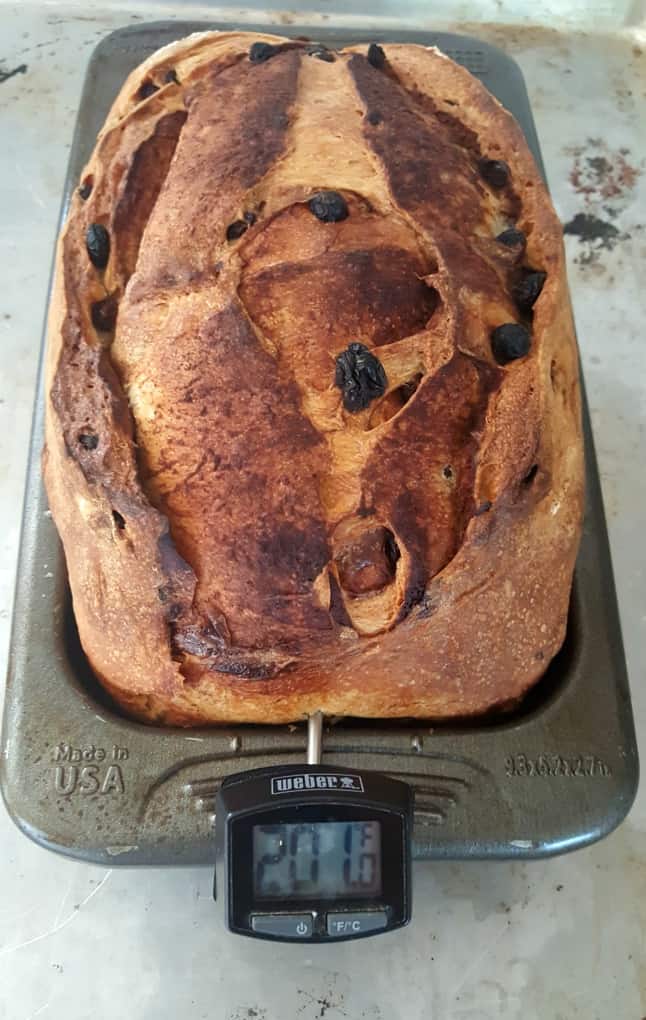
- Using a digital thermometer check internal Temp of loaf. It is done at 200°. If you don't have a thermometer pop loaves out to test for hollow on bottom. Or thump the loaf. Does is have a hollow sound?
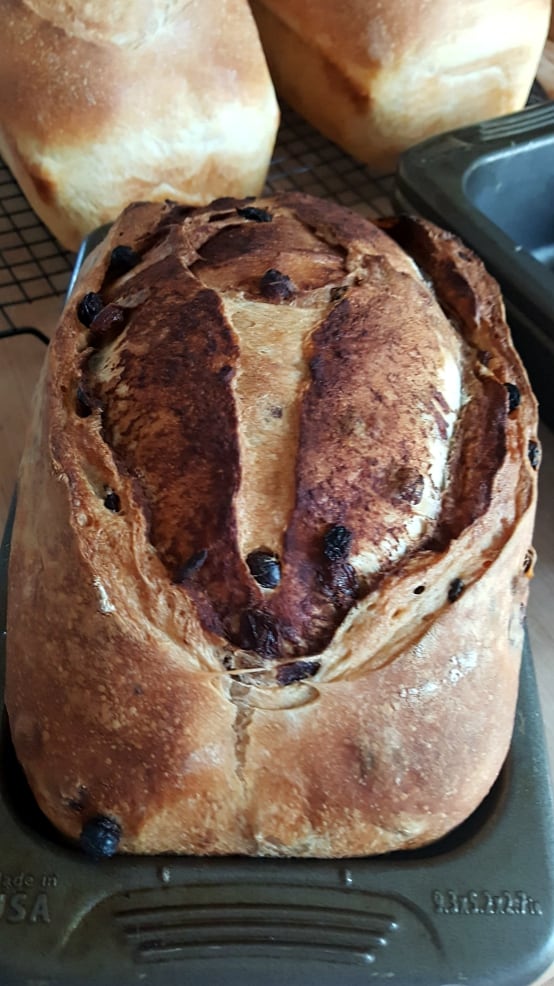
- Remove from oven and cool on racks to room temperature before cutting the bread.
Notes
Alternate Method: To add cinnamon and raisins
If you decide to turn a loaf into a cinnamon swirl bread at the last minute. You can do this just before shaping the loaf. It is NOT ideal. But it will still taste great.
- Take your dough and dump the cinnamon / sugar mix and raisins on top.
- Chop and fold it all into your dough with your bench scraper.
- I do that sometimes when I feel like making a plain loaf into a flavored loaf at the last minute.
Alternate method 2 :
It is easy to add the raisins in when making the cinnamon layers when forming the dough for the bread pans. WATCH the VIDEO below to see me use this method.
More Loaves:
This recipe is for two LARGE loaves. One plain and one cinnamon raisin bread. If you prefer to make three smaller loaves the recipe will divide into three smaller loaves.
You will have to decide at the second stretch and fold how many loaves you wish to make with raisins. Divide the dough into thirds at this point and add the raisins into the loaves as you prefer.
NOTE: If you want two loves of cinnamon raisin bread increase the raisin and cinnamon filling up by a third. The same applies if you want two loaves plain and one with the fillings. But DECREASE by a third.
Recommended Products
As an Amazon Associate and member of other affiliate programs, I earn from qualifying purchases.
-
 Spring Chef Stainless Steel Pastry Scraper/Bench Scraper Chopper, Best as Pizza and Dough Cutter
 -
 Fletchers' Mill Rolling Pin, Maple - 18 inch, Dough Roller, Perfect for Skilled Bakers, Home Chef's, Great for Bread, Pasta, Cookie Dough, Fondant, Pastry, Cookies, Pie, Pizza, MADE IN U.S.A.
 -
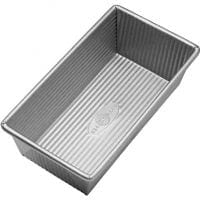 USA Pan Bakeware Aluminized Steel Loaf Pan 1140LF 8.5 x 4.5 x 3 Inch, Small, Silver
Nutrition Information
Yield
24Serving Size
1 slice cinnamon breadAmount Per Serving Calories 217Total Fat 2gSaturated Fat 0gTrans Fat 0gUnsaturated Fat 2gCholesterol 0mgSodium 326mgCarbohydrates 39gFiber 2gSugar 7gProtein 5g
More Sourdough Bread Recipes:
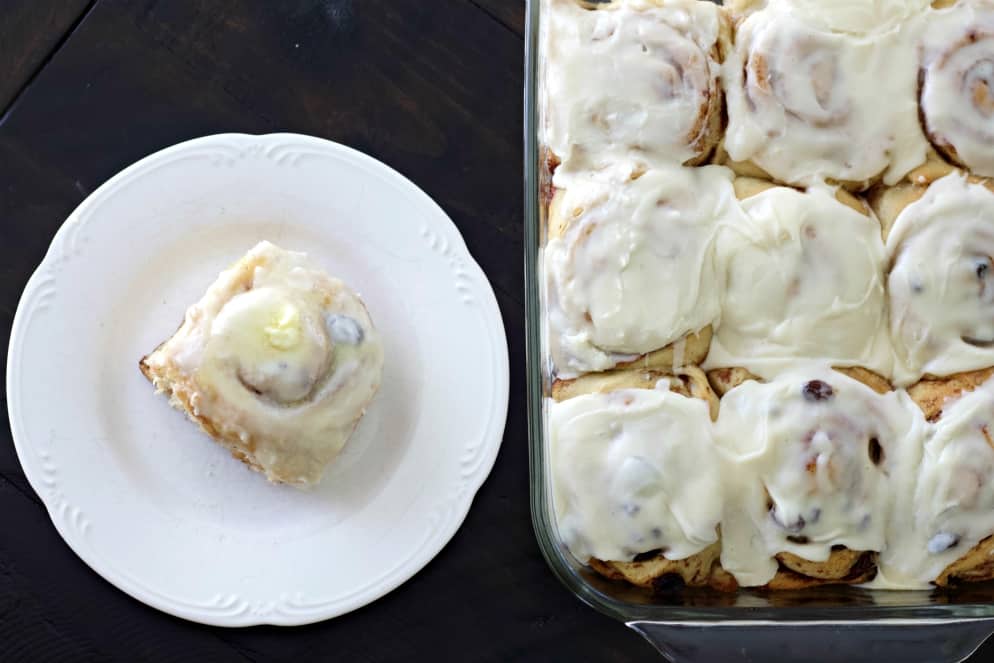
Looking for more sourdough bread? Start with these delicious recipes.
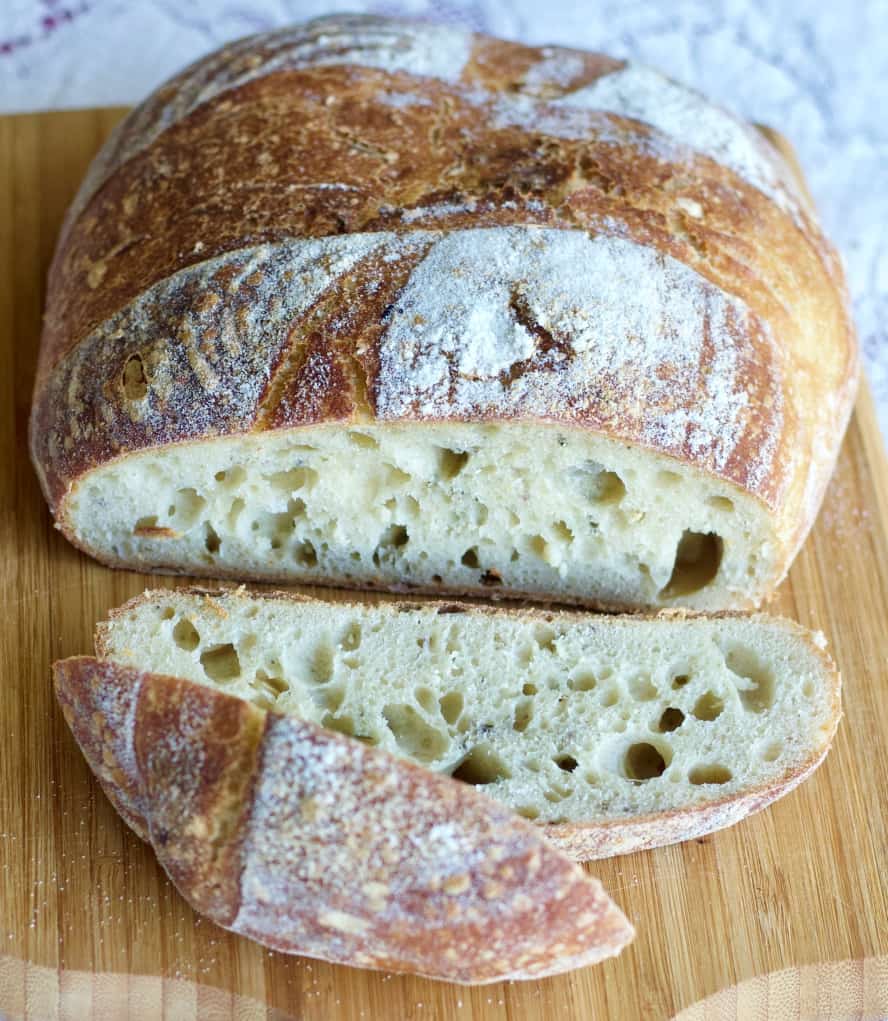
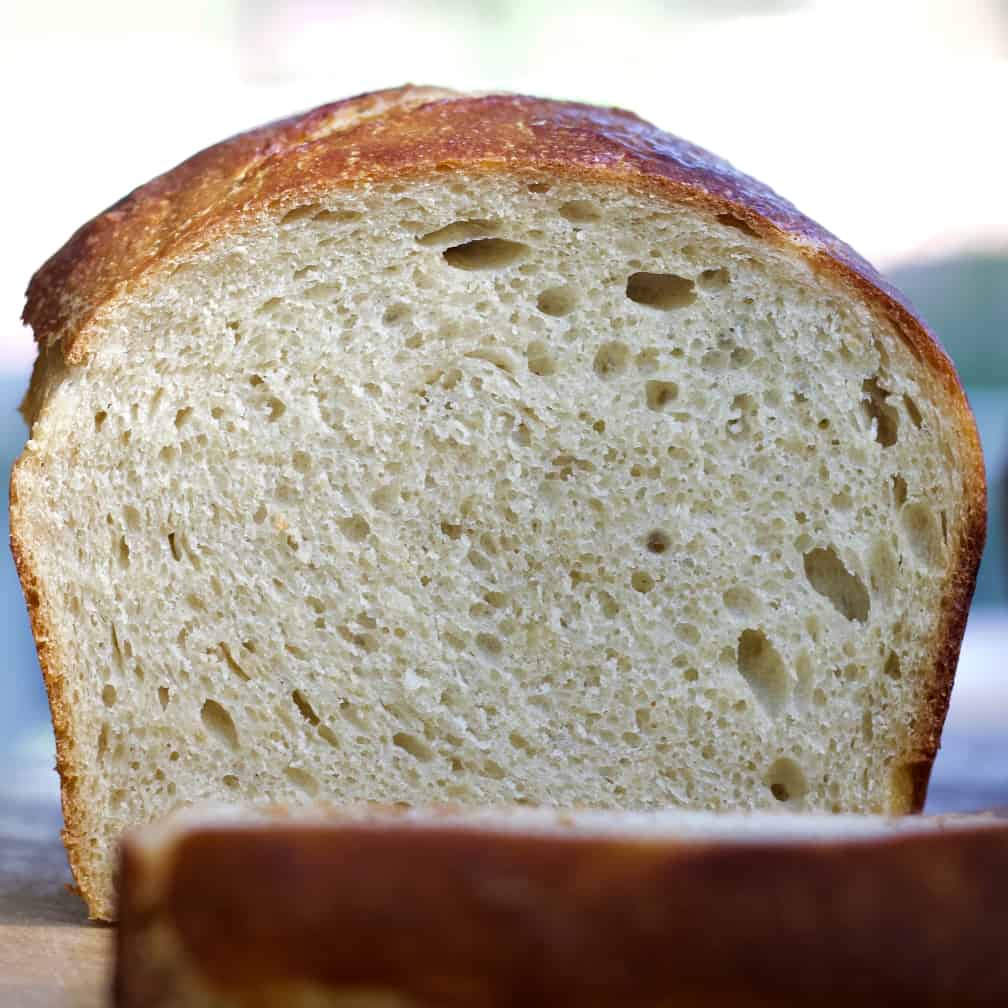
Want even more sourdough recipes? Visit our Sourdough section for sourdough discard recipes, bagels, pretzels and …so much more
Sourcing Sourdough Starter:
All sourdough bread is only as good as the starter you use. Read our posts on how to make your own Sourdough Starter, How to properly feed your sourdough starter, and Drying Sourdough Starter.
If you want to buy sourdough starter that is well established and ready to go CONTACT SASHA. She sells hers all over the US.
Follow Us:
We enjoy meeting you on our social networks. Follow us on Facebook, Pinterest, Instagram . Tag us with your pictures of our recipes and comment on how it went for you. We would love to see what you do with them.
We often like, comment and share your posts of our recipes on our daily Instagram stories.
Ask questions and rate the recipe in the comments section below. Please share what you did with this recipe. We are always looking for more and better ways to make homemade food. Other cooks love your ideas!
Recent Posts:
Hey I am so looking forward to trying this bread! I would like to make this bread and mail it priority to my dad as his Father’s Day gift. However, I have a rambunctious toddler so its much easier for me to do the labor intensive work on this after she goes to bed. Our mail goes out at 3:30 pm daily so hoping this can be baked and cool by then on the final day. Can you tell me if this schedule would work? Any feedback?
Night #1: mix dough, autolyse, and stretch and fold, place in fridge
Next day: Long cold rise until the late afternoon. Pull dough from fridge about 3 hours before toddler bedtime.
Night #2: Shape and place in fridge for final rise overnight
Next morning: Bake, cool and mail by 3:30 pm
Thank you!
Hi Elizabeth, I think you can shave a day off this schedule and still have a great bread. Do night #1 as you describe. Long cold rise till morning (OR you CAN omit the long cold rise.
TIP: The bread will still work without the long cold rise (maybe do four hours) but the dough may be a bit trickier to work with. KEEP your hands and tools wet. This is a high hydration dough not anything like the yeast bread doughs you may be used to.
Some of our bakers are doing this bread in a day and still having good results.
Even with a busy toddler I think you can do the shaping during the the morning. Maybe during snack time? (Pull the high chair up to the table so baby can watch while eating or at nap time?). . Bake, cool and mail by 3:30.
Hope this works out for you! Happy Father’s Day to your dad.:)
Thank you for your advice Diane! The bread was a success. It survived the cross country journey in the mail and my dad loved his Father’s Day gift. The bread kept quite well. A week after I baked it my dad said he was still eating off the loaf. Looking forward to making it again!
I’m SO glad it worked! That’s a challenging gift of love for you to make and send. What an inspiration! Thanks so much for letting us know. I was actually just wondering the other day how it traveled for you. 🙂
I made your Cinnamon bread, making one Cinnamon and the other plain. I am so pleased with your recipe. And love the bread. I have just recently learned to make sourdough bread and your recipe is the only recipe that I have made where mine looked just like your pictures. In other recipes my dough never rises as has high as in the pictures. This will now be my go to Sandwich bread and Cinnamon Raisin bread. Love them. I just did not use all the cinnamon sugar, bummer, I was afraid I was putting in too much. Your recipes point readers to your video but for the life of me I can not find it. I could not find a video link in either recipes. I was hoping to watch the dough and how you added the cinnamon sugar. Aside from that, I am thrilled to have found your recipes.
Hi Diane, Here is the YouTube link to the video I mentioned. Please note: This is NOT the recipe you are making. It is a link to a video that shows the basic techniques I use for several of our sourdough breads. I was hoping the visual gallery was helpful in constructing the cinnamon raisin layers. At some point I may make a video specific to this recipe. But I don’t have one at this time.
I’m happy you found us and enjoy the recipes. I just posted a soft sourdough Cinnamon rolls recipe using this soft sourdough bread too. We DID do a video on that. Hope this helps. Happy Baking!
After the 15 min of steam do I remove them from the water or continue to cook them as they are ?
Hi Alexis, I don’t bake the loaves IN the water. I bake the loaves on the middle rack of the oven. I put the water bath on the rack UNDER the loaves. I can see how you got confused. Baking cheesecakes and cream bruleè you do put the pan in the water. Don’t do that here. And you can keep the water bath in the oven the whole baking time on the rack below the bread. The steam helps keep the crust soft for you. Hope this helps!
So I have made this recipe 4 times now because it is such a favorite in my house. However, twice now, including today, when I pop the bread out of the pan it is kind of “wet” on the sides almost like if it’s not fully cooked. I haven’t sliced today’s loaf but last time this happened the bread was fully cooked inside, just the sides were “wet”. We ate it anyway after toasting the slices a bit. I don’t hav a thermometer but I check with a skewer (like for a cake) and take the bread out when the skewer is dry. Both times even after cutting the dough on top with a knife the loaf did not split. Any idea what may be causing this? Could this be too much moisture trapped inside? Two questions that I have are: 1) Should the dough be placed in the pan seam up or down? Maybe the seam up helps with moisture leaving the bread? 2) should I take the bread out of the pan right away? Or let it cool a bit in the pan? Thanks
Hi Rosario, Are you popping the bread out after it has cooled to room temperature? The bread should come out of the pan when it’s hot from the oven. The bread is baked in a steamy wet oven. When it cools it needs air all around the loaves to release that moisture.
If this is not the case it’s possible the moisture in the oven is actually getting down onto the bread dough. Once the crumb is set we don’t want water on the bread.
Two remedies here. Try baking the loaves a bit drier. Maybe not so much water on the dough at first. And do not spray the oven with water during the bake. Water must be running down the sides of the pan and collecting on the bread either during the baking process or during the cooling process. possibly your oven cannot evaporate the steam as it makes it.Reducing the water should help.
Hi and thanks for the advice. I left it in the pan for a while, not fully room temperature but substantially cooler than when it came out of the oven. I’ll pop it out right away next time. This time I didn’t put any water on the loaf or splashed the sides of the oven when I put it in. Another question: do you put the broiler pan with water when you turn the oven on to preheat (so that the oven is full of steam when you place the loaf) or do you pour hot water in the pan at the same time as when the loaf goes in? Thank you!
I put the cold pan of water in the oven when it preheats so the oven is steamy when the loaves go in.
Hi Diane
I was forwarded your information on the sourdough raisin bread and just wanted to let you know how it went. First of all, I had to keep feeding my finicky starter to get it up to the amount needed and it went well. I made the dough yesterday, put it in the refrigerator and it was HUGE in my mixing bowl. I followed the rest of the directions exactly. The dough was sticky and hard to roll but I got my cinnamon sugar on my 2 loaves and put them in the pans. The yeast was STILL SPITTING at me. It was actually funny. It is humid here in my house so I understand it being sticky. The loaves are rising now in their pans and I will bake on a stone. So excited to see how they turn out. This is the best sourdough recipe I’ve ever experienced!
Hi Bonnie, Lol. I have never heard of sourdough spitting. Naughty stuff! This is a high hydration dough so it will be sticky to work with. Especially in your humid warm kitchen. I am SO curious to see your finished loaves. If you can please tag us with a pic or story on instagram, message us on FB or email us at Homemadefoodjunkie@outlook.com.I am currently working on a post of making this recipe into cinnamon rolls. Stay tuned!
I made this today and without a word of a lie, it is the most delicious cinnamon raisin loaf we’ve ever tasted. Rolling it out didn’t work for me as the dough was too sticky but no worries, I just eased it out as I was de-gassing it. Worked like a charm! I also halved the recipe but one thing’s for sure, I won’t the next time! One for us and one for the freezer!
Thanks for the great review Kaaren. I’m so happy it turned out so well for you. Happy Baking!
Hi,
I’m excited to try this. It would really help to know the dimensions of the dough when you first roll it, whether you fold the short or long sides to the center before adding the second layer of cinnamon sugar, and what the dimensions should be before you roll it up. Also, what are the dimensions of your loaf pans?.
Hi Sarah,
This is a wet sticky dough with a lot of resilience. So you may find the rectangle fights you a bit if you try to make these exact dimensions. Unlike a yeast bread dough our sourdough is not so easily tamed.
The main thing is to get it degassed and then adjust the rectangle to roughly 12 inches wide to 14 to 16 inches long.
Now lay on the cinnamon. Fold the dough over on itself to the middle as shown. Layer more cinnamon sugar on the top. Now fold it from the narrow end to the point. Roll it up. The loaf will be fat and short possibly. But don’t worry if this happens.
Smooth the dough from the middle( both hands gently grasp the dough and pull apart from each other to the ends of the loaf. This might be necessary to elongate the loaf to fit your bread pans. Mine are about 9 x 4.5 inches. The thing is you want to adjust the loaves to fit the bread pans end to end and tuck the dough ends and pinch the seams. Put it in the pans seam side down to rise. Hope this helps!
Can I halve the ingredients if I want to make just one raisin cinnamon loaf? It looks delicious!
Hi Kaaren, Yes, that will work great! Enjoy!
First off! Great recipe! I’m in the final bench rest and wondering if I can bake these freeform on a stone?
You can! Be sure to use the water bath on the shelf under it and follow the instructions for the bake. It should turn out great. The crust might be a bit crunchier but the crumb should be fine. Please let us know how it goes!
Worked out great! I split the recipe into three for one large loaf, one small loaf and a boule that I baked on a stone. Couldn’t be happier with the results!!
Hi Jane, I’m delighted the recipe worked so well for you. Thanks for the great review!
Hello,
I’m wondering if it would be okay to make the loaves with the cinnamon sugar and then put them in the fridge to do the second rise in the morning? Or maybe do the second rise and then put them in the fridge to be baked the next morning? I made the bread today and the process in the morning took 8 hours total because it’s very cold where I live! I would love to be able to make this for breakfast but it’s not possible with all of the morning steps!!
Yes, I’m sure that would work if the dough can be worked. Go ahead and put the cinnamon sugar in and form the loaves. Then put them in plastic bags and leave in fridge until morning. Then you can bake them straight out of the fridge in the morning. I have never done exactly this but it should work. Let us know!
Hi there! my dough is at the bench rest stage. What should it be looking for me to move onto the next stage??
Thank you
Hi Justine, the bench rest is for relaxing the dough and getting it ready to degass. It usually takes about 30 minutes. The dough should have good structure at this point (it hold the shape of the dough ball somewhat after 30 minutes). If so you are ready to move on. If the dough is very slack you may need to work it up into a ball again and give it another 20 minutes or so at rest. Remember summer temps do play in. If your room temperature is very high the dough may be slack and VERY sticky. You can put it in the fridge for an hour before the degassing if this happens. Hope this helps!
How long does it normally take for the final rise?
Hi Ashley, The final rise normally will take from two to four hours. Remember you are not expecting the loaf to double in size. Just rise the dough to the top of the bread pan and bake as directed. Your room temperature will have a big impact on the time it takes to get the dough properly risen. So check the dough every hour or so. This will help you determine what is normal for your kitchen.
I made this with AP flour and I messed up with the oil (didn’t count right) and it still came delicious, next time I’ll use bread flour (if I find it) and try to be fully awake when I measure the ingredients 🙂 thanks for a great recipe
Hi Rosario, Thanks so much for the great review. It’s matters so much to have bakers share their experiences with our recipes. Lol. It’s nice to know the recipe is somewhat flexible. 🙂
Hello, if my kitchen is cool, is it ok to let it sit out on my counter over night? And avoid the two hour wait in the morning?
Hi Heather, The flavor of the bread will be much better if you do the fridge time. You can eliminate the counter time if you want to Just make the dough and put it in the fridge. Do your bench rest cold but double the time it sits. Now form the loaves and bake. You CAN eliminate the fridge time but the bread will be better if given time. Let us know how it goes!
Thank you for this thorough recipe. I have made it twice, and it is a favorite in our household! The toasted slices with butter and coffee in the morning are like, ok this day is going to be great.. I make a half recipe and just bake it in a pyrex loaf pan (all I have right now), and it looks just like your photos. Ok, so my question: can you let it cool completely in the pan? I’ve noticed that as mine cools outside of the pan, it shrinks in height about an inch – I think because it is a heavier bread. Maybe I take them out of the loaf pan too soon? Regardless, the loaves are beautiful and have a great crumb. Even with the shrink, it is still tall and has a big proud crown.
Hi Laura, I’m so happy to know the recipe is working for you. Here’s my ideas on your loaf shrinking.
I’m thinking the loaf may not be completely baked. Have you checked it with a digital thermometer? It should read 200 degrees F to 206 before removing from the pan. This will help get the crumb structure perfected.
If you do NOT have a thermometer (grill thermometers work) thump the loaves. They should sound hollow and feel light. If you remove the loaf from the pan to the cooling rack look at the bottom. Make sure its a bit hollow too. Thump it. If it sounds dull and the loaf is sort of heavy put it back in the pan gently and bake another 5 to 10 minutes.
If you cool the loaf COMPLETELY in the pans it will build condensation on the loaf sides and bottom. You can leave it in the pan an extra 5 minutes of so but the bread needs to evaporate moisture to help set the crumb and crust properly. I hope this helps.
Thank you so much for the thorough answer. You were exactly right. not fully baked! I made it again when visiting my parents who had a digital thermometer. It showed I was nearly 30 degrees too low when I would have thought it was done based on appearance. It only took another 12 minutes to come up to 202, at which point I took it out. This time it did not shrink upon cooling at all. Thank you again.
Also, I wanted to let you know (someone above asked about this) that I have made this through the filling and rolling up stage and then refrigerated it overnight. In the morning, I took it out of the fridge at the same time I preheated the oven, then when oven was ready, I scored and egg washed and baked. I baked it about ten or 15 minutes longer than if it had not been cold, and it worked beautifully. In fact, overnight, some of the cinnamon sugar became caramel-ly, which just made it insanely good.
Thank you so much for letting us know you found your answer. Underbaking is so easy to do and without a thermometer is really difficult to tell until it’s too late. Especially for a filled bread like this. So Yay!
And how intriguing to hear about doing the long cold rise with the fillings in! Now I’m going to have to try that. I really apprecitate you sharing your experience on our comment forum. We all benefit from each other this way. Have and great day and happy baking!
Absolutely incredible! I’m completely new to sourdough and this was only the second loaf of sourdough bread I have ever made. Mine did not split as beautifully as yours, but I am able to tell that my scoring didn’t go deep enough. I have a stoneware loaf pan and it baked up beautifully in that. Such a lovely texture when toasted. I need not look any further. Thank you for sharing!
Hi Lori, That’s great to hear. This recipe also makes great sandwich bread and cinnamon rolls. As a basic soft sourdough bread recipe it’s very versatile. We also have a few other sourdough recipes that may work well for you. I’m delighted you’re having a great start with sourdough. Happy Baking!
What type of bread flour brand of bread flour did you use? Enriched?
I use either king Arthur bread flour or Montana brand All purpose flour. They are both high protein bread flours that gives the bread structure you want here. NOTE: I put up two amazon affiliate links but price gouging is horrible right now. See where you can find the flour you need the cheapest. Walmart carries the Montana brand and most stores carry king arthur. Right now that may be your best bet.
In these times of shortage people use all kinds of flours. Basically whatever is in the store. If you can’t find a good high protein bread flour (Look for label that say 5 grams of protein or labeled 12 % for king arthur). Ask the store bakery if they will package you up bread flour in 5 lb. bags or more. Our local groceries will do that. They use a good quality flour that will raise sourdough well.Best of luck!
Hello,
If this recipe makes two loafs, should I be adding 300 gr of raisins to the dough at the stretch and fold part? And do you think I can cook them as rounds in the dutch oven like the milk and honey sourdough recipe?
Thanks!
Hi Christine, You can divide the dough after autolyse stage (OR after the second stretch and fold like the recipe calls for) to do the loaves separately if you want just one loaf of cinnamon raisin bread. For two loaves keep the dough in one bowl and add 300 grams of plumped and drained raisins and proceed with the recipe. You will double the cinnamon sugar filling for two loaves as well.
And yes. You can shape this dough into boules. The milk and honey bread has a bit more structure for shaping that way but I think this dough will also work fine as boules. Let us know how it goes!
Hello,
I want to try baking with sour dough starter. All of the recipes look fine except for the fact there is no instruction on how much starter to put in each recipe. Is there a formula I should know? Did I miss seeing it because of being a neophyte?
I will be gratefull for any insight you have. Thank you.
.
Hi Anna, All our starter amounts are listed in the ingredients list. Let us know if we can be of further service to you. Happy Baking!
Hi! I don’t have avocado oil. Could you recommend a substitute? Olive oil maybe?
Hi Brooke, Olive oil is fine if it’s not too flavorful. Any canola or grapeseed oil will also work. Basically any oil will be ok. I like avocado because it is heart healthy and flavorless. Use what you have and let us know if you need further help. Happy Baking!
Hi there,
I am wondering approximately what size the rectangle of dough is when you first roll it out. I seem to wind up with a pretty short loaf…it all works out though and seems to vanish shortly after it is baked. I really like the flavor of this bread.
Hi Melissa, I roll it to about 10 inches wide and 15 inches long. It’s pretty flexible. go ahead an adjust the length as you roll it up by gently pulling it out if it tend to shrink as it rolls. OR when you put it in the pan you can gently massage the loaf from the middle to the ends. With your two hands at the middle of the loaf gently pull sideways. the ends don’t have to touch on both sides if they are close. The dough will expand as it proofs and bakes. I’m happy to hear you like the flavor. It’s a big favorite with our bakers. Have a great day!
I made the 2 sourdough loaves and they turned out amazing! I couldn’t find bread flour so I substituted Roger’s all purpose. It worked fine. I also didn’t have honey so I used agave syrup. Also seemed to work out ok. I’m trying corn syrup in today’s loaves. Wish me luck! It’s my first time making raisin bread.
Oh and I substituted avocado oil for canola oil. Aren’t shortages lovely?! 😉
Lol. They are. 🙁 not. However they do make us better bakers. You will soon know all the substitutions that work in your recipes. 🙂
Liz, you have our very best wishes for a good bake! Fingers crossed.
Hi again Diane, just want to thank you again for this lovely recipe. And I appreciate your diligent attention to answering everyone’s questions. During these crazy times both my daughters have decided to pick up bread baking…Sourdough bread baking to be exact and this recipe was an instant hit with them! I have lost track of how many times I have made this recipe. It is so forgiving, and adaptable…any oil works, I used coconut once, apples, cranberries dried apricots, and blueberries…whatever is in the cupboard, I have lost track of stretch and folds, left it in the fridge 24 hours and got carried away outside working and forgot about it on the counter…it works every time and is photograph perfect! Thank you!
Hi Melissa, You just made my day so much brighter. <3 Thanks so much for your support of our site. I'm just ecstatic that your daughters are learning bread baking. Think of all the great recipes out there to share. What a fantastic family hobby. Your experiments with additions for this recipe sound mouth watering. Happy Baking to all of you.