
Soft Sourdough Sandwich Bread Recipe
As an Amazon Associate and member of other affiliate programs we earn a small commission from qualifying purchases through our affiliate link. For more information read our Entire Affiliate Disclosure.
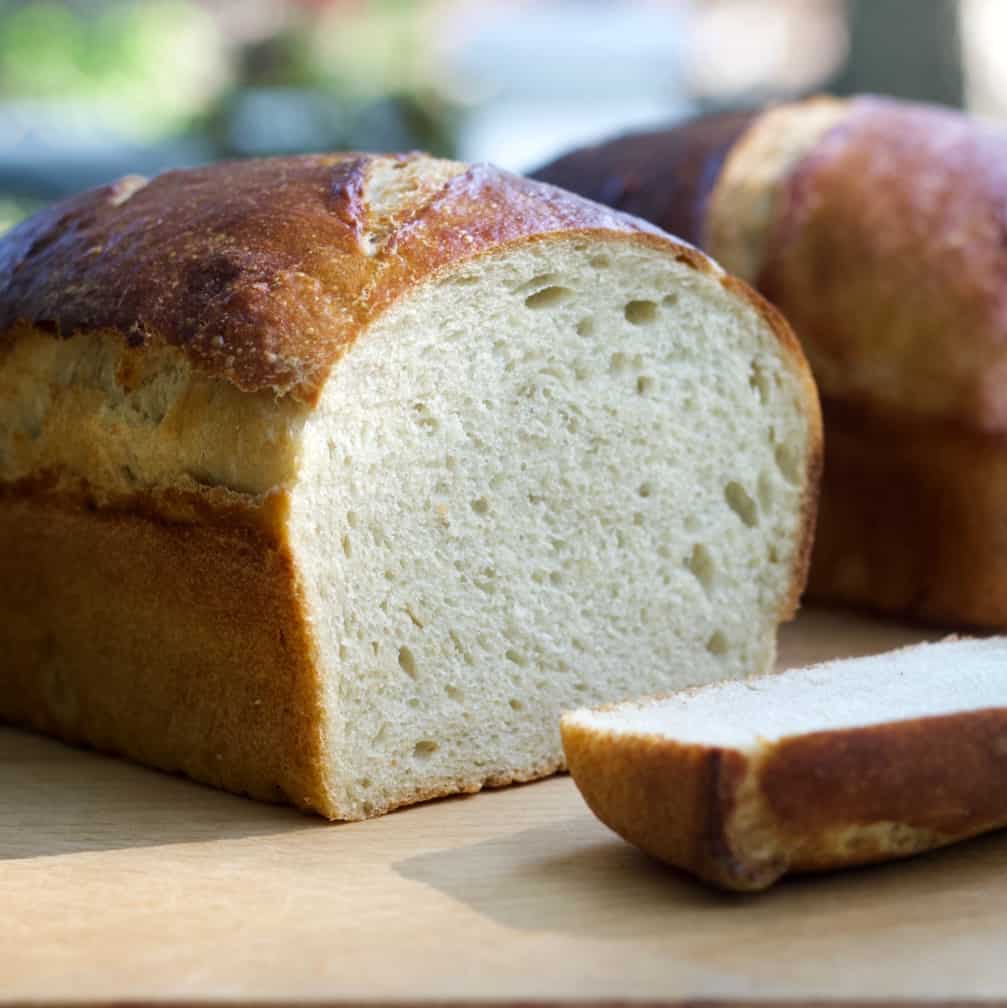
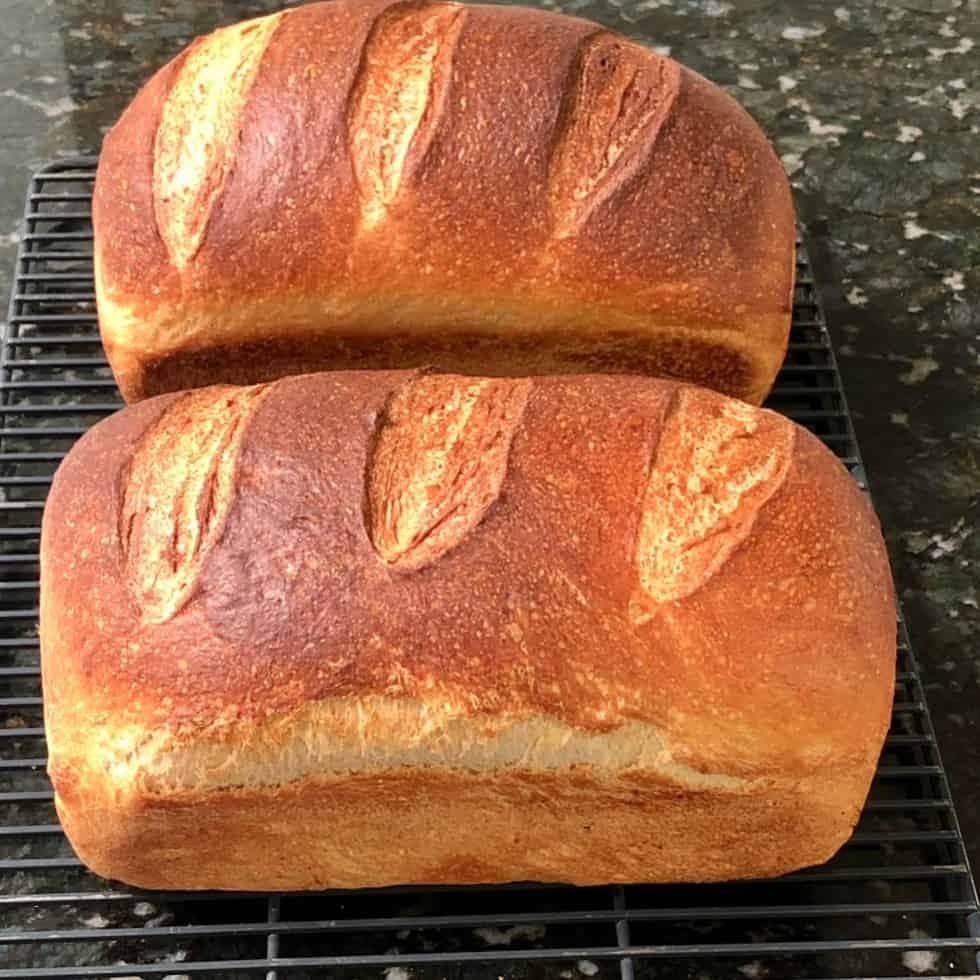
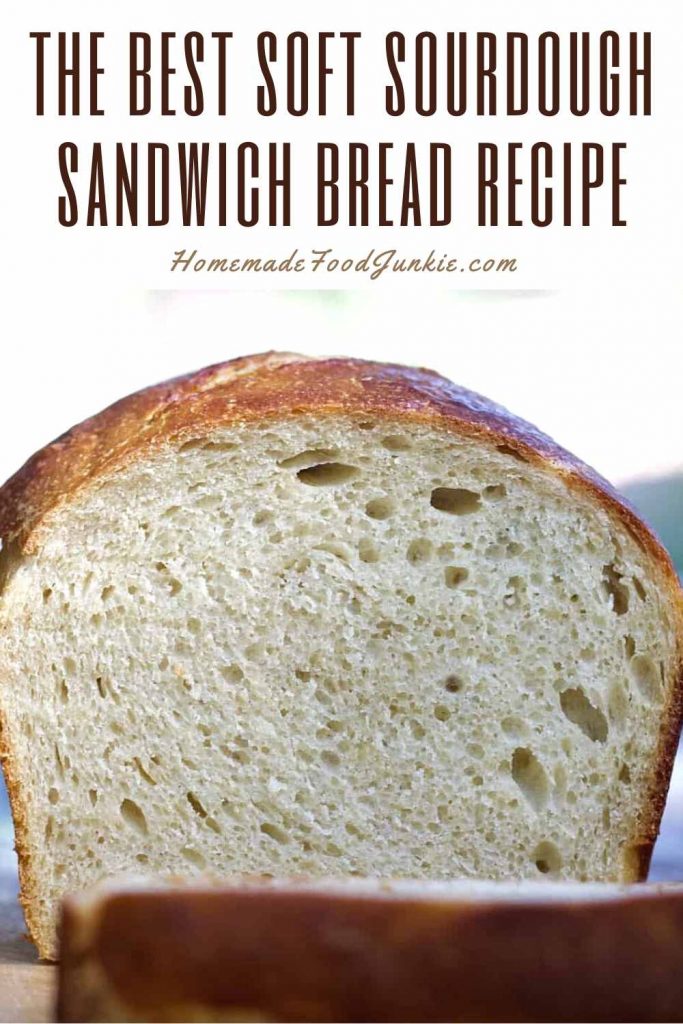
Bake this beautiful soft white sourdough sandwich bread recipe for your favorite sandwiches.
Soft Sourdough Sandwich bread is an easy sourdough bread recipe to make. This sourdough recipe is formed into soft and fluffy loaves that are perfect for sliced bread. Make this sourdough sandwich bread once a week to always have yummy sandwich bread on hand.
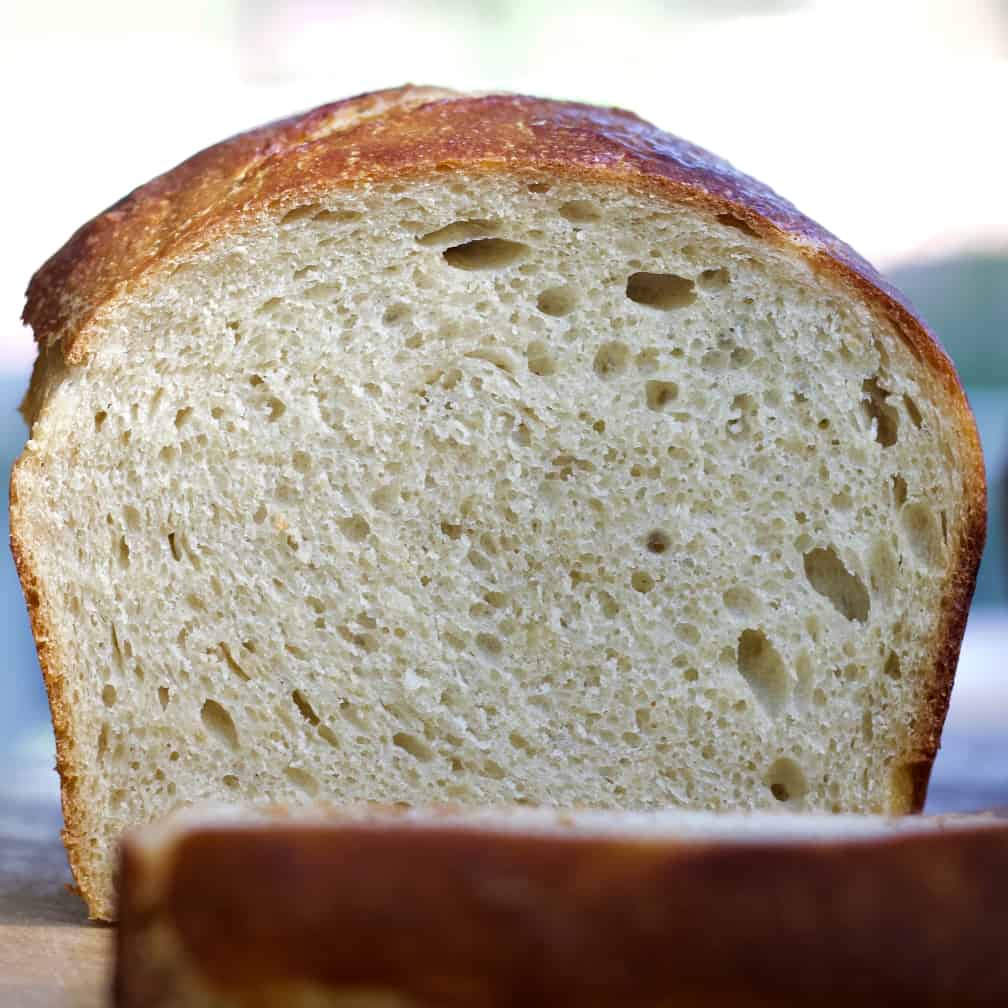
This dough has delicious sweet flavor and a soft and fluffy texture. We have a few tips and tricks in this post for making the best sourdough sandwich bread ever!
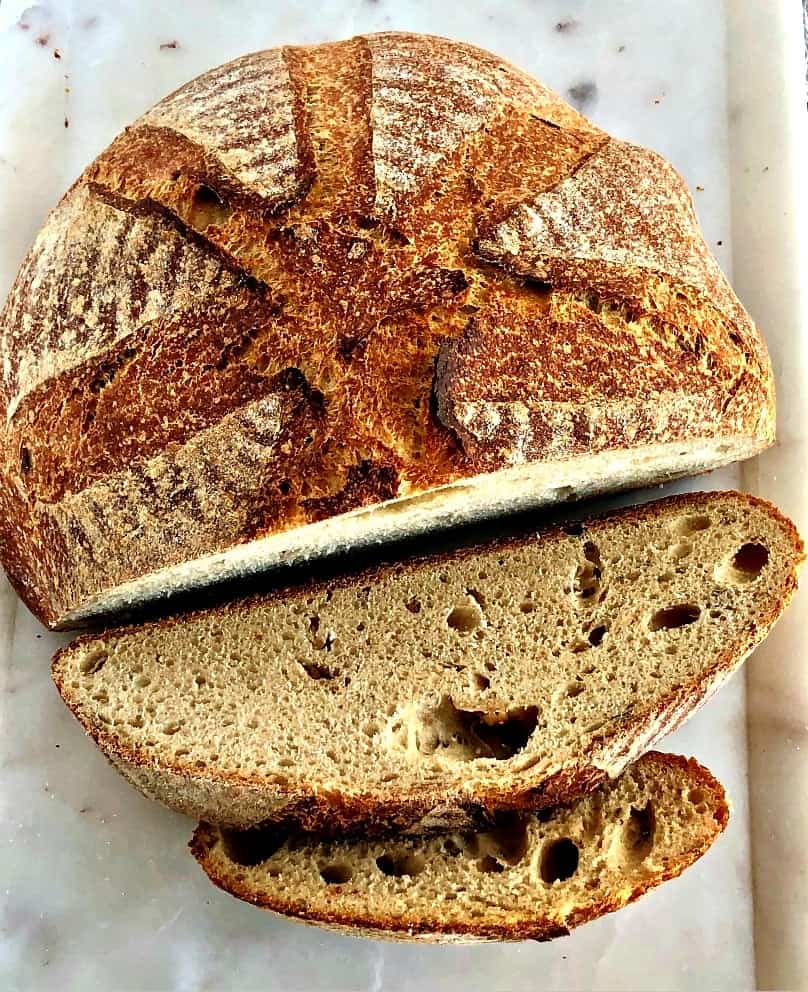
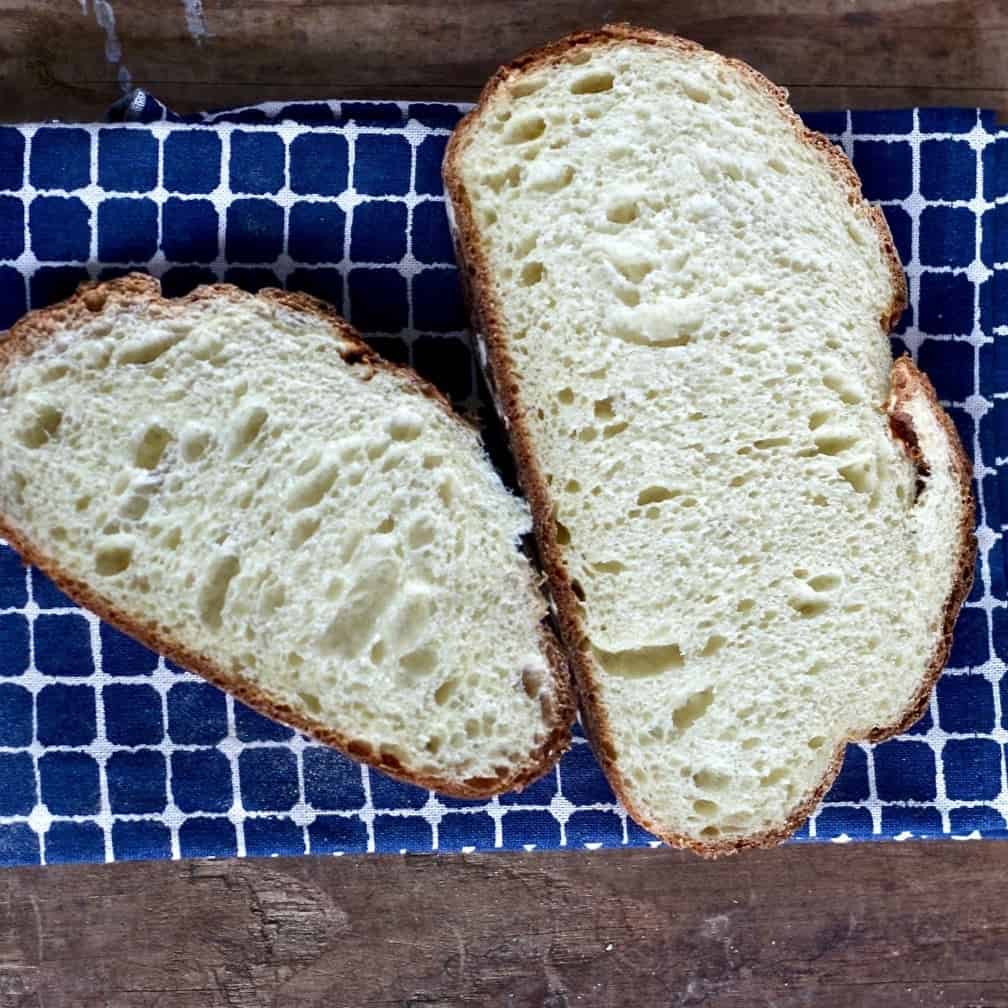
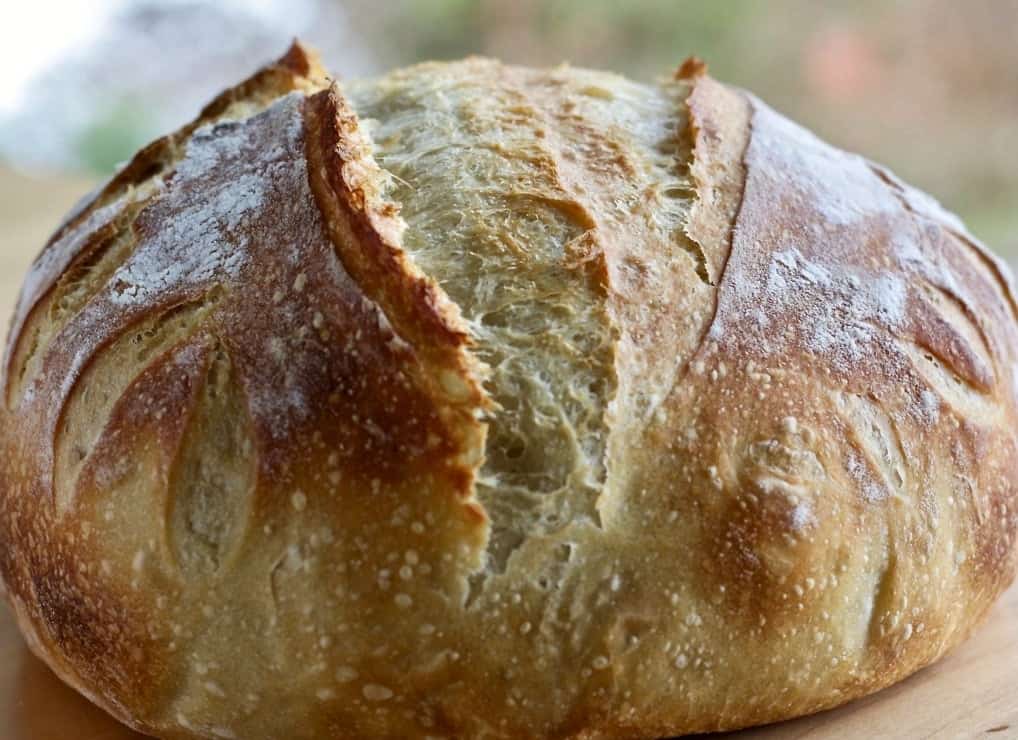
Sourdough artisan breads are famous for their crusty crusts and soft holy crumb. Perfect for dipping in soups and making paninis or crostinis. Who doesn’t love that shattery crust with a steak or plate of lasagna?
However, When you want a soft squishable sandwich with Mayo or a piece of buttery toast? Eat THIS sourdough sandwich bread.
More Sourdough Bread Recipes:
See our complete sourdough bread recipe tutorial and step by step guide for Beginners in our Artisan Sourdough Bread Recipe. Find all of our sourdough Bread Recipes here.
How long does Homemade Sourdough Bread Last?
This bread will last about a week when stored in a proper airtight container. Homemade sandwich bread will mold quicker than store-bought bread. This is because homemade bread does not contain the preservatives that you will find in store-bought bread. Keep that in mind when making homemade sourdough bread. Store it properly to avoid a moldy and stale loaf of bread. This recipe makes two 1000 gram loaves of soft sandwich bread.
Is Sourdough Bread good for Sandwiches?
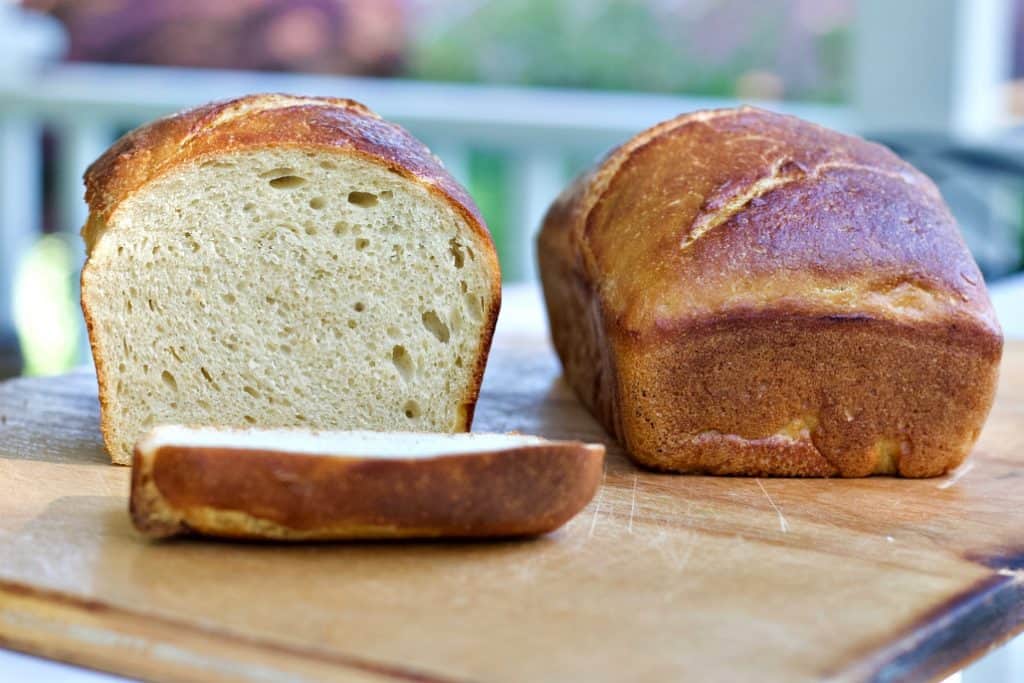
Regular Sourdough bread is great for sandwiches. Many restaurants use sourdough bread to make grilled cheese sandwiches, turkey, toasted sandwiches etc. A regular loaf of sourdough bread has a different shape than sandwich bread. It usually produces long and narrow pieces of bread. A sourdough sandwich bread will be shaped into a traditional bread loaf shape. This makes it easier to toast the sourdough bread in a toaster.
Soft sourdough sandwich bread is great for peanut butter and jelly sandwiches, turkey, or traditionally shaped sandwiches. The great thing about this bread is it is really easy to work with and store.
Why is my Sourdough Sandwich Bread not Rising?
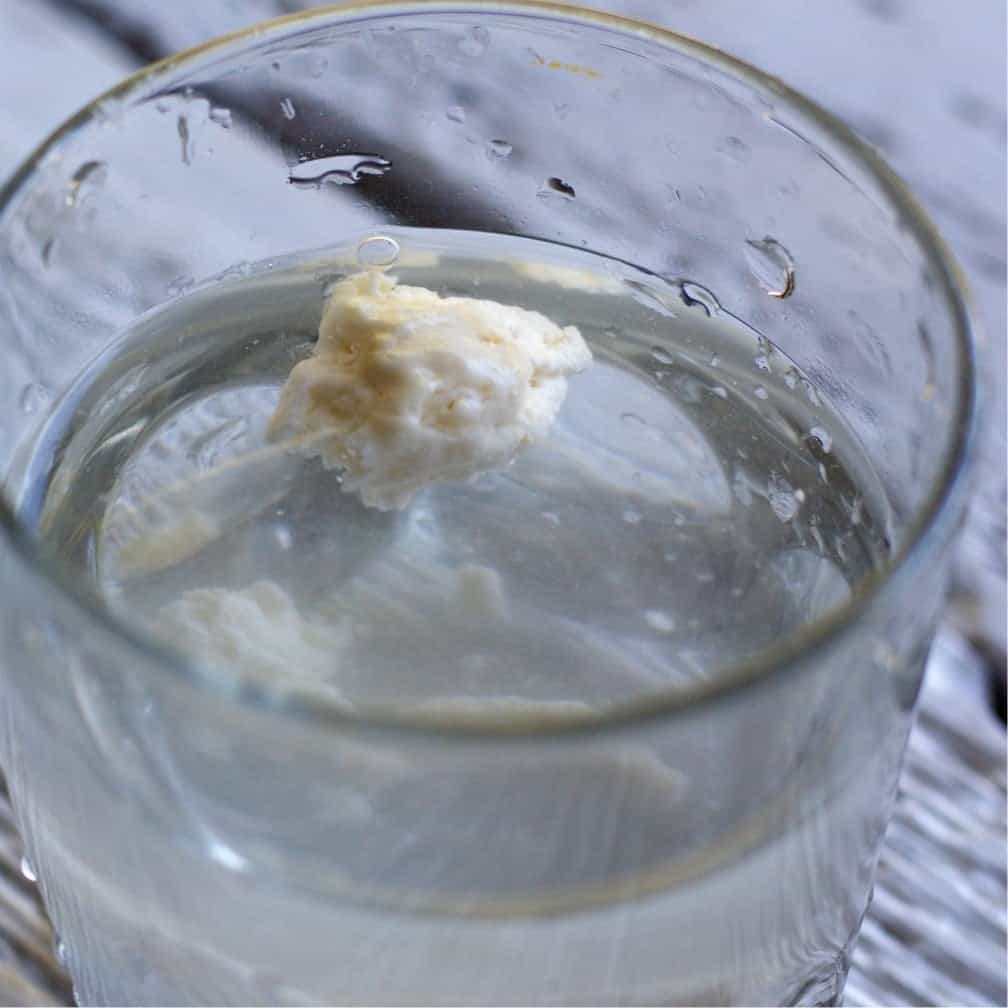
Sourdough Sandwich Bread not rising is usually due to a weak or inactive starter. Always ensure that your starter can pass the float test before using it to bake. It can be tempting to make the bread early before the starter is ready. Always wait until your starter can float in a cup of water before baking. There is no way to save a loaf of bread that turns out flat. It is worth it to properly prepare the starter for the best loaf of bread.
Do I need to score Sourdough Sandwich Bread?
There is no need to score a loaf of sourdough sandwich bread. This bread will rise and ferment without scoring it on top. If you wish to score the sourdough sandwich bread, you can do a gentle slice down the center of the loaf prior to baking. However, there is no need to score this type of sourdough bread. It will bake and rise just fine without going through the scoring process.
Watch our video tutorial to see all the techniques I use to make this bread recipe.
Sasha’s Soft Sourdough Sandwich Bread Recipe:
Sasha, our master baker contributor, created this sourdough recipe for her hubby. He wanted a soft white squishable bread with a soft crust. We all agree this bread makes great sandwiches.
Sasha’s family is incredibly lucky. And so are we. She is sharing her soft sandwich bread recipe with us so we all can benefit from her expertise.
Sasha also shared her Sourdough Milk and Honey Sandwich bread with us in case you missed it. Thank you Sasha!
Tips on making the Sourdough Sandwich Loaf:
This is a white bread recipe. However, you can mix whole wheat flour up to 50-50 with your white bread flour and still get good results.
- Begin with an active fed sourdough starter for best results. You do NOT need active dry yeast for this recipe.
- WATCH our video tutorial for ALL the techniques used in this bread dough making process. If you don’t know a term or technique the video will teach you.
- Good Flour is critical to the outcome of any homemade bread recipe. Use a fresh high protein bread flour (at least 5% protein).
How to Make a Soft Sourdough Sandwich Bread Loaf:
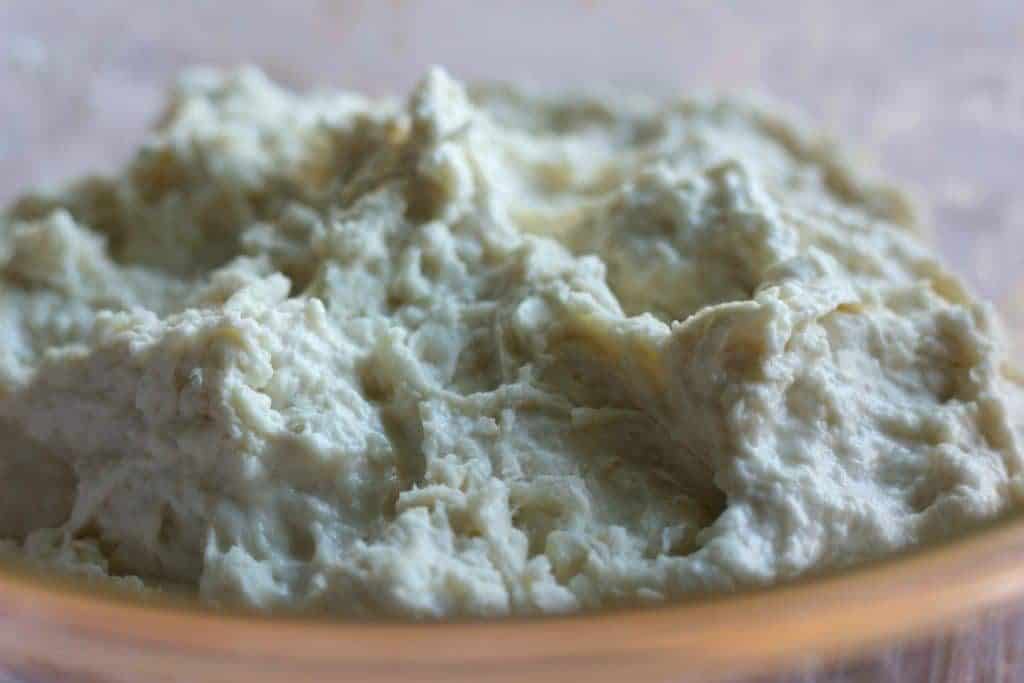
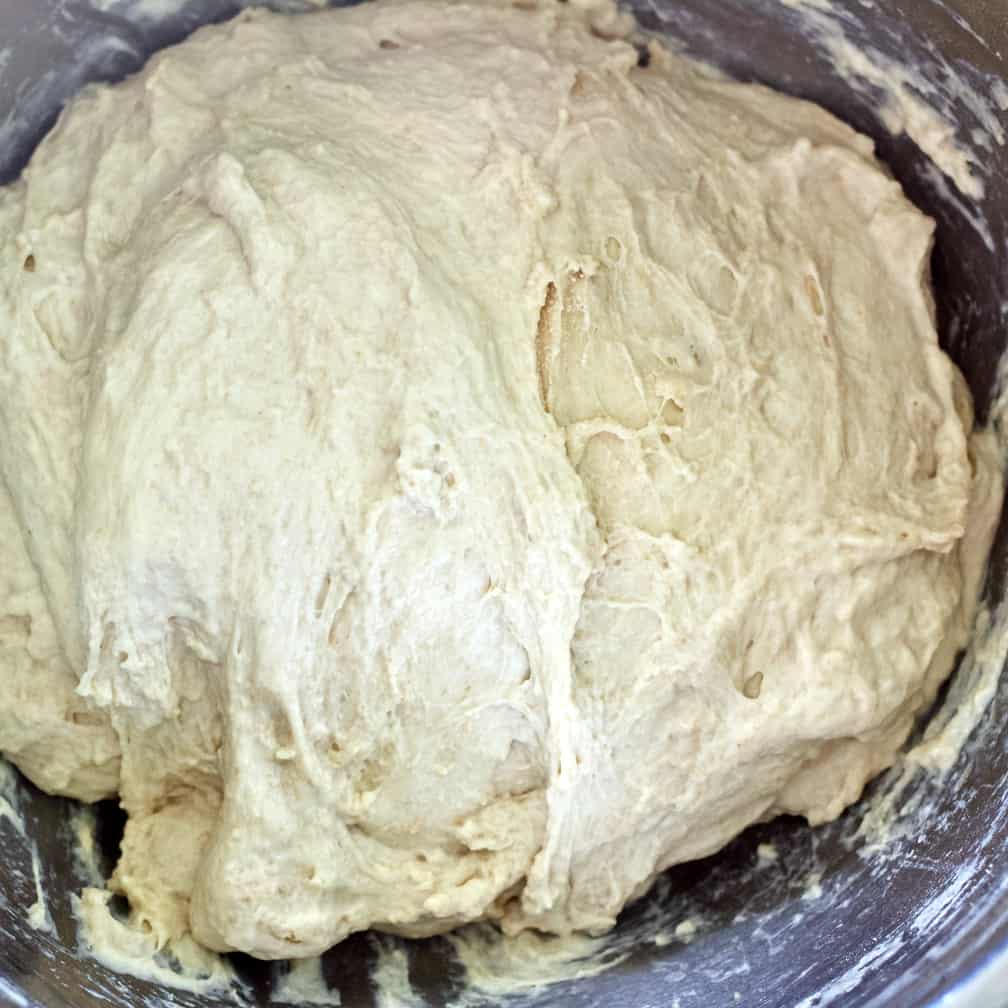
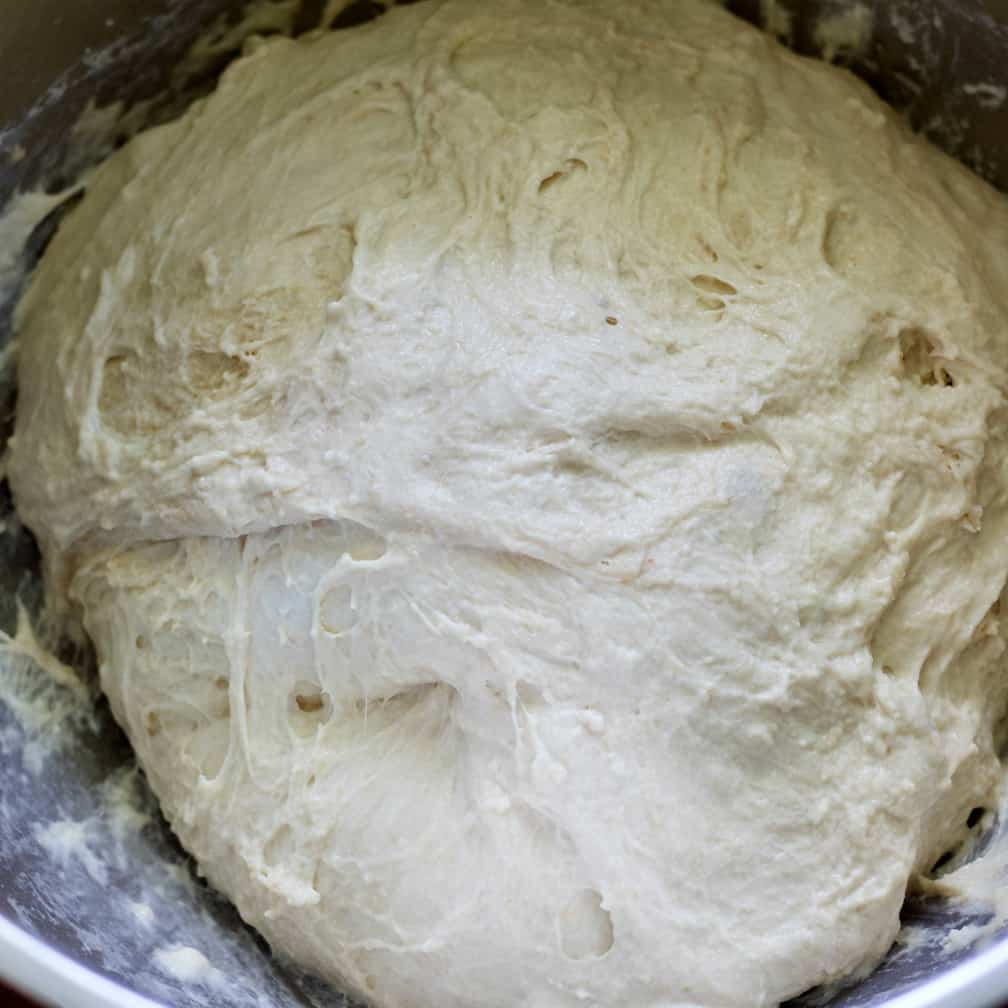
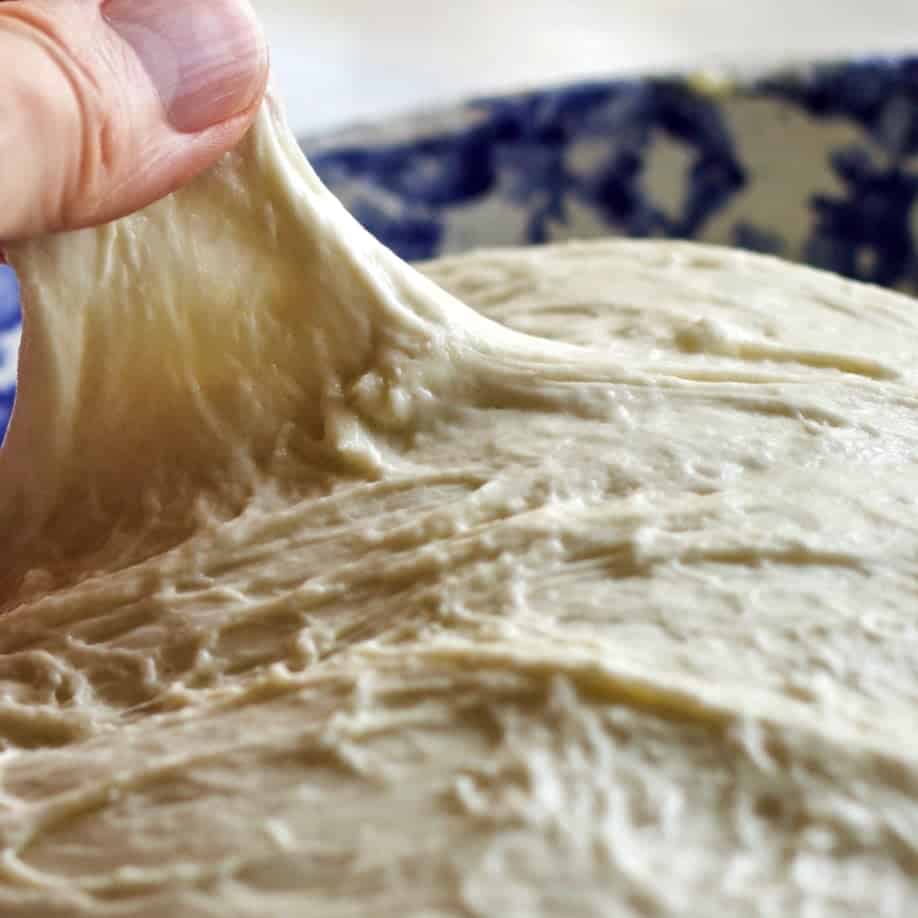
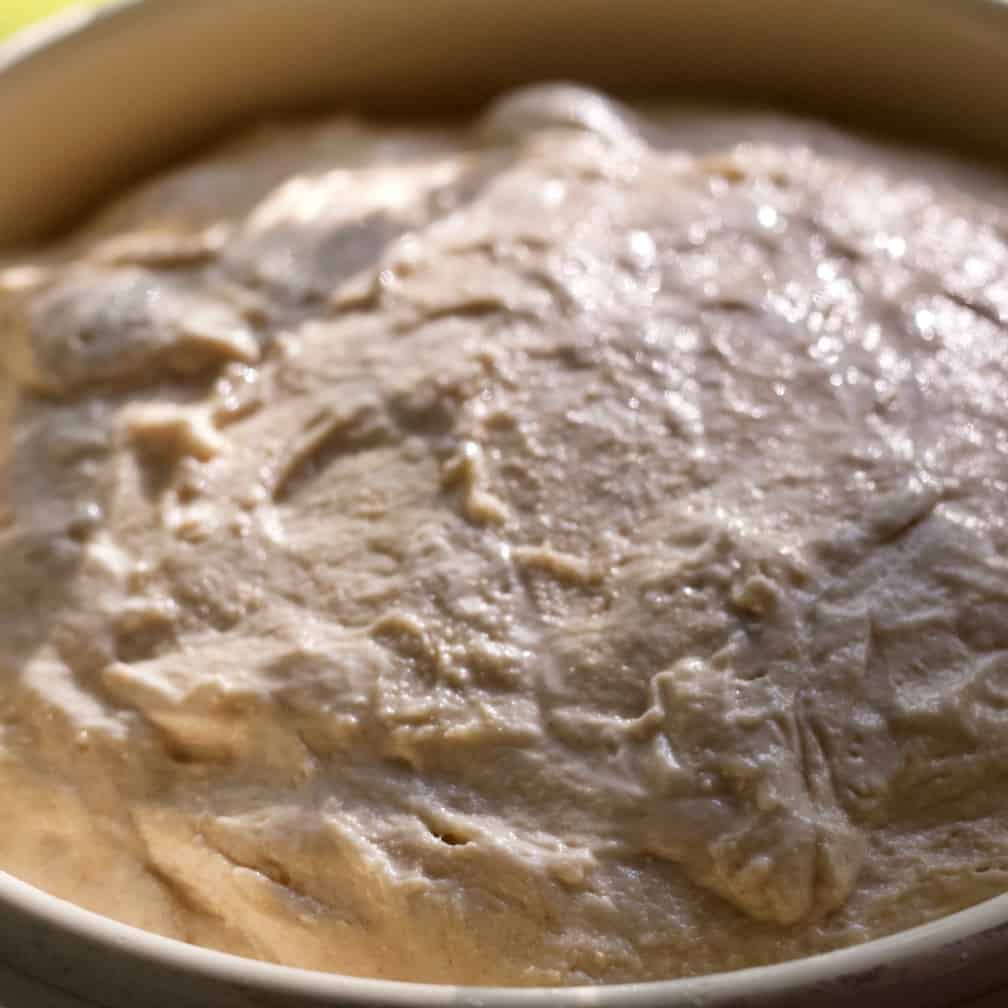
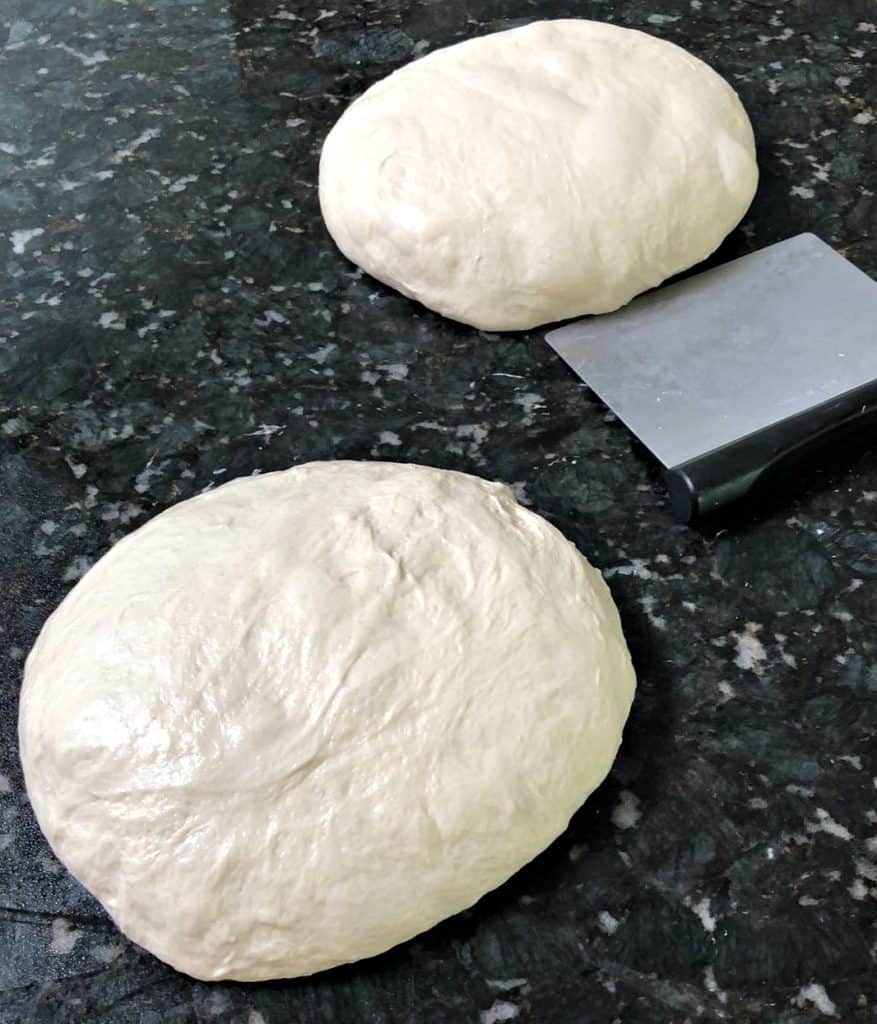
Here is a quick visual walkthrough of this recipe. The complete recipe is in our Printable Recipe Card. But here are the main points.
Sometimes a picture really helps. AND don’t miss our video tutorial (playing in the sidebar) if you need further examples of the techniques.
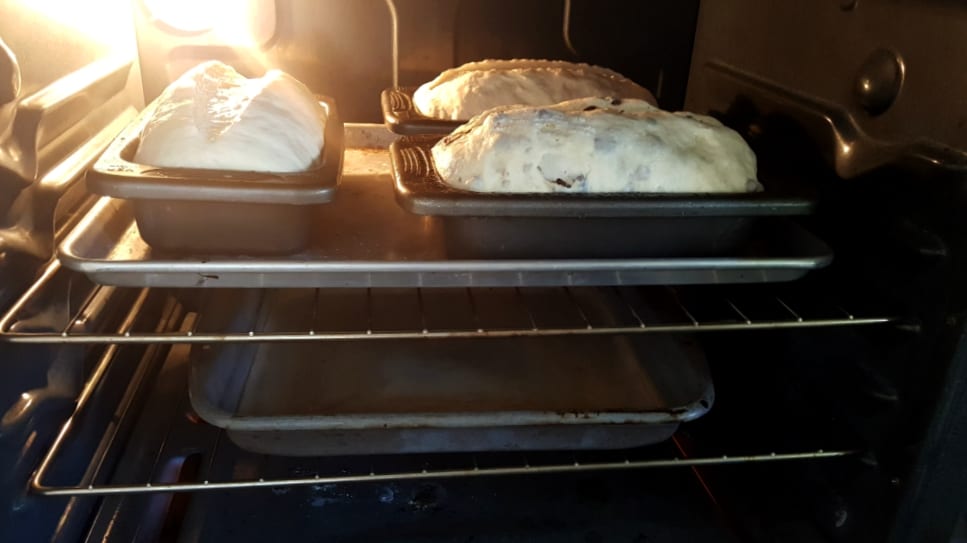
Cinnamon Swirl Bread Variation and Soft Cinnamon Sourdough Rolls:
Look at the bread baking in the oven (pictured above). The one closest to the front sideways is This soft sourdough bread made as Cinnamon Raisin Bread.
You will find This Complete recipe post for Sourdough Cinnamon Raisin bread has LOTS of tips. A complete walkthrough and guide for incorporating the plumped raisins, layering the cinnamon filling and forming the loaves.
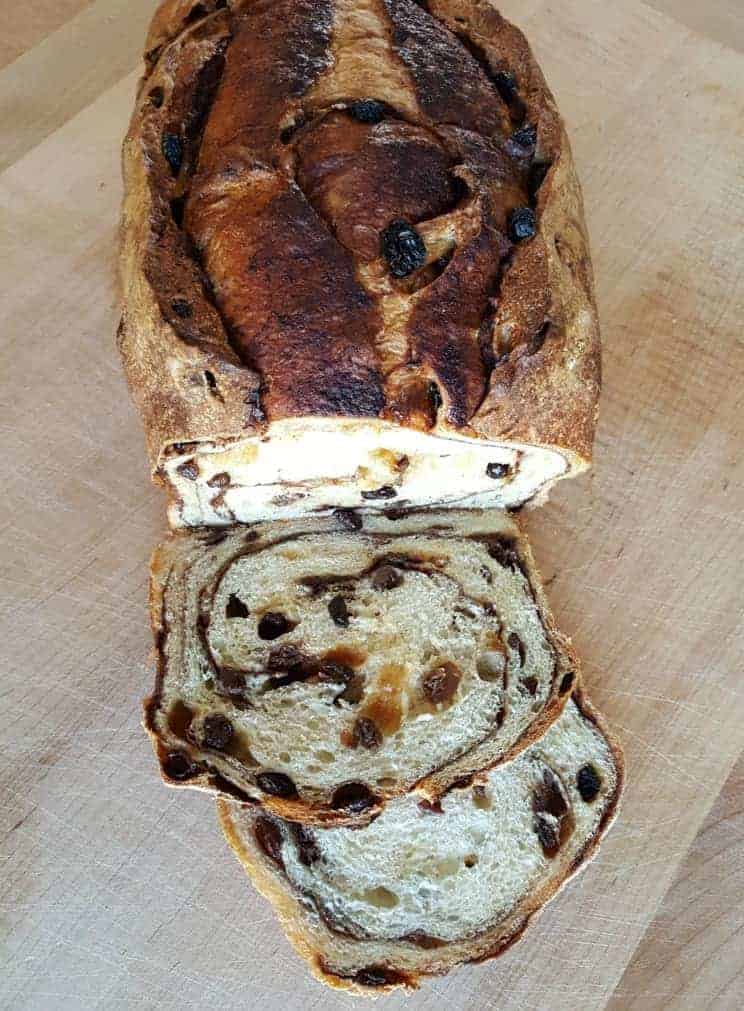
Soft sourdough made as cinnamon raisin swirl bread is pretty darn amazing breakfast food. Give it a try.
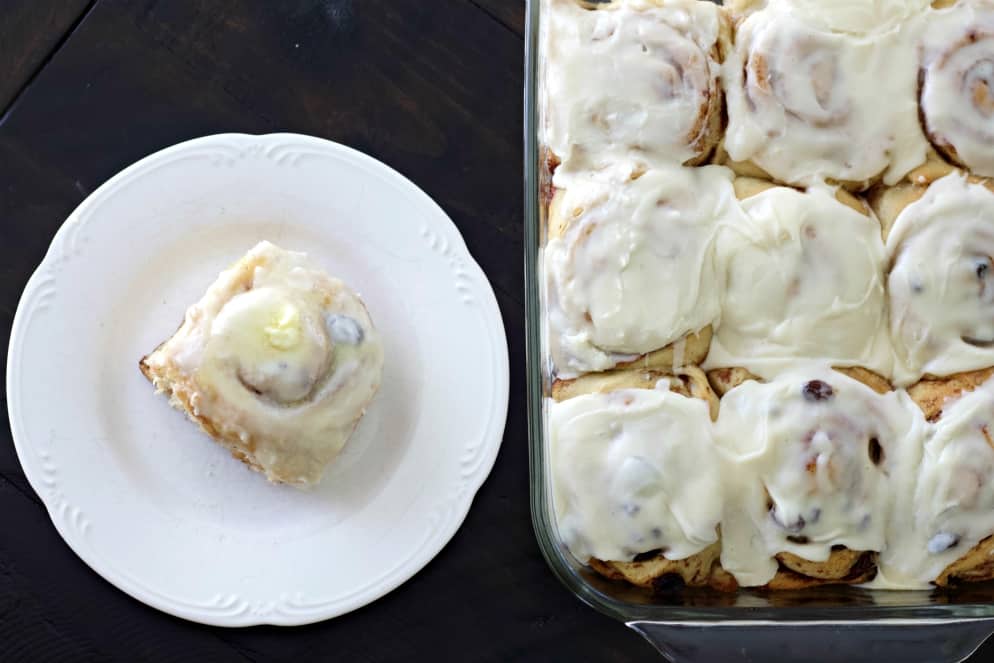
Also make these Soft Sourdough Cinnamon Rolls from this bread dough recipe. They are absolutely scrumptious!
How to Shape A loaf of Bread:
You can bake this recipe in boules. However it is much easier to eat as sandwiches and toast when baked in pans.
Here’s how to shape the dough for baking in bread pans. I use two 9 x 5 inch bread loaf pans for this recipe.
Prepare the dough for Shaping:
- Remove Dough From Fridge and allow to come to room temperature. This will take about 2 hours.
- Divide and shape the dough into two 1000 gram balls of dough.
- Bench Rest the balls loosely covered about 60 minutes until very elastic.
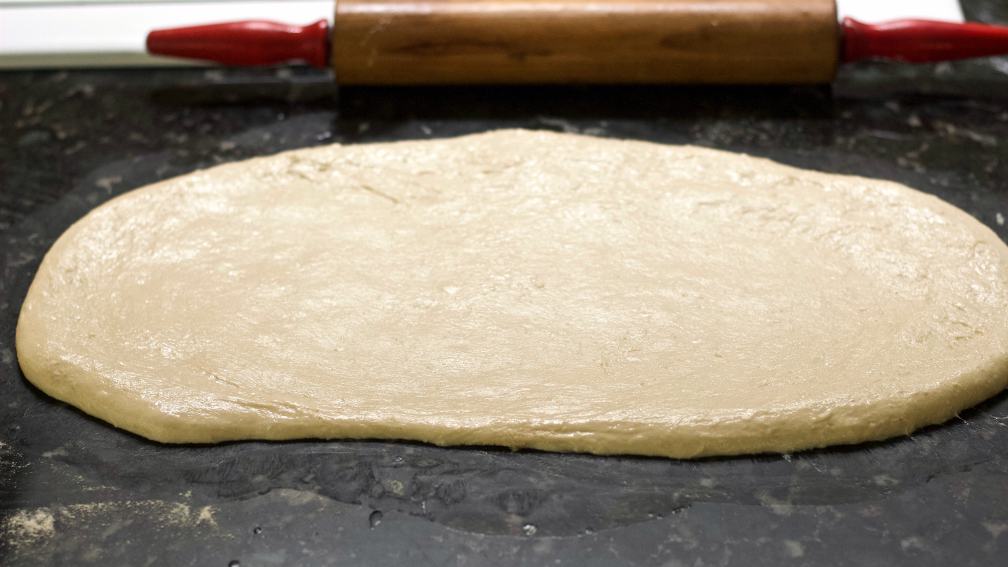
Shaping:
- Choose one dough ball. Set the other aside to be next.
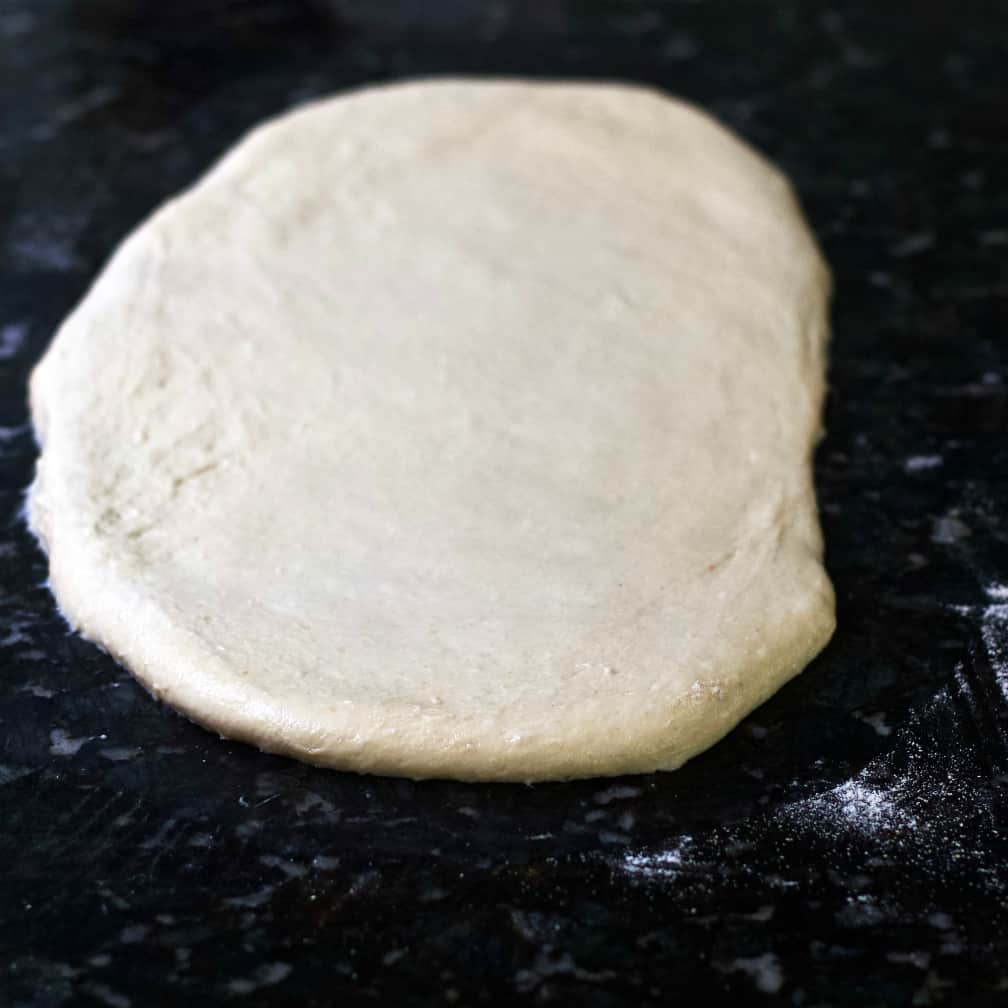
- Flatten the ball on a floured board with your rolling pin to degass. This may take several passes. (You will notice my bread does still have a few small holes. It needed more degassing)
- Shape the degassed dough into a rectangle and spritz with water.
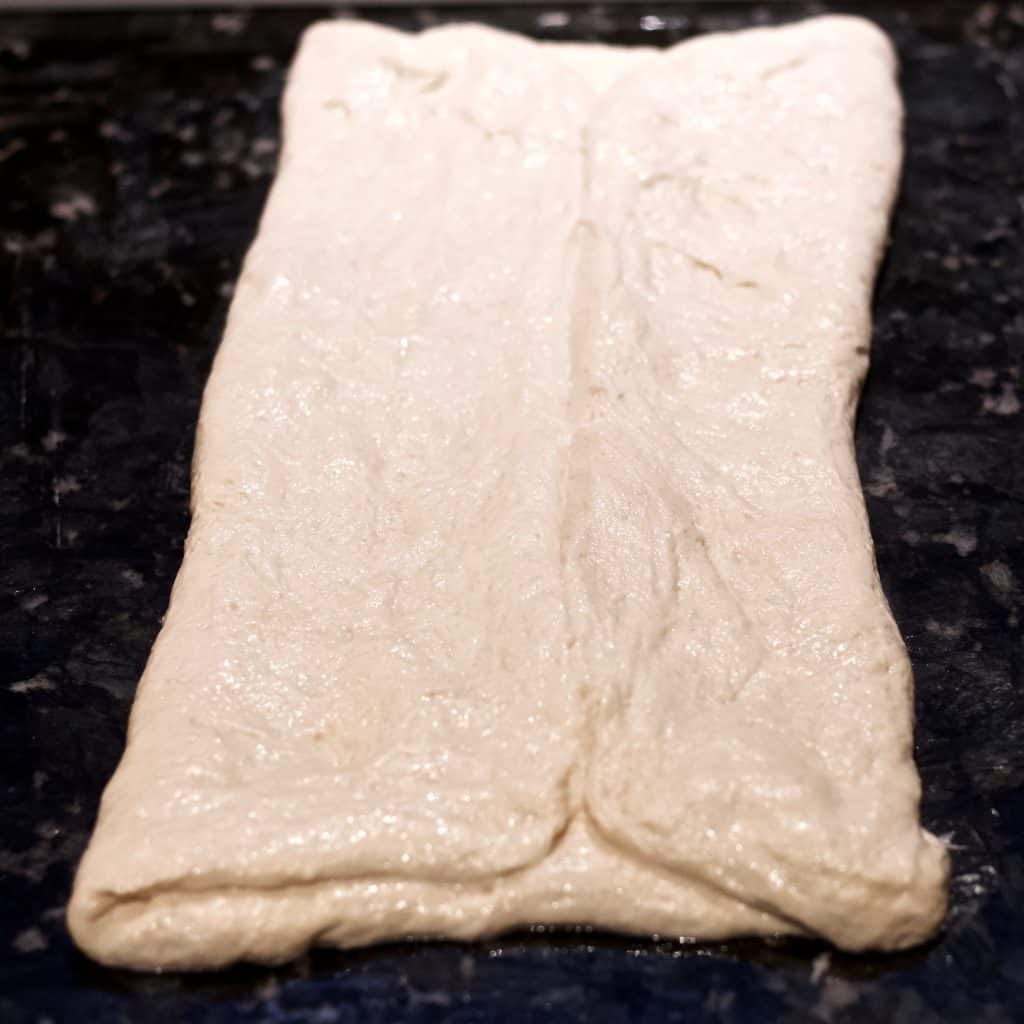
- Bring the long edges into the center and form a closed seam.
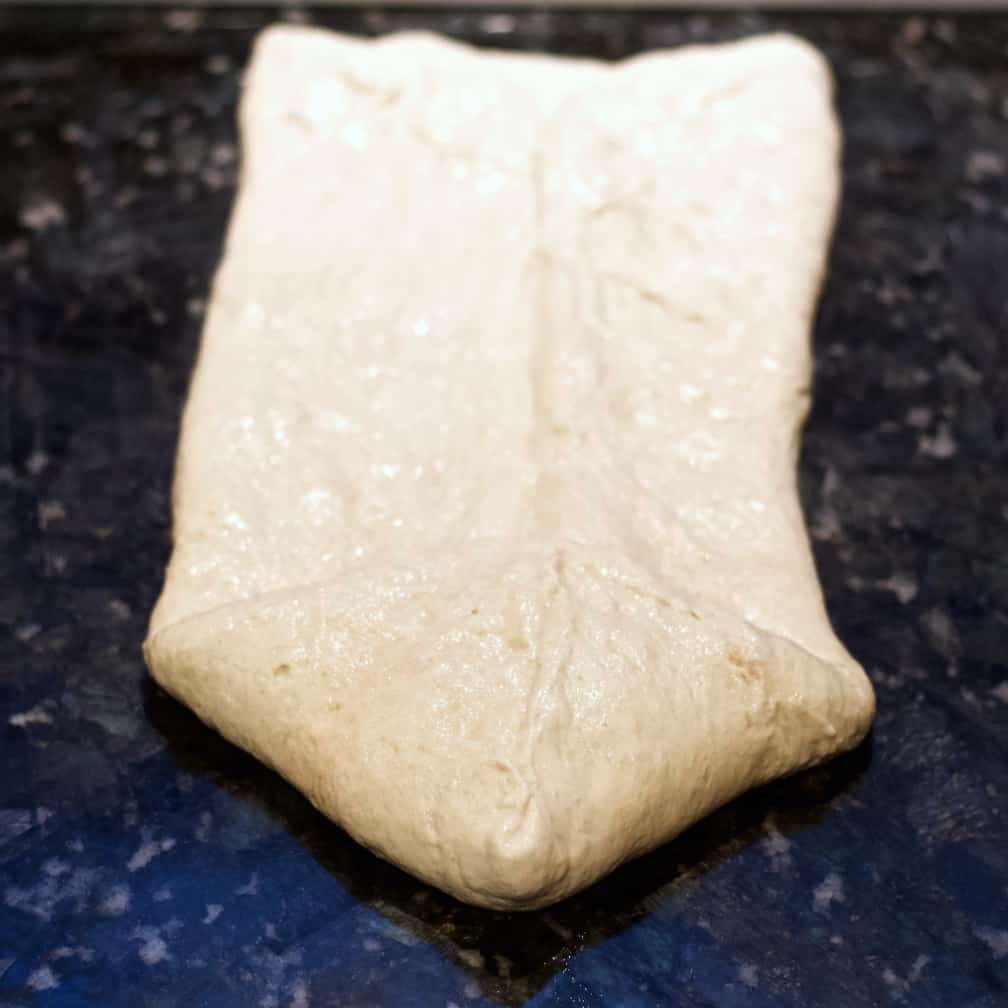
- Fold the two front corners to the middle seam as shown below.
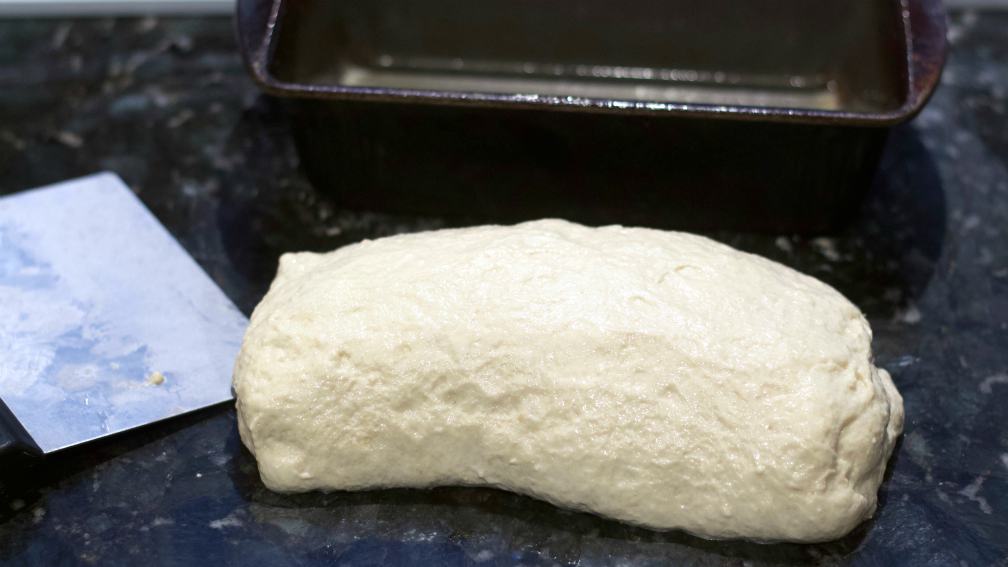
- Roll the dough tightly. tucking it as you roll to avoid air pockets.
- Pinch the ends of the loaf and flatten the seam.
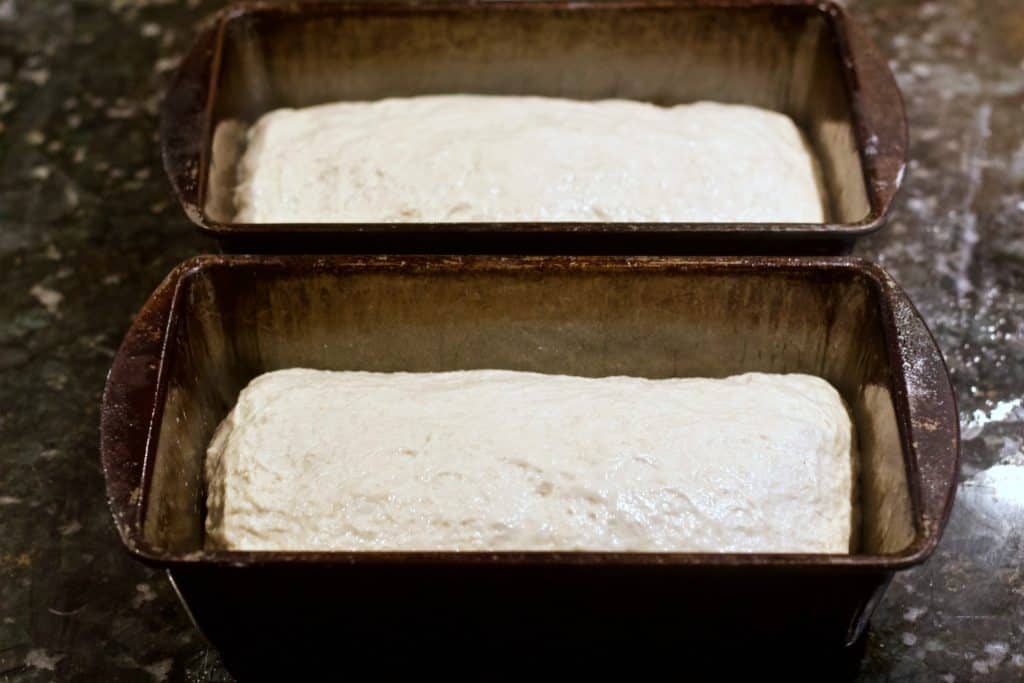
- Place the dough loaf into your OILED loaf pan.
- REPEAT with second dough ball. Continue with the recipe.
For more tips on shaping your bread read our sourdough shaping guide.
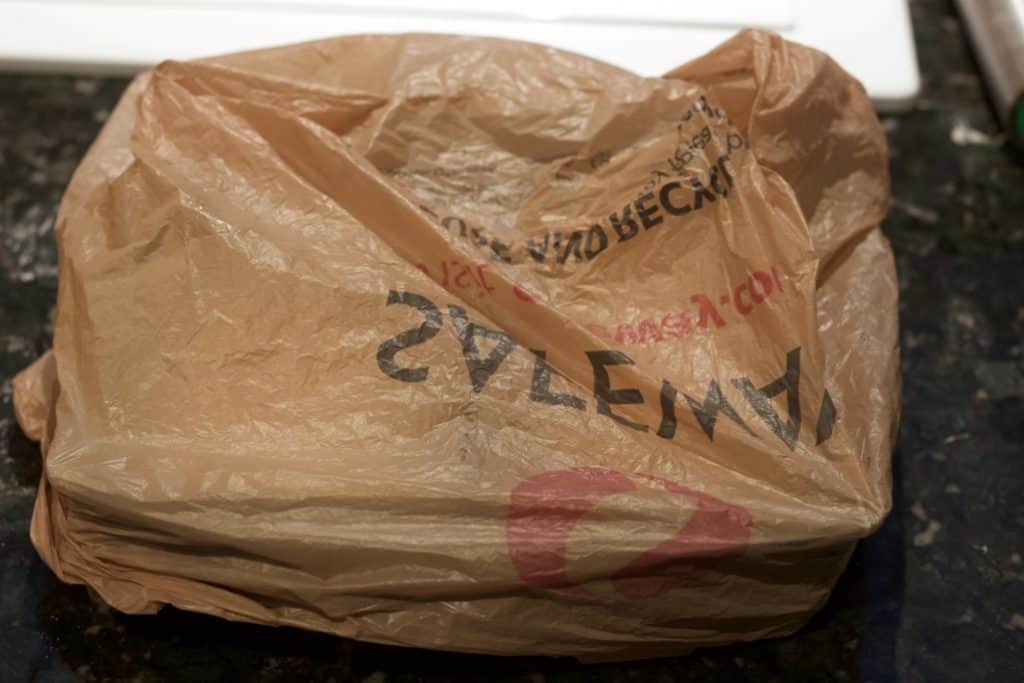
The final rise is done in the plastic bags as shown. Allow the dough to rise to the pan top or slightly above.
Now when the oven is thoroughly preheated, remove one loaf from the fridge, score it deeply and bake as directed with a water bath.
Your Printable Recipe Card:
Read the complete recipe and instructions below. If you print this recipe the pictures will not print. This is to save you ink and paper.
NEW! We now have a complete video recipe demonstration of this bread in the sidebar and the bottom of the printable recipe card.

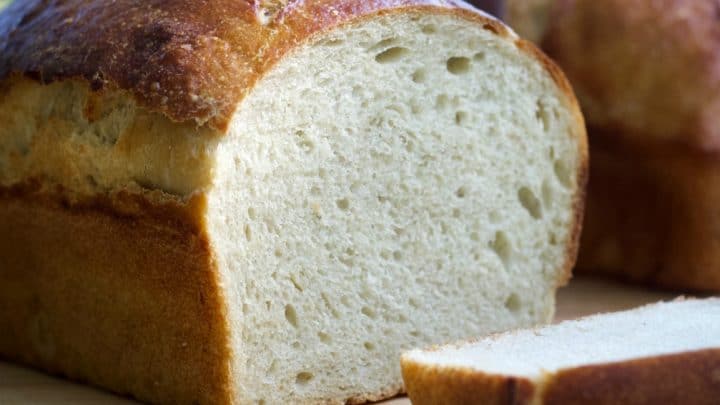
Soft Sourdough Sandwich Bread Recipe
Soft Sourdough Sandwich bread is the perfect soft squishy bread for toast and peanut butter sandwiches. You can also grill this bread for amazing grilled cheese sandwiches. The flavor is outstanding.
Ingredients
- 300 grams starter-freshly fed and active
- 650 grams warm water
- 50 grams honey
- 40 grams avocado oil
- 1000 grams White bread flour (high protein)
- 20 grams Salt
Instructions
MIXING:
- Begin with a very active recently fed starter. It should pass the float test.
- Set a large bowl on a digital food scale set to grams and press the tare button. The scale should read zero.
- Pour in the water to weight of 650 g. Press tare.
- Pour in 300 grams of starter. Press tare. The starter should form a floating mass on the water.
- Add the oil. Press tare
- Add the honey. Press tare.
- Whisk together the starter, oil, honey and water until they are mixed.
- Add the 1000 grams of flour.
- Mix the flour into the water/starter with a dough hook, spatula and your wet hands until you have a shaggy ball of dough.
AUTOLYSE: Technically our process is a fermentalyse, since we add the starter in with the flour and water initially.
- Rest dough 1 hour.
- Sprinkle salt across dough.
- spritz with water bottle and work in the salt with wet hands.
- Rest 30 mins
STRETCH AND FOLDS:
- Begin Stretch and Folds. You need 4 rounds of stretch and folds 30 mins apart. See video for technique.
LONG COLD RISE:
- Refrigerate overnight or up to 24 hours.
BENCH REST DOUGH:
- Remove from fridge and warm to room temperature. (ABOUT TWO HOURS)
- Divide the dough into two 1000 grams dough balls by weight.
- Bench rest 30 to 45 minutes until dough is elastic.
SHAPE AND FINAL RISE:
- Choose one dough ball. Set the other aside to be next.
- Flatten the ball on a floured board with your rolling pin to degass. This may take several passes. (You will notice my bread does still have a few small holes. It needed more degassing)
- Shape the degassed dough into a rectangle and spritz with water.
- Bring the long edges into the center and form a closed seam.
- Fold the two front corners to the middle seam as shown below.
- Roll the dough tightly. tucking it as you roll to avoid air pockets.
- Pinch the ends of the loaf and flatten the seam.
- Place the dough loaf into your OILED loaf pan.
REPEAT for second loaf.
- Let sit on counter 2 to 4 hours until the dough reaches to the top of the bread pans. For best oven spring chill two hours in the fridge covered.
BAKING PREP AND INSTRUCTIONS:
- Preheat oven and water bath(any pan half full of water. Set it on the shelf UNDER THE BREAD) to 400° F.
- Remove the loaves from the fridge and score them deeply. (I do three slashes diagonally accross the top).
- OPTIONAL: For a shiny loaf of baked bread, brush the dough with a beaten egg.
- Set the loaf pans in the middle of oven.
- Bake the loaves 15 minutes.
- Reduce the oven temp to 375 degrees F.
- Bake an additional 25 to 30 minutes.
- Using a digital thermometer check internal Temp of loaf. It is done at 200°. If you don't have a thermometer pop loaves out to test for hollow on bottom. Or thump the loaf. Does is have a hollow sound?
- Remove from oven and cool on racks to room temperature before cutting the bread.
Notes
- Measure the ingredients CAREFULLY for best results.
- THE SALT: I use Himalayan salt. All salt works. However, they have different volumes by weight. So you need to be careful. Weighing helps get it right.
- THE OIL: Avocado oil is recommended for best health. Use any neutral flavor oil you prefer.
- THE FLOUR: Use any high protein (On the label 12 % protein or 5 grams protein) organic white bread flour. You can make this loaf with 50/50 white and WHITE whole wheat.
- The loaf will stay soft and have a great nutty flavor. Using 100 percent whole wheat or Hard red whole wheat will give you a different result. The recipe may need some adjusting. I suggest you stick with 100 percent white or 50/50.
- 2 2/3 Cups -300 grams starter-freshly fed and active
- 2 3/4 Cups 650 grams warm water
- 2 3/8 Tablespoons -50 grams honey
- 3 Tablespoons- 40 grams avocado oil
- 8 Cups- 1000 grams White bread flour (high protein)
- 1 Tablespoon-20 grams Salt
Conversion CUPS to GRAMS:
I do NOT recommend volume measurements for best results with sourdough baking. There are differences in the starter and flours that make weighing by Scale a MUCH more reliable method. But if your not using a scale here are the approximate volume measurements of the ingredients.
Final NOTE:
The video in this post is for those unfamiliar with the techniques I use. It is actually demonstrating our Beginner Sourdough Artisan Bread Recipe. This soft sourdough sandwich bread process uses many of the same techniques.
Recommended Products
As an Amazon Associate and member of other affiliate programs, I earn from qualifying purchases.
-
 Fletchers' Mill Rolling Pin, Maple - 18 inch, Dough Roller, Perfect for Skilled Bakers, Home Chef's, Great for Bread, Pasta, Cookie Dough, Fondant, Pastry, Cookies, Pie, Pizza, MADE IN U.S.A.
 -
 Pyrex Glass Mixing Bowl Set (3-Piece)
 -
 USA Pan Bakeware Aluminized Steel Loaf Pan 1140LF 8.5 x 4.5 x 3 Inch, Small, Silver
Nutrition Information
Yield
24Serving Size
1 sliceAmount Per Serving Calories 171Total Fat 2gSaturated Fat 0gTrans Fat 0gUnsaturated Fat 2gCholesterol 0mgSodium 325mgCarbohydrates 32gFiber 1gSugar 2gProtein 5g
Sourdough Troubleshooting:
If your bread doesn’t turn out the way you expect, start with our comprehensive Sourdough Troubleshooting Guide
Or jump to the specific issue you’re seeing: Find all of our Sourdough Baking guides here.
- Bread turns out dense – Why Is My Sourdough Bread Dense?
- Dough spreads instead of rising – How to Shape Sourdough Bread
- Score won’t open – How to Score Sourdough Bread
- Crust is soft or pale – How Steam Baking Sourdough Affects Oven Spring and Crust
Follow Us:
We enjoy meeting you on our social networks. Follow us on Facebook, Pinterest, Instagram . Tag us with your pictures of our recipes and comment on how it went for you. We would love to see what you do with them.
We often like, comment and share your posts of our recipes on our daily Instagram stories.
Ask questions and rate the recipe in the comments section below. Please share what you did with this recipe. We are always looking for more and better ways to make homemade food. Other cooks love your ideas!
Recent Posts:
Contact Sasha over on Etsy if you want to buy sourdough starter. She has a well established starter just for you. She sells all over the US.
HI,
This is my go to recipe for sourdough bread. I use olive oil instead of avocado oil and 100% white whole wheat flour except for the starter, which is white flour, and it always turns out great. I have tried molasses instead of honey which works too. A great recipe!
Thank you.
Hi Barb, Oh yum. I’ll have to give molasses a try in this recipe. thanks for sharing how you use this recipe. Happy Holidays!
Can I mix and knead it in my stand mixer
Hi Cindy, if you want to forego the stretch and folds, you can mix this dough in your stand mixer. It will be very different from your yeasted bread dough so fair warning there.
And if you want to imitate sort of a stretch and fold method, try mixing it, let it sit (autolyse), then hit the mixer switch(low speed) for just a few seconds to see if it will stretch in your mixer. Not sure which mixer you have. My Bosch will do it. All you want it a short stretching of the dough evenly. Wait 30 minutes. Then repeat as instructions say. I’ve never done this but it should work. Please let us know how it goes for you. Thanks!
The video is no longer playing in the sidebar. Looked all over– couldn’t find it.
What to do if after the 4 stretches, the lump is quite wet and was very hard to roll and shape. So sticky. (I think it’s cuz I went too far beyond the time on one of those stretch times- I forgot during church). Should I have added flour while rolling it out? I did add some but it was tricky! Finally got it rolled up and in a pan but practically goo still and not what yours looked like.
Hi Karen, the video is still on the post. but you may have an ad blocker on your browser since there is an ad before the video plays and your browser may not allow that. Here is a link to our YouTube video for you. Hopefully that works for you.
The video is very helpful, but if you can’t get it to play I’ll try to hazard some guesses for you.
-The Method: to do this method properly, after the stretch and folds, do a bulk rise on the counter. then set it in your fridge for the long cold rise. AFTER the long cold rise the dough should be well developed and ready to handle much more easily. This method is very simple but does require some time. If you try to go from stretch and folds straight to forming it will be difficult for sure. But you could do that. Some bakers have and it worked for them.
-hydration: This dough is not a high hydration dough. It’s more a middle of the road hydration and so it should be easier to handle than you describe. When a a dough is extremely wet, it is difficult to work with. We use wet hands and tools to make this dough easy to handle since it will stick if your hands and tools are dry. HOWEVER,if you add more water to the dough either at the beginning by measuring incorrectly, or during the process by using a LOT of water on hands and tools this dough, like all doughs is going to get stickier and more difficult to work with.
-It is also possible your flour is not developing during the stretch and folds. This may happen if you’re using a low protein flour or it’s stale. A good high protein all purpose flour (5 grams of protein) should work well in this recipe.
Finally, adding flour to this dough is not necessary and it is really tricky. When you get the dough past the long cold rise and are ready to bench rest and form the loaves a bit of flour is fine, especially on wooden work surfaces. I never need flour on granite and use the stick to pull the loaves around to tighten them when forming.
For sure the videos will help and walk you through every step of the way. I hope you keep trying. This bread is worth learning. Happy holidays!
Can I use my stand mixer to knead for the stretch and folds if so how long?
Hi Cindy, For a good sourdough bread that uses a stand mixer, try this simple sourdough Jalapeño bread. Or our Garlic rosemary bread. Both use a stand mixer and make a great bread.
The recipes that use the stretch and folds are a lighter airer bread with a completely different approach. Using a stand mixed on these is just way more work than you need to do considering the length of time this takes. And a stand mixer will not allow the dough to develop and rise. So you’re defeating the purpose of this method. I hope this helps! Happy Holidays
Great recipe, but I would advise anyone without stone countertops or similar prep surface to use a scant amount of flour. I use a large Boos board for bread baking prep and with this dough being so sticky it was a nightmare until I used the least bit of flour. I did a plain loaf and cinnamon loaf (no raisins) which turned out well, still waiting for them to cool. Can’t wait to taste. I’m also switching to ceramic loaf bags, I have one and bread is always a success in that pan. Just ordered another.
Hi Jan, We’re glad you enjoyed the recipe and Thanks so much for the tips! Happy Holidays!
Do u by any chance have a non sourdough recipe similar to this?
This is my fav recipe it’s sooo good but my husband wants one without sourdough
I do have a very quick white bread recipe you can try. The recipe is here. Also he may enjoy our homemade French bread. it’s more artisan but still makes dynamite sandwiches. If you poke around in the blog there is also a homemade whole wheat bread he may like. but my guess is he’s a soft white bread fan. Thats the first link. Hope he enjoys it!
Does anyone know how long it’s safe to do the long cold ferment on this I did 36 hours last time, but I’m Not gonna be home by the end of 36 hours
I’m wondering about over proofing it
Hi Cindy, If you plan to be gone over 36 hours eliminate the bulk rise and go straight from the stretch and folds to the LCR. It’s ok if you don[‘t have a good window pane test since you have plenty of time to develop the dough slowly. happy Baking!
@Diane, Thank you
Thank you for this recipe! It’s overall worked well, but it grows so very quickly after put in the pans and again in the refrigerator before baking so that it it way above the rim of the pan and makes huge puffy loaves of bread. Could this be due to over proofing (even though I’m not leaving it very long) or perhaps not degassing well enough? I’m considering putting it into 3 pans next time- even though my pans measure the correct size. Any advise would be great! I am new to sourdough and love your recipes.
Hi MLH, I’m happy to hear the recipe is working well for you. If you want smaller loaves, it’s ok to split the dough evenly into thirds and bake it in three pans. I have done this and the recipe still works well when following the baking instructions. Just watch the time and check the loaves five minutes or so early with a thermometer to make sure you don’t over bake them.
Happy Baking!
My family absolutely loves this sandwich bread and I’ve made it many times – it’s so flexible and the results are predictably delicious!!! Lately I’ve been using a 70/30 blend of bread flour and einkorn flour, still getting a nice high rise with that blend and 2 hours of chilling in the fridge prior to baking and the flavor is incredible.
I’d like to try using this dough for hot dog/hamburger buns… have tried some other recipes and none were quite right. Would you still recommend starting at 400 then reducing to 375 if I shape this dough as buns? What about total bake time? (For reference, I’d plan to use about 100g of dough for each bun if that helps).
Thank you for all of your amazing sourdough recipes. The peanut butter chocolate chip oatmeal cookies are one of my go-to recipes for using up my discard – I portion and freeze the unbaked dough so we can thaw/bake off just a few cookies at a time and always have fresh cookies around whenever the mood strikes. 🙂
HI Lauren,It’s wonderful to hear this recipe is an old friend in your kitchen. We love to know our recipes are working well for our bakers. This sourdough bread recipe is one of our personal favorites.
To make this dough into hot dog or hamburger buns you will need to adjust the baking method somewhat.
-Preheat your oven to 375°F (190°C).
-Score the tops of the buns with a sharp knife or razor blade just before baking. Scoring helps with oven spring and looks nice.
-Place the baking sheet with the buns in the preheated oven and bake at 375°F (190°C) for approximately 15-20 minutes, or until they turn golden brown on top. Keep a close eye on them. Baking times can vary with different ovens and the size of the buns. They are done when they sound hollow when tapped on the bottom or when their internal temperature reaches around 190°F (87°C). Please let us know if this method works out for you and what adjustments you make. We really appreciate your feedback and input. Happy Baking!
For the second rise ! You can either leave out for 2/4 hours or for best oven spring cover and refrigerate. Do you mean to do both or just one method ?
Hi Gina, I mean if you’re wanting the best rise, leave out on counter until the dough is level with the bread pan. Then chill it covered in the fridge for best rise. Happy baking!
Can I add salt while mixing the shaggy dough instead of waiting and adding the extra 30 minutes after adding salt before stretch and folds
Hi Gina, Thanks for the question. Adding the salt into the shaggy dough is not best practice since the dough is supposed to rest in the autolyse stage before proceeding to dough development. That said. It will probly still work out fine in the end. just be sure your dough is well rested and hydrated before proceeding to the stretch and folds. Happy Baking!
@Gina, I am new here but have made this recipe several times now (have made artisan sourdough boules for a few mos too) and I always add my salt at the beginning. When its water, starter, oil and honey. I then add my 20gm salt to that then I add in all the flour and mix til shaggy. Let it sit 30-60 min then do the stretch n folds and fridge over night etc. My bread turns out perfect every time. I diligently looked into ‘when to add salt’ from all the experts and everyone has a different opinion but ultimately, no one could tell a difference when adding it in earlier than waiting 30 min for autolyse. Maybe try it and see. Its a more simple process to add it along with everything else 🙂
New to all of this, and after watching the videos on how to make it along with the sourdough starter feeding process, can you tell me, how, to make the FIRST starter? What am I missing?
Hi Jackie, If you want to make sourdough you need to make your first starter. Here is a post on that complete process. Sourdough baking is a wonderful endeavor. You do need a good starter though. If you dont want to make your own ETSY has Many many starters you can buy from shops. We have several post on starter, so please read them all. And welcome to the world of sourdough baking.
After hours of research I discovered your recipe – actually, out of necessity. I’m in the middle of full mouth dental implant procedures and am on a mush/liquid diet for the next 3-4 months. I was going crazy, longing for my sourdough bread, which had always been the artisanal kind. So I began researching, looking for a recipe that would produce a bread soft enough that I could suck on and not hurt my delicate gums. Voila! I chose yours because it calls for 300 g of starter.
I mean, how cool is that, no fake sourdough here! It produces the most awesome textured and tasty bread. THANK YOU so very much, it’s such a comfort to have my bread back! xoxo
This bread is hands down my favourite soft sourdough recipe ever and the only one I will ever use going forward – and it’s so much fun to make! I love the way it develops and changes with each S&F. The dough is such a joy to work with. I’ve made some variations that have been a huge success and I’d love to share them with you.
I use homemade browned grass-fed ghee in place of the avocado oil.
250 g coconut milk beverage as part of the water. Organic maple syrup in place of the honey. 150 g organic sprouted buckwheat flour and 150 g fresh ground organic einkorn, with 700 g organic AP bread flour. I also cold ferment for 36-48 hours.
It seems to take longer to cook in the middle than the outside, so I usually lower the temp. to 350 the last twenty minutes or so and cover the loaves with parchment so they don’t get too dark. When they come out I brush on more ghee and wrap them in a damp tea towel and voila – soft crust, too!
Thank you again, I’m so grateful. This implant journey is not fun, so having this one comfort food I can turn to is such a blessing… 🙂
Hi Kalyn, I’m so sorry your implant journey is not so good. It sounds pretty awful. And I’m REALLY happy and grateful to hear our soft sourdough bread is a comfort to you when your miserable. I hope your implants are soon finished and you get all your favorite food again.yummy cinnamon bread too. If you look through our recipes you may find a few more that you can enjoy now and in the future. We wish you all the best and hope your out of pain soon!
I also want to thank you so much for sharing how you use this recipe, your substitutions and how you played with the method to get it just how you like it. Its so fun to share new ideas with sourdough. If you want to change this recipe up it does make tasty cinnamon rolls and
@Diane, thanks so much for your kind words and encouragement. I look forward to exploring and sharing your culinary journey with you when I’m able to eat properly again. Until then, wishing you and yours healthy, happy food adventures. Have a wonderful spring and summer!
My family absolutely loves this bread! The two loaves are a little large for us so I divided the batch into three and am using smaller pans. How should I adjust the baking time?
Hi Jann, I think the baking time should be reduced by about 10 minutes. However, your oven be different from mine. So be sure to check the internal temp with a digital thermometer before finishing the bake. That will tell you how long your loaves need to bake properly at that size. Each loaf should read over 200 degrees F. when it is done. We are thrilled to hear you love this bread. Happy Baking!
I make this bread every week. My family loves it. Thank you for sharing.
Hi Dana, We are delighted you love this bread. Its a favorite for sure. Thanks so much for letting us know. Happy Baking!
I made for the first time…cut recipe in half because I didn’t have 300g of starter on hand…but it was made yesterday afternoon and put in fridge after stretch and folds…got out at 9:30 this am…at 11:30 tried to shape to put in loaf pan but it is too wet…I didn’t add any flour but wasn’t able to flatten with rolling pin as it is a gooey mess…so flattened with my hands but had to almost “pour” it into the pan…? Hoping it will turn out ok but what did I do wrong?
Hi Lynne, I’m not sure you did anything wrong. This dough is a bit wet and sticky. But your starter and flour hydration do matter. Local humidity does make flour more moist and heavy. Also, I tell you to use wet hands when making these no knead sourdough loaves. But wetting your hands will add hydration to the dough as well. If you prepped the starter as directed and it is a strong healthy active starter and the flour is strong flour with 5 grams of protein or more, I’d say the loaf will bake ok. It may have some holes in it though. Seeing how wet the dough is please don’t spritz the loaves before baking. They should do better without adding more water. I hope this helps. Please let me know how the bake turns out.
Hi!
I am really enjoying this recipe. I’ve made it a few times now, each time trying to refine my skills. I’m about to bake a couple more loaves tonight but have 2 questions:
1)After the final rise, would it be ok to refrigerate overnight and then bake in the morning?
2)a thin layer at the bottom of the loaf, after baked, has been consistently doughy…how can I fix this?
For the first question, sometimes I start the process too late and find myself starting the bake late at night.
For the second question, I plan to pull out the water bath after 15 minutes tonight and see if that helps…
Thank you for your wonderful recipe and all the help you’ve provided all of us who ask questions!
Hi Katrina, Thanks for the questions! We are happy to hear your enjoying this bread.
Here’s the answers.
This dough works just fine as an overnight bread. Thats how I most often bake it. After the bulk rise cover the bowl and set it in the fridge to up to 24 hours (even longer if you have a schedule issue). Then allow the dough to warm an hour and complete the recipe.
For the doughiness, I suspect you may be too liberal with the misting before baking or you have a really tight oven. OR you have a slow oven that is not completely baking the bread. Be sure to check the interior of the loaves and be sure they reach about 206 degrees F.
If water is the trouble, try baking them with a small spritz or even eliminating the misting. Baking the loaves with a water bath may be all you need. Every oven is different. My daughter just moved and it took her awhile to learn the oven since it was very different from her old one. It’s all just tweaking until you get the bread you are striving for. Happy Baking!
This is my go to recipe for bread. I use 100% white whole wheat flour and it works beautifully. Crisp crust, soft insides and slices nice and thin for toast or sandwiches. Have substituted molasses for the honey which gives it a stronger flavor.
Hi Barbara, We’re happy your enjoying this recipe. And thanks for the great idea! I’ll have to try the molasses. Sounds yummy!
I may have missed it but please advise if the water pan is removed at some time or left in the oven for the full baking time. Thanks!
Hi Jaybee, I leave it in for the full bake. I don’t like handling the pan of hot water. So I let it cool when the bake is done and then remove it. You can remove the water bath after you remove the lid from the loaves if you like.
After putting dough into bread pans you mention “for best results place in refridgerator for 2 hours” Is this before the sourdoug rises or afer it peaks?
Hi Lori, Yes. After the dough has risen to the top of the bread pans (or very close) you can set it in the fridge to chill before baking. This is optional but will improve the oven spring. Hope this helps!