
Milk And Honey Sourdough Sandwich Bread
As an Amazon Associate and member of other affiliate programs we earn a small commission from qualifying purchases through our affiliate link. For more information read our Entire Affiliate Disclosure.
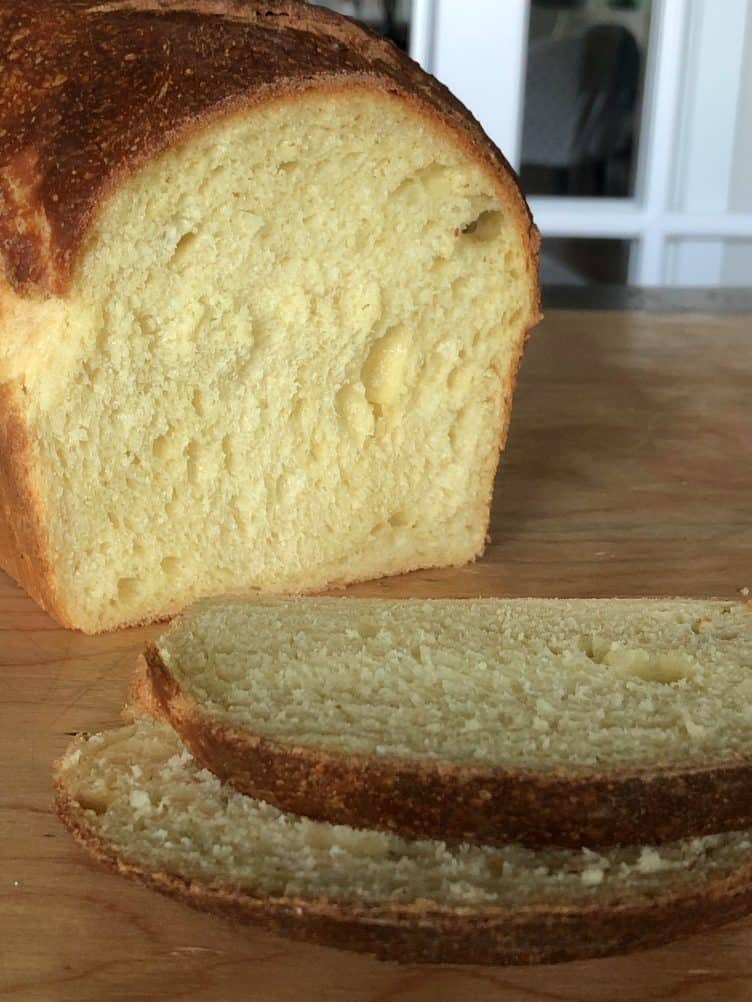
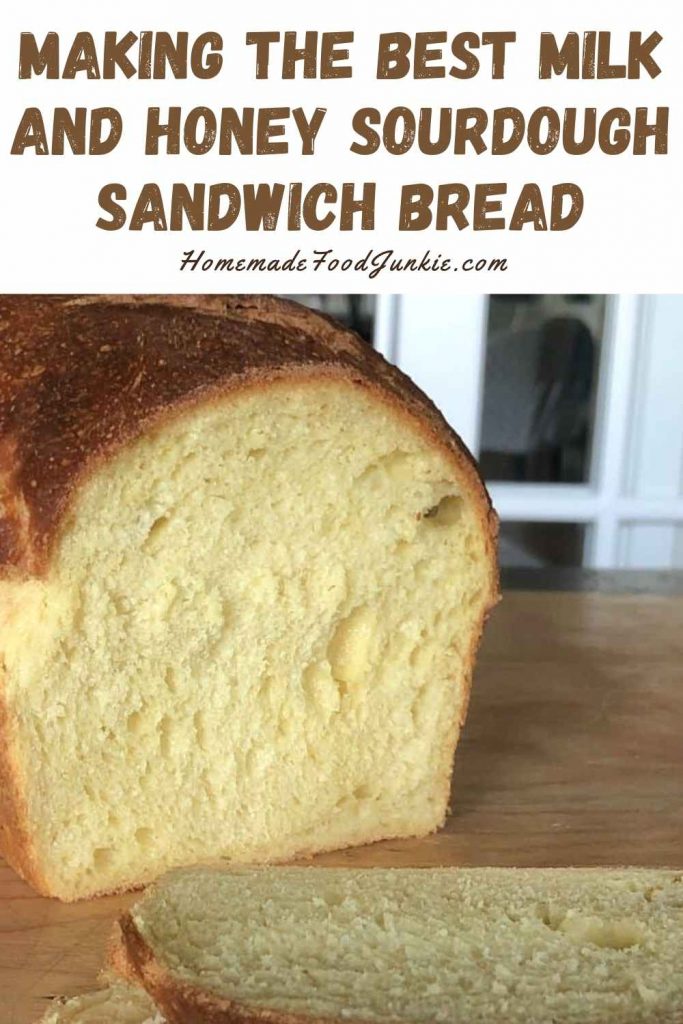
Our Milk and Honey Sourdough Sandwich Bread recipe makes a lovely loaf of sliceable bread with a soft tender crumb. Perfect for sandwiches, paninis and toast this recipe is formed in loaf pans for a dense crumb that will hold together.
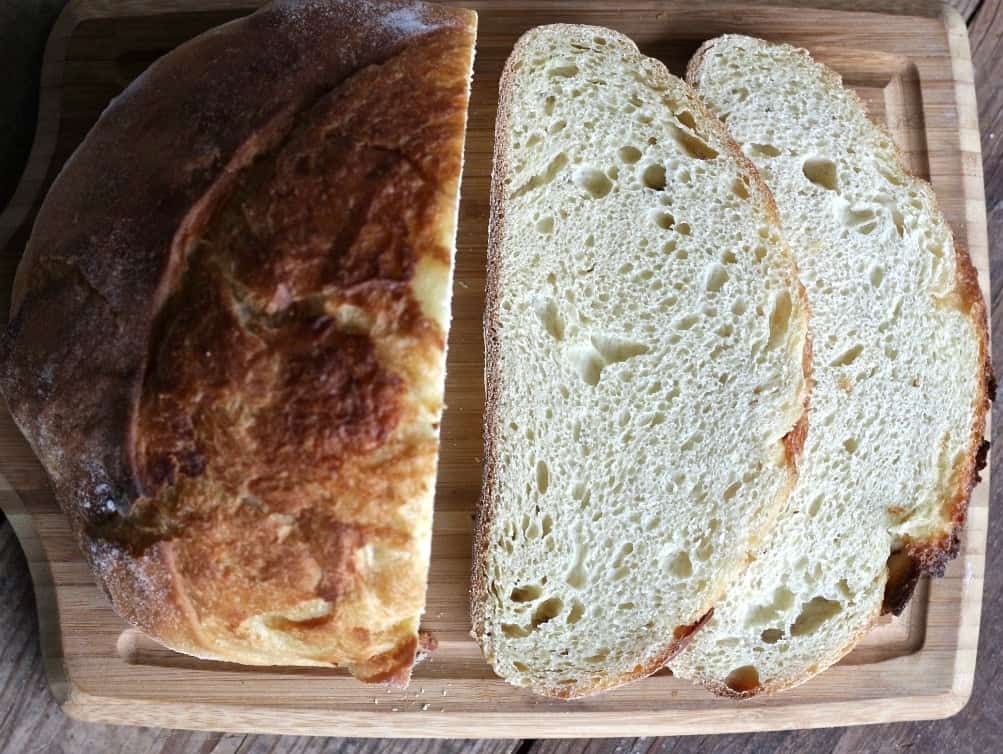
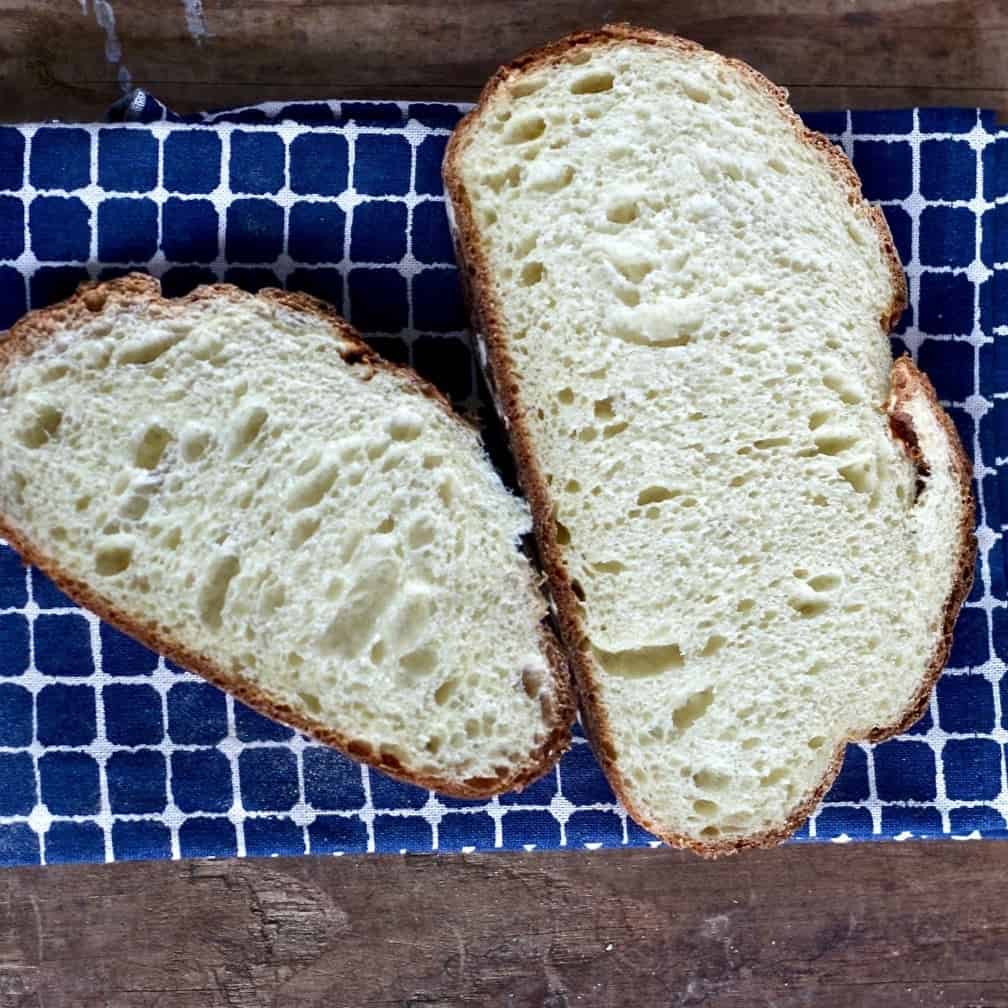
If you prefer the traditional sourdough boule with an open crumb and crunchy crust, we have instructions for both in this post. This is a beautiful bread that can be enjoyed any way you prefer. With the addition of good quality honey, warm milk, eggs and warm butter this sourdough loaf has a sweeter flavor profile that everyone raves about.
Sourdough baking can be an intimidating feat for many, but in this post we walk you through all of the steps in a clear and concise way so that you are successful in baking your own sourdough bread. If you feel you need further help with the processes, visit our Sourdough Baking Hub for all of our sourdough baking guides.
Beginner Artisan Sourdough Bread Recipe
We made this Video (see sidebar) To help you see the entire process with all the steps involved. This video is our Homemade Food Junkie sourdough tutorial on the Beginner Artisan Sourdough Bread Recipe . Find all of our Sourdough Bread Recipes here.
It will show you how to make sourdough bread in this recipe too. The long cold rise method and no knead stretch and fold sourdough bread recipes are all similar techniques. Once you master one of these sourdough recipes the others will be a snap.
This Milk and Honey Sourdough Sandwich bread recipe is Sasha Hunter’s creation. She has worked in bread many years (Sourdough for the last three years) and is an amazing bread baker. Follow Sasha on Instagram and Facebook to see her work and read her bio further on in our post.
What does adding milk and honey do to Sourdough Bread?
All sourdough bakers know that traditional sourdough is a very basic recipe consisting of your active starter, water, flour and salt. So what happens when you add additional ingredients such as honey or milk?
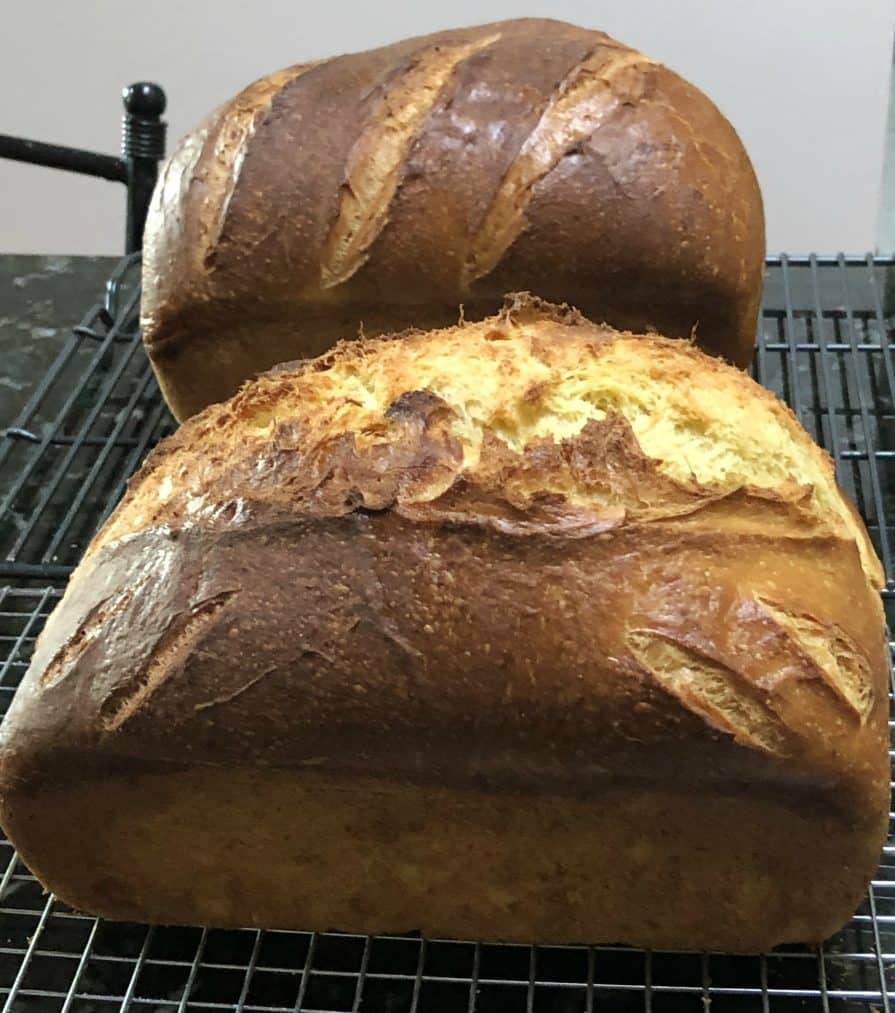
When you add milk to a sourdough bread recipe it will give the the loaf a softer crust that is perfect for sandwich style slices. It will also cause the crust to darken more than usual due to the caramelizing lactose sugars. Milk introduces fat to the recipe, as well as more sugars.
When honey is added to a sourdough loaf the most noticeable difference will be in the flavor. Honey will of course reduce the sour flavor that is prominent in sourdough breads, as well as adding a slightly sweet profile. Honey will also reduce the bulk ferment time that is needed, as well as aiding in a softer crumb.
Is Sourdough Bread really good for your digestion?
Studies have been done that show sourdough bread acts as a prebiotic, this means that the bread helps feed good bacteria in your guts. We all need good bacteria for a healthy and stable digestive system and sourdough bread can help with that. The natural yeast is beneficial and the no fuss recipes keep it simple and straightforward with good clean ingredients. Read more on Why sourdough is Good For You.
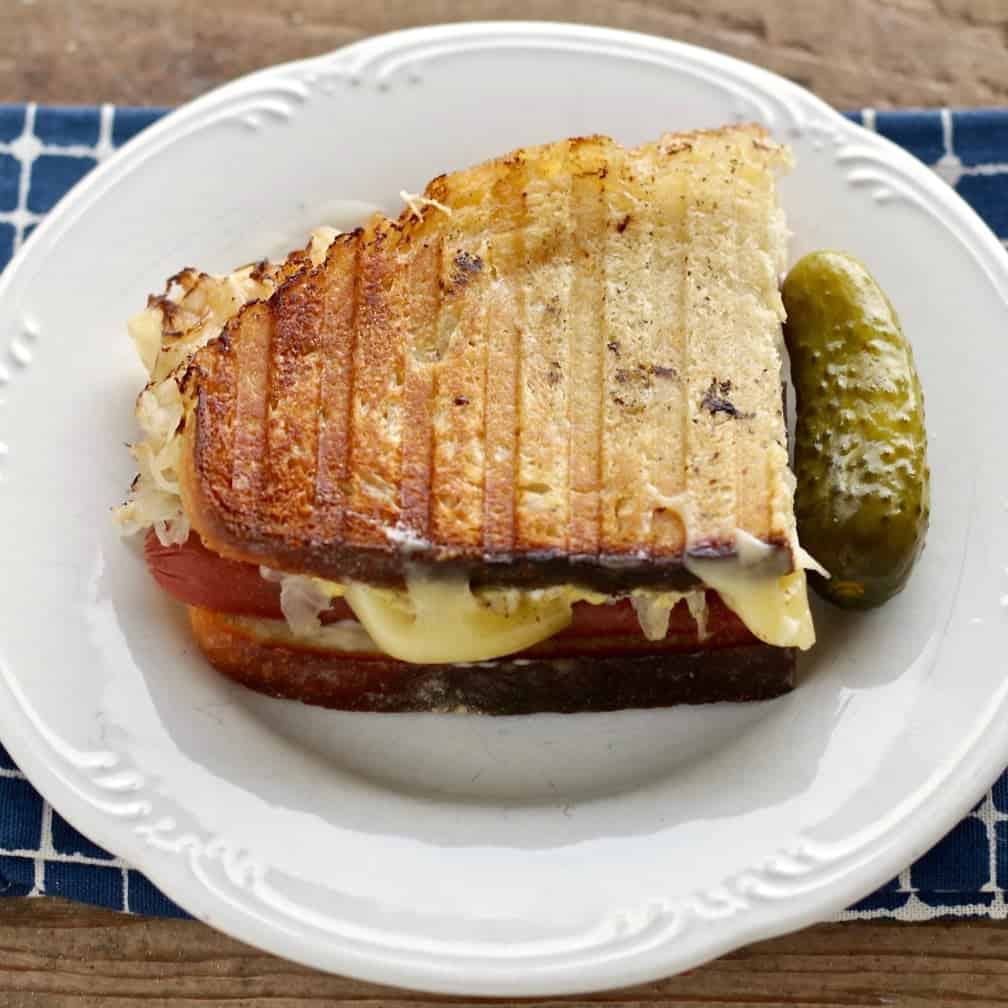
This recipe makes a beautiful hot sandwich, a classic PB&J, or a scrumptious slice of avocado toast.
Helpful tips For the Milk and Honey Sourdough Sandwich Bread
- Keep the recipe proportions correct and follow all the processes in order every time. Yes you can fudge the rising times a bit but do this as a matter of experiment once you learn the recipe as it is written.
- Make sure your starter is active and ready to bake bread.I’m using this 100 percent hydration sourdough bread starter.
- Hot temps will easily over proof a loaf. Learn to watch the dough and be careful of overproofing.
- This recipe freezes well at least two weeks. The loaves defrost beautifully and make great toast and sandwich bread.
Testing your starter
Is your starter doubling every five to 12 hours after feeding? If not, even if it looks active and passes the float test it may lose strength before your bread is baked.
The Float test. Drop a teaspoonful of starter into a cup of water and see if it floats. It should pop up to the top of the water in a nice solid mass with good spring and life.
For best results for any sourdough bread baking recipe keep feeding your starter until it is very active (it should bubble and talk to you a bit). If it floats up on top of the water you drop it into in a bouncy solid mass and stays there a while (several minutes) without dissolving you are ready to bake.
If it sort of barely lifts off the bottom and spreads out or is not all together at the surface… keep feeding it. Your starter is still too hungry and weak to work well.
What flour is best for Sourdough?
A high protein flour like Montana Wheat Flour, King Arthur Flour or Central Milling Flours. Organic and non GMO contribute greatly to good bread! The important thing is that your flour protein content should be around 12% less than that and you may not yield a strong load with good structure. The protein content is also critical for feeding your starter, if your flour does not give your starter enough protein to eat, it will essentially starve and die.
The addition of enzyme boosters such as rye flour are very helpful to feed your starter as a little treat every now and then. You will see a noticeable boost in the life of your starter.
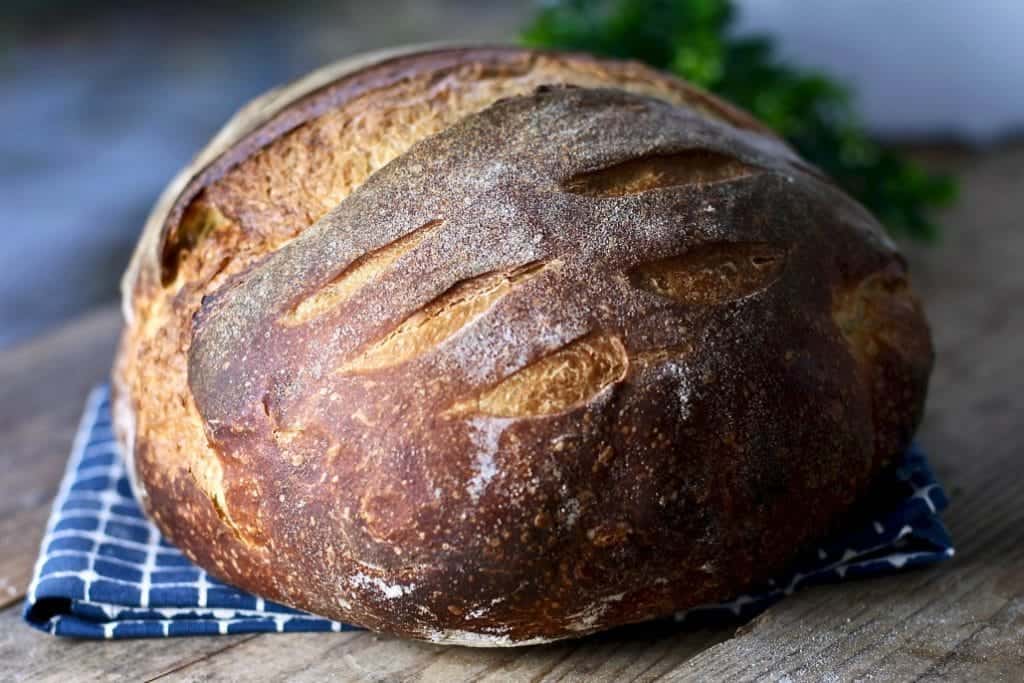
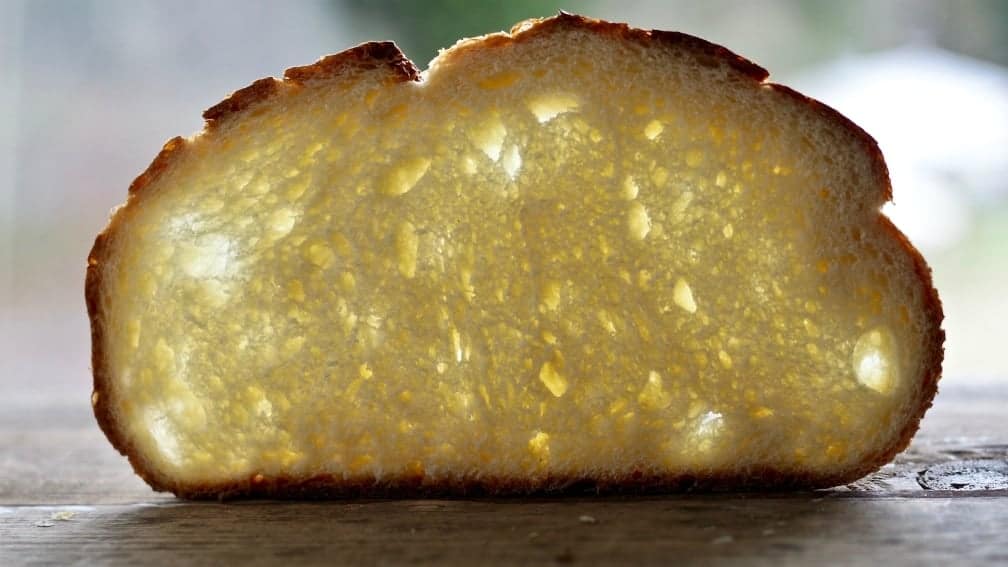
Creating the crumb structure
- You actually have complete control over this aspect. By completely degassing the dough before shaping you can achieve a very even, and closed structured crumb making it the perfect sandwich bread.
- On the flip side, you can create an open and lofty structure by handling the dough very gently when shaping and only degassing what’s absolutely necessary.
- Hydration (total liquid content) and protein content (which affects gluten development and elasticity, i.e. the bread’s ability to hold its gas bubbles) will greatly affect your results as well.
- Don’t expect to obtain equal results with all purpose flour if a recipe calls for bread flour. It’s all about protein content. By paying attention to these aspects you can easily manipulate your loaves without changing your recipe.
- This recipe also makes a beautiful pan loaf, which I fully de-gass (with a rolling pin) before shaping. Rise time will increase, but that always varies. Learning to judge your doughs in the fermentation process as well as final rise period comes with practice.
In short, bread can be a wonderful stand alone food but it needs to serve as a vehicle for whatever deliciousness we are placing upon it! Learn more about how to read your sourdough crumb structure.
Why is my Milk and Honey Sourdough Loaf so dark?
This recipe is heavily enriched with honey, milk, & butter. These three items all have sugars that will caramelize beautifully and create a soft texture, but have great potential to go past the point of appealing, and may very well burn if you don’t keep an eye on it.
Leave the sheet pan below, remove the lid of your Dutch oven and let the loaf bake until you achieve the desired exterior color.
If you find your loaf is browning too quickly, place a piece of tin foil over the loaf loosely. This will act as a shield and allow your loaf to finish baking without scorching.
Keep in mind that contact with the bottom of the dutch oven for longer than 30 minutes will increase bottom scorching risk. So be careful if your bake time exceeds this time frame too much.
NOTE: My oven is hot and does tend to darken the crust a bit no matter what I do to compensate for that. I made this latest loaf with all of Sasha’s instructions but it did darken more than hers does. But it is a soft crust and very delicious in sandwiches.
SCORING TIP: slash your loaf assertively down the center and end to end. Optionally, slash the “leaf” pattern on either side of the center slash. This will give the loaf room to expand in a controlled and beautiful way so as to avoid it exploding or rising over the edges of the pans too much.
Milk & Honey Sourdough Sandwich Bread
-By Sasha Hunter
Yield: 2 large loaves (reduce by 50% for 1)
Complete nutritional information and sourdough bread calories are included in our printable recipe card below.
Sourdough Troubleshooting:
If your bread doesn’t turn out the way you expect, start with our comprehensive Sourdough Troubleshooting Guide.
Or jump to the specific issue you’re seeing:
- Bread turns out dense – Why Is My Sourdough Bread Dense?
- Find out more about How to Proof Sourdough
- Dough spreads instead of rising – How to Shape Sourdough Bread
- Crust is soft, too dark or pale – How Steam Baking Sourdough Affects Oven Spring and Crust
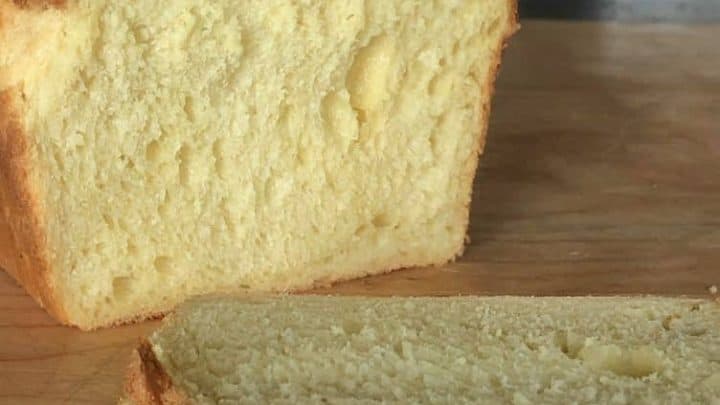
Milk & Honey Sourdough Sandwich Bread
A reliable, flexible recipe for a lovely sourdough sandwich bread using the dutch oven, stretch and fold and long cold rise methods. This bread slices well, makes excellent toast, paninis and sandwiches.
Ingredients
- 300 grams Starter (2 Cups)
- 250 grams water (1 Cup)
- 380 grams Whole Milk-warmed (1 1/2 Cups)
- 180 grams Eggs (4 large eggs)
- 60 grams or Butter-melted (1/4 Cup)
- 100 grams Honey (1/3 Cup)
- 1100 grams bread Flour (8 Cups)
- 20 grams natural sea salt (1 1/2 Tablespoon)
Instructions
DOUGH BUILD:
Begin with accurate measuring. Read more about why measuring matters.
- Weigh out starter into a large bowl.
- Add water and mix until it turns into cloudy murky water.
- Add Milk, Eggs, Butter, and Honey and mix. (I mix them together and warm them all to about 80 degrees in my microwave)
- Add flour and mix with your hands(or a dough spatula) until the dough comes together.
AUTOLYSE: Technically we do a fermentalyse since we add the starter before the resting. This kick starts gluten build.
- Rest the dough without stretching for 30 to 60 minutes:
- Add salt, work in with wet hands using a pinching action. Drive the salt into the dough with your fingers rather than try to mix it in or roll it.
- Cover. Rest 30 minutes.
STRETCH AND FOLDS:
- Pull the dough gently but firmly from the back of the bowl up and over to the front. Turn the bowl 1/4 Turn and repeat. Do this until you have stretched the dough and folded it over on all four sides.
- Rest the dough covered, 30 minutes at room temperature(about 70 degrees). (I set a timer)
- Repeat the stretch and fold process four times 30 minutes apart. You are building the gluten in the dough in this stage. As you repeat the stretch and folds the dough will change from a gloppy mess to an elastic resilient dough.
RAISING THE DOUGH:
- Let the dough sit and bulk ferment (raise) for 1 hour at room temperature.
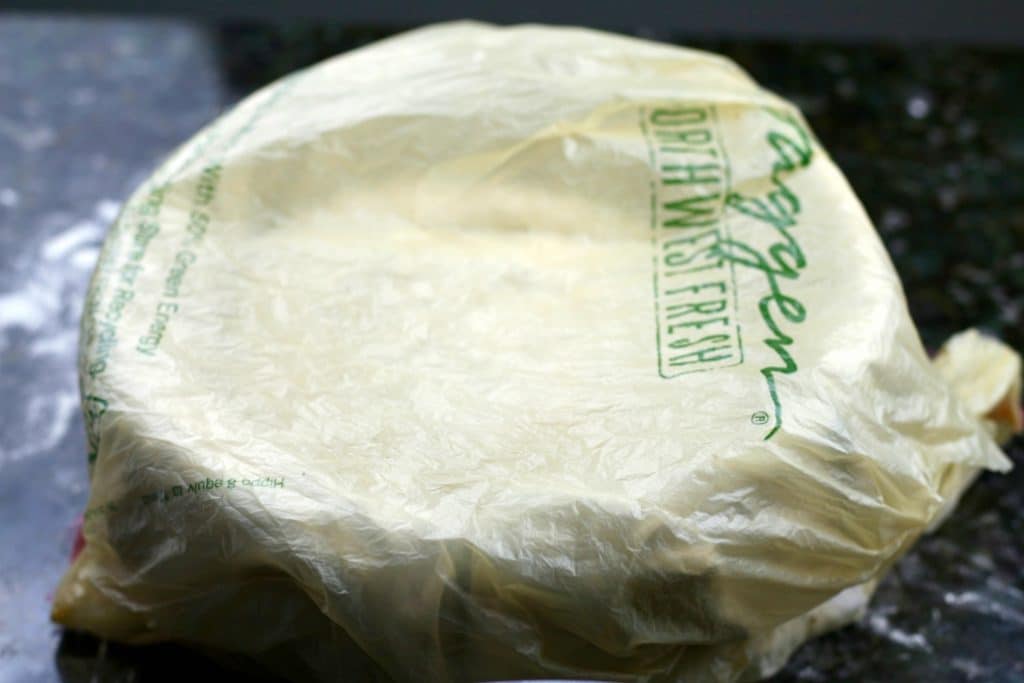
- Put the bowl into A plastic(grocery) bag and set in the refrigerator to finish cold fermentation for 24 hours. Why do we cold bulk? ***see notes at page bottom
NEXT DAY:
- Remove Dough from the refrigerator and turn out onto a floured board.
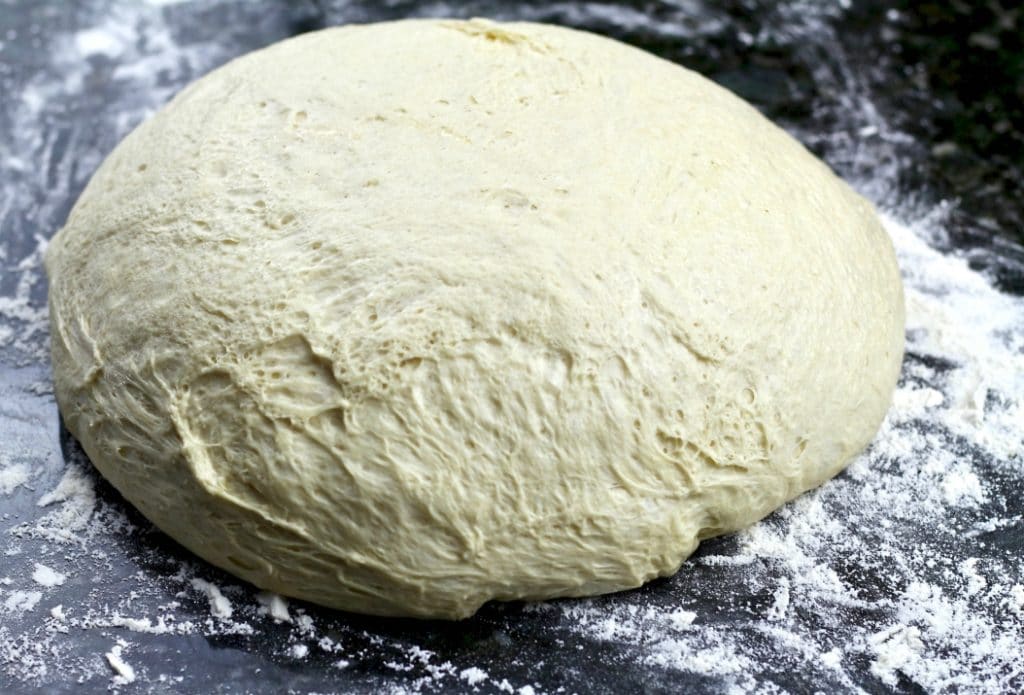 How to Read your dough. When is it proofed?
 - Divide (by weight for even size) into two dough balls. Gently shape into two rounds, cover and let rest until dough comes to room temperature and is pliable. 30 to 60 minutes.
- Shape and gently place into bannetons or pans (seam side up) to rise at room temperature until raised 20 to 30 percent.
- Chill in refrigerator before baking two hours to cold proof in the plastic bag again. (this helps get a higher oven spring).
Baking Instructions for Boules in Dutch Oven:
- Preheat oven with Dutch oven inside to 450˚F for at least 30 minutes.
- Cut a piece of parchment paper large enough to accommodate your loaf. You'll use the paper as handles to lower your proofed loaf down into the very hot Dutch oven.
- Take the risen dough out of the refrigerator .
- Place the parchment round over the basket and carefully flip the whole thing over and un-mold the dough.
- Using a pastry brush, dust the loaf to remove excess flour.
- Score.
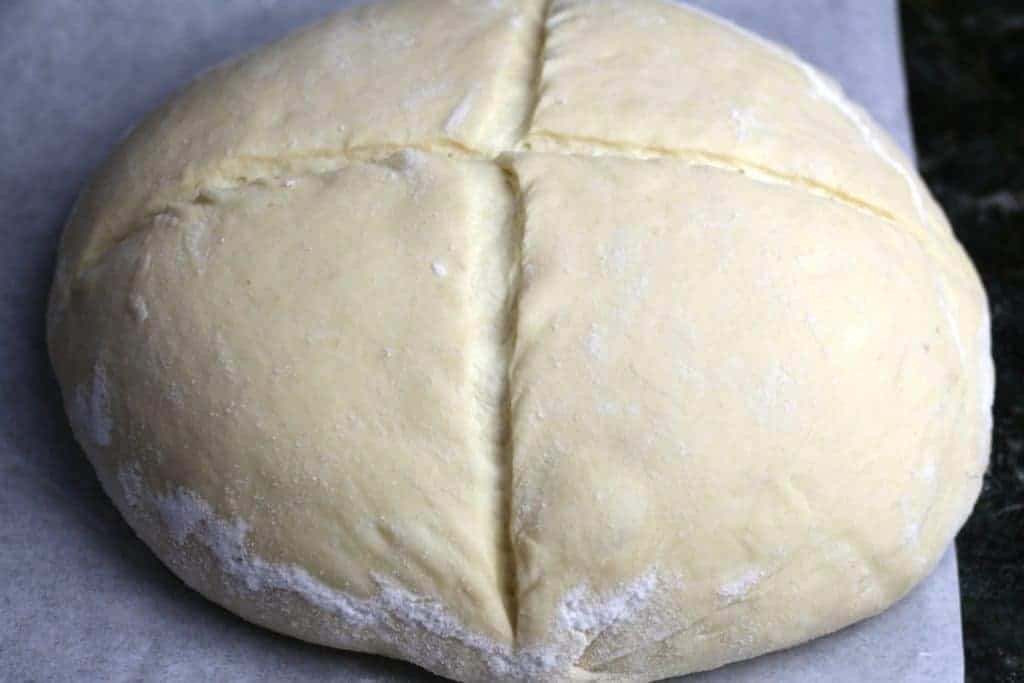
- Spritz liberally with water (for a blistered, flour free crust) or omit the spritz for a rustic looking loaf
- Carefully lower your loaf into the preheated Dutch oven and place the lid on and set into the oven.
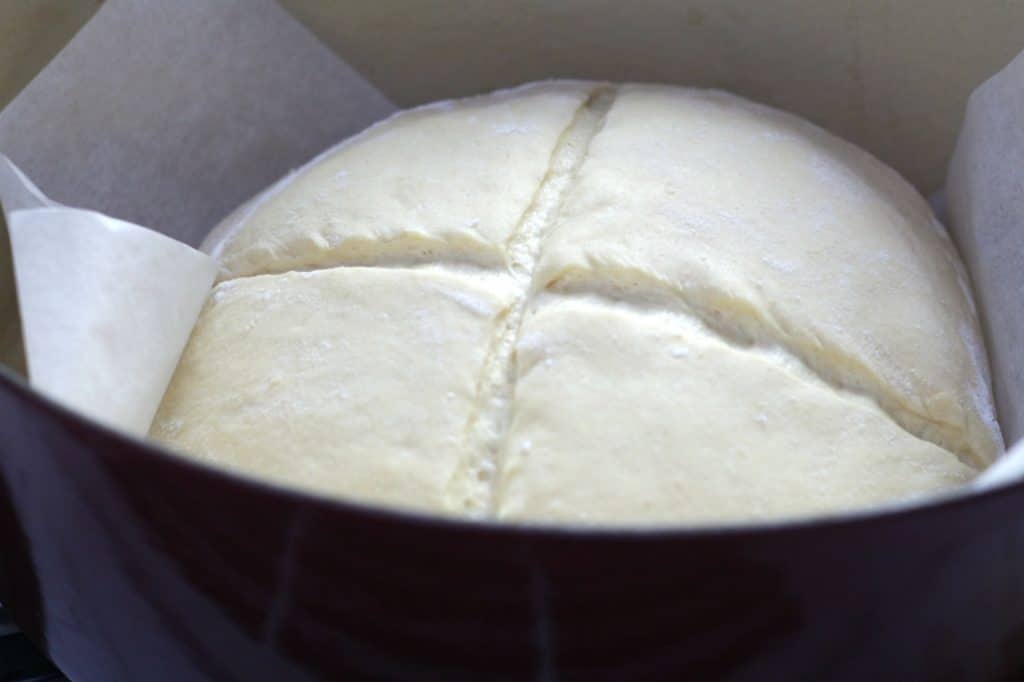
- Slide a sheet pan one rack below the Dutch oven to deflect excess heat from the bottom crust.
- Bake covered for 30 minutes at 450˚F. *(MY oven is so hot I bake the bread completely covered for 40 minutes on convection heat at 450 degrees and it comes out as pictured. Adjust these directions to your own oven)
- After 30 minutes, remove the Dutch oven from the oven. Carefully remove the par-baked loaf from the Dutch oven using the parchment paper as handles.
- Slide loaf back into the oven directly on the center rack.
- Spritz oven with water bottle.
- Bake for an additional 10-15 minutes until an internal temperature of 200˚F-205˚F is achieved.
- Remove from oven to a cooling rack.
- Let cool completely. To keep the soft crust store the loaf in a plastic bag at room temperature.
- Let the Dutch oven heat back up for a few minutes and start the process over again for the second loaf. Enjoy!
To Make bread Loaves:
- Instead of forming for boules after bench rest roll the dough out and degass it.
- Now form the dough into loaves for two 9 x 4.5 x 5 bread pans.
- OIL your bread pans and lay the dough in so it just touches the sides of the pan and the ends.
- Allow to rise covered in the bread pans two to four hours until the dough is level with the top of your bread pans.
- Set the loaves covered in the fridge.
- Preheat your oven to 400 degrees F.
- Set a pan of water on the bottom shelf of your oven. (I use a broiler pan half full of water).
- When the pan is steaming and the oven is preheated SCORE the loaves and set the loaf pans on a baking stone (or baking sheet) in the middle of your oven.
- Bake 15 minutes then reduce the heat to 375 degrees F and bake an additional 35 minutes.
- Check for doneness. Use a digital thermometer and push it into the end of your loaves to the center. It should read 210.
- Remove the loaves and let cool in the pans 5 to 10 minutes.
- Cut around the sides of your pan carefully to release the bread from the pan as needed.
- Cool on racks an hour until room temperature before cutting.
Notes
***Note: Seasonal temperatures greatly affect the speed at which dough ferments. Keep a watchful eye on its progress. Make sure not to over proof. Your dough may need to be shaped sooner than 24 hours depending upon activity.
The nutritional information on this recipe is going to change according to the flour and other ingredients you choose to use. If made as directed the slices size will also somewhat affect serving size. We usually eat one half of a slice of these large loaves and cut it down the middle for a sandwich. That means we are getting twice the servings noted in this recipe.
Nutrition Information
Yield
24Serving Size
1 Slice of breadAmount Per Serving Calories 216Total Fat 4gSaturated Fat 2gTrans Fat 0gUnsaturated Fat 2gCholesterol 35mgSodium 358mgCarbohydrates 37gNet Carbohydrates 0gFiber 1gSugar 4gSugar Alcohols 0gProtein 7g
Sasha’s Bio:
“I live in Central Washington state with my husband Nate, two kids and our 4 dogs, and 5 horses.
I’m a passionate baker and cook. I lean heavily toward the natural / organic lifestyle with balance for life’s pleasures of course! I enjoy sharing my creations with friends and bartering for farm fresh eggs, grass-fed meat, raw honey, ect.
I worked as a baker’s apprentice while going to school. Learned production baking and made everything from scratch donuts to wedding cakes. Worked as a cake decorator for a bit in local grocery stores.
My husband and I have a custom cabinetry and fine furniture business. I worked with him building our business for several years while producing numerous custom cakes for a range of clients (including one celebrity!…who I do not have permission to name, darn).
I have baked yeasted breads for years but I began my journey with sourdough in the summer of 2016. Bread was an area I was looking to “grow” in as well as improving what we were eating on a daily basis. The health benefits of sourdough were very intriguing to me, so I embarked on a hiatus from my cake business. I made my first sourdough starter following the King Arthur Flour instructions on their website. I began to create my first loaves of sourdough and was overjoyed with my results.
In the fall of 2016 I created another (APPLE JACK) starter by using the peels of apples grown on our farm. I created a yeast water with the apple peels and used that yeast water as the liquid component in my starter. This starter (I named him Apple Jack) has been very successful and is my preferred culture today. I use it in all of my sourdough creations, both sweet and savory.
You can purchase my Apple Jack Starter through my ETSY page at Sourdough Sentiment.
Sasha
I am no longer making custom cakes (except occasionally for friends/family). Currently I work on my ETSY shop baking sourdough bread while raising my family
I’m constantly developing new recipes, and keep a sourdough journal to log all of my bakes. We are expecting our second child in March. 🙂
It delights me to know that I have the ability to provide my family with wholesome food and self sustaining skills. I hope to build an outdoor wood-fired oven in my next adventures (for pizza and breads).
I’m working toward my dream of authoring baking books one day.
Education-BFA in Fine Art: Concentration Painting & Drawing from Central Washington University Graduated 2010
Follow Us:
We enjoy meeting you on our social networks. Follow us on Facebook, Pinterest, Instagram . Tag us with your pictures of our recipes and comment on how it went for you. We would love to see what you do with them.
We often like, comment and share your posts of our recipes on our daily Instagram stories.
Ask questions and rate the recipe in the comments section below. Please share what you did with this recipe. We are always looking for more and better ways to make homemade food. Other cooks love your ideas!
Recent Posts:
Any advice on using Einkorn AP flour or a combination thereof? Einkorn is a low gluten flour with 11.6 % protein and doesn’t absorb liquid as readily. It’s such a healthy flour I’m wondering how to add a portion of the flour total with this unique flour. Any ideas?
Hi Judith, I have never taken the plunge into Einkhorn. However, I have some einkhorn berries and plan to get started with it soon. Im going to send you to the little spoon farm since she has some experience and offers a good well though out post to go with her recipe. Happy Baking
I’ve tried several different sourdough sandwich loaf recipes over the last 6 months and this one is hands down my favorite! The first time I halved the recipe and the load was HUGE, overflowing my 9×5 pan, but super soft and pillowy. I thought for sure it was beginners luck and had to try again. Again I halved the recipe, but used cold starter from the fridge that hadn’t been fed in about 2 days. Followed the recipe as written and once again had a HUGE, soft, pillowy, overflowing 9×5 loaf. The third time I decided to try half the flour as whole wheat AND add cinnamon, raisins and brown sugar from a Cinnamon Raisin Swirl recipe. Once again, HUGE, soft, pillowy, overflowing 9×5 pan. I couldn’t be more thrilled with this recipe! I do think I might follow another commentors advice and try 1/3 recipe instead of 1/2 so it’s not quite so big. I can’t fit a slice in my toaster the way it is now. I’d love to try it in my 13×4 Pullman pan, but would need to play with adjusting for the pan size, unless you have a suggestion on that? Thank You and especially Sasha for the brilliant recipe!
Hi Tracy, Yes this is a pretty large loaf. I’m also very grateful to Sasha for this recipe. She’s a master baker and this recipe does deliver a beautifully soft pillowy sandwich bread. I would agree that cutting it to one third might be worth trying. Others have used a pullman pan for this recipe and made it work you might search the comments for what they did. Thanks for the great review and Happy Baking!
So you keep the pan of water in oven during entire baking time? I’ve seen recipes where it’s removed after the first 15-20 min.
Hi Jayne, I have in the past, removed the pan once I take the lid off the loaf. You can do it this way. I just don’t like manipulating a very hot pan of sloshing water halfway through the bake. So I prefer to leave the water in through the entire bake and remove it once the water cools after the oven is off. In my opinion it does not negatively affect the bread and it’s much safer for the baker. I hope this helps. Happy Baking!
Can you use a dairy free milk with this recipe?
Hi Angela, Thanks for the question. Dairy free milk should work well in this recipe. Please let us know how it goes for you. Happy Baking!
Have you ever tried making this with a stand mixer? I’m trying to do this more and more as I get older and was interested if you think this is possible/
Hi Sally, As a matter of fact I have never made this particular sourdough bread in a mixer. Since it is a sandwich bread that is degassed anyway, I think it will work fine in a mixer.
I DID make the whole wheat Sourdough Bread in my new Bosch Universal plus (which I LOVE BTW). It turned out fine. Just be careful if you want the aeration (holes) in the loaves like an artisan bread. A mixer will tend to beat the air out of the dough if you over do it.
Our Rosemary Garlic Sourdough bread is made for the stand mixer so give that one a try too.
With no knead breads, a mixer is actually more work than you need to do simply because you have to clean it. Many of our sourdough breads are not kneaded in the classic sense but only stretched. Let me know if I can be of any more help. Happy Baking!
@Diane, thank you so much. I went ahead and made it without stand mixer. I did find the initial stirring of all the flour, etc to get into rough ball was a bit of a workout for my shoulder. I may try to use hook for that next time—in other recipes it has taken just a few minutes to combine all so I will surely watch that.
The rest of the care of the dough was a breezed as it is so silky smooth! It’s all resting in refrigerator now and I’m very excited to bake tomorrow.
I do have another question. I’m thinking of cutting dough into thirds as some have mentioned. If I do this, I will plan on 2 smaller boule and loaf—using a smaller loaf pan (I think it is a little over 8 inches.) I don’t know how to judge this for loaf but will let you know results!
Thank you for your info on other recipes. I’m enjoying trying new recipes and I feel this one will be amazing!
I agree, the stand mixer will help get it to the shaggy ball stage before autolyse easily. With shoulder trouble I think your smart to do that. I’m happy the rest of the recipe will work well for you. This recipe particularly has a wonderful dough I enjoy working. And this will make quite a lot of dough so splitting in into three parts makes a lot of sense. Can’t wait to hear how this recipe goes. I hope you enjoy the finished loaves too.
I’m glad you find the other sourdough breads intriguing. We have so many great recipes for sourdough I hope you try those that will work for you. Have a wonderful time!
Love this recipe! Beautiful fluffy texture and flavor. I use it for sandwich bread. However this definitely makes enough for 3 loaves. The first 2 times my bread was busting out of the pans and just making huge bread. I divided it by 3 and my loaves are perfect size! We have a family of 6 so this works nicely for us. But if you won’t use up that much bread you should half this recipe. Enjoy!
I’ve made this twice now and I always follow your recipes with great success. This recipe is delicious but it always take almost an hour or longer to cook to temp. I can’t figure our why. I’m mostly wondering if anyone else has this issue. Thank you for all the delicious recipes and video instructions!
Hi lesa, This is a heavy rich dough. I’m not sure why it is not baking the same for you as it does for me.
However,here are a few possibilities:
-You can look at your flour and make sure it has strong protein of 5 grams or better. Without a high protein content the flour will be heavier and take longer to bake.
-Also the starter needs to be strong and balanced. Be sure it is well fed and balanced for baking. Even strong starters can get unbalanced. If this happens, they may float since they are strong enough, but not ferment the dough properly and again cause the dough to be denser and not bake as well.
-Lastly, (and most likely) It could be just our ovens are very different. I bake in a leaky (heat and steam escapes) convection oven. Convect baking does tend to get the bread done a bit faster than conventional baking. If you oven really hold the steam well it may also just be steaming your loaves really well and the dough needs longer to bake.
So you may just need to plan for the extra time for this reason. Hope this helps! Happy Baking!
Made this yesterday and soooooooo delish!!! Thank you for this recipe!!!
Hi Angela, I’m so glad you enjoyed this bread. Thanks for the great review. Happy Thanksgiving!
Hi there just love this recipe ,just wondering I took my grad out of fridge and let it sit on counter for about 50 mins then I degassed it and put it into bread pans then now I put it back into the fridge and will bake it in the morning,do you think it will turn out ,I never let it sit on counter for 2-4 hrs just put it in pans and back into fridge till the morning then I’ll bake it up
Hi Val, That should work ok. It will rise a small bit in the fridge overnight but it should still bake fine. Might just get a bit loftier. Glad you enjoy this recipe. 🙂
@Diane, thanks for your quick reply
Hi there just wondering it say to leave in fridge for 24 hr can I take it out before,then as I’ll be up all nite baking ,I’ve made this in bread pans and it’s our favorite sour dough
Hi Val, I’m happy you enjoy this recipe. The long cold rise is a pretty flexible process. If you can get over 12 hours in the fridge or leave it in the fridge for longer(up to 72 hours) the dough should be fine. Thanks for the questions. Happy Baking!
I made two sandwich loaves using this recipe and they turned out huge! Rose up very vigorously and had a nice crumb. I subbed in a little white wheat bread flour. I did not use the water pan method, but I did spritz them with water a few times during baking. Will probably make again. Thanks!
Hi Meg, This recipe does make large loaves. All the better to make large sandwiches. 🙂 I especially love this as a grilled sandwich of any kind. Thanks for coming back and letting us know you enjoyed the recipe with this great review. Have a wonderful Day!
Hi there just wondering if I could use coconut milk in place of whole milk ,or whipping cream I have both on hand to use up
Hi Val, I have never tried either of these in this recipe but I’m pretty sure they will work fine. If the cream is extremely heavy you might want to dilute it 30 to 50% so it does not change the density of the bread too much. Please let us know how it works out for you. Happy Baking!
I made this last week and could not be happier with how this turned out. It’s officially fall here so where in the summer I could let everything proof on the counter my hourse just sin’t warm enough for that, switching to the cold proof and learning how to actually test my dough with the poke test was very valudable. I’m now going to bake this at least once a month and use one of my loafs to trade with for fresh eggs. Thank you so much for this recipe and the directions.
Hi Joday, I’m so happy to hear this recipe is working well for you. It’s a favorite of mine. I love this long cold rise method because it is so simple and gives great results. And how fun to turn your hobby into a bartering tool. Thanks for the great review. Happy Baking!
Hi, I just came across your site, and definitely want to try your milk & honey sourdough recipe. ?
I’m interested in getting a starter going from apple peels..could you give me some specifics on how you did this..thank you.
Mary
Hi Mary, Welcome to Homemade Food Junkie. I have messaged Sasha. She made the apple jack starter. I am waiting to hear back. I will put the process in the comments for you when I do. Happy Baking!
Mary, Here is the Link to Sasha’s FaceBook Marketplace. You can also message her through the ad. She sells her Apple Jack starter and will mail it to you or answer any questions you have. Hope this helps!
A couple questions-
After stretch and fold I assume the dough needs to pass the windowpane test? I didn’t see a note so I wanted to confirm.
My loaf pans are slightly smaller than the ones you used. How full should they be when you place the dough in them?
Hi Carolyn, Yes the dough should be developed to window pane before the bulk rise. This dough usually develops really well with all the enrichments.
The bread pans…If they are really small you may need to do three loaves.
I would fill the greased pans about 3/4 of the pan (or maybe a little more). You just rise to the top of the pans (2 to 4 hours usually).
If you overfill the pans the loaves will take extra time to bake. Use a digital thermometer and make sure the loaves are done to 200 degrees F before removing from the oven. Hope this helps. Happy Baking!
Hi, I’m planning on starting this today. I’m wanting to use up some buttermilk I bought for a different recipe but saw yours and it looks so good! Do you think I can substitute buttermilk for the milk in this recipe? I hope so! It sounds fantastic. Thank you, in advance, for your help.
Yes you can! Let us know how it turns out!! Happy Bread Baking! 🙂
Turned out great for me! I tried to do a shaped loaf on a sheet pan and had an eruption on one side but otherwise it looked and tasted great!
Thanks for sharing your review with us. Happy Baking! 🙂
I have now made this at least 3 times, and I’m baking it again today! I love how tall the loves come out when I use a pan, and the carmelized crust is so ! *chef kisses* ! It’s delicious!!
I’d love your thoughts on adapting for a same day loaf. Do you think it would work to start it in the morning and allow for a longer, room temp rise instead of putting it in the fridge overnight after the 1 hour room temp rise?
Hi Abby, I’m glad your a fan of this recipe. I make it all the time. I have never tried to make it all in one day but I believe you could get away with it. This dough develops pretty fast with the enrichments.
METHOD:
-After the stretch and folds try a two hour bulk rise at 70 degrees or so.
-Then bench rest and form the loaves.
-Rise in loaf pans until it reaches the pan top (2 to 4 hours).
-Chill the loaves an hour while you preheat the oven and the water bath or dutch oven (whichever you are using), Then bake.
-If not using the loaf pans rise in the bannetons 2 to 4 hours at counter temp. Then chill and bake. (The chilled dough will have a better oven spring).
I’d love to know if you are happy with the one day results!
This Recipe is now my go to. I adapted my own folding method and schedule into and it has worked perfectly. I echo that these loaves are MASSIVE. My traditional Sourdough Loaf has 360 Grams Flour (from starter and Levain), while this recipe calls for 625 grams of flour. That alone gives us a view of how HUGE these loaves come out to be. With how delicious they are I’m definitely not complaining.
Also, I substitute Maple Syrup in place of the Honey, works just fine. Thank you for the recipe.
Hi Trent, Fortunately they freeze well. 🙂 Thanks so much for sharing how you use this recipe. it’s a favorite!
Hi there,just new at sour dough baking ,,so iam trying the milk and honey recipe ,,but it seemed my starters to so long to rise ,,so after 8 hr I did the float test and it floated so I started to make the bread and by the time I finished the stretches it was 10:30 pm so now it the frige for 24 hr does it need to stay there that long just wondering if I could get it into pans before then other wise iam up all nite
Thanks Val
Hi Val, Just set the dough in the fridge until you have time to progress with the recipe. This dough will be fine in the fridge up to 36 hours. If you have further questions we are here for you. 🙂
My family and I love this recipe! I am making it again, and I would like to bake in my standard loaf pans for easier slicing. I am worried that halving recipe for two loaf pans might be too much dough per pan. Wondering if I should divide into thirds? Any thoughts/advice would be appreciated! Thanks again for sharing a lovely recipe!
Charlotte
Hi Charlotte, I’m so happy you love this recipe. It should make two 9 x 4.5 x 5 pan loaves. Go ahead and divide it. You will need to de-gass and form the loaves as I describe in our soft sourdough sandwich bread recipe. It has a quick visual guide to how to make it into bread loaves. If you don’t de-gass the dough the bread crumb will be very open and may overflow the pans. De-gassed and properly formed the dough should fit well into your pans. I hope this helps.
Charlotte, I just made a half recipe of this for the first time, degassing it completely and placing in a 9×5 loaf pan and it came out huge & beautiful. No complaints, but I’m going to try it in my 10×5 next time. I think there’s definitely enough dough for it to be perfect in that. I believe it will make a longer loaf and maybe not so high. Gorgeous in the 9×5 but I had to flip over the slices to get each piece toasted, they’re that tall! Great recipe, thank you!
Thanks for the great review. It’s so helpful when our bakers share experience with others. Happy Baking!