
How to Make Sourdough Starter
As an Amazon Associate and member of other affiliate programs we earn a small commission from qualifying purchases through our affiliate link. For more information read our Entire Affiliate Disclosure.
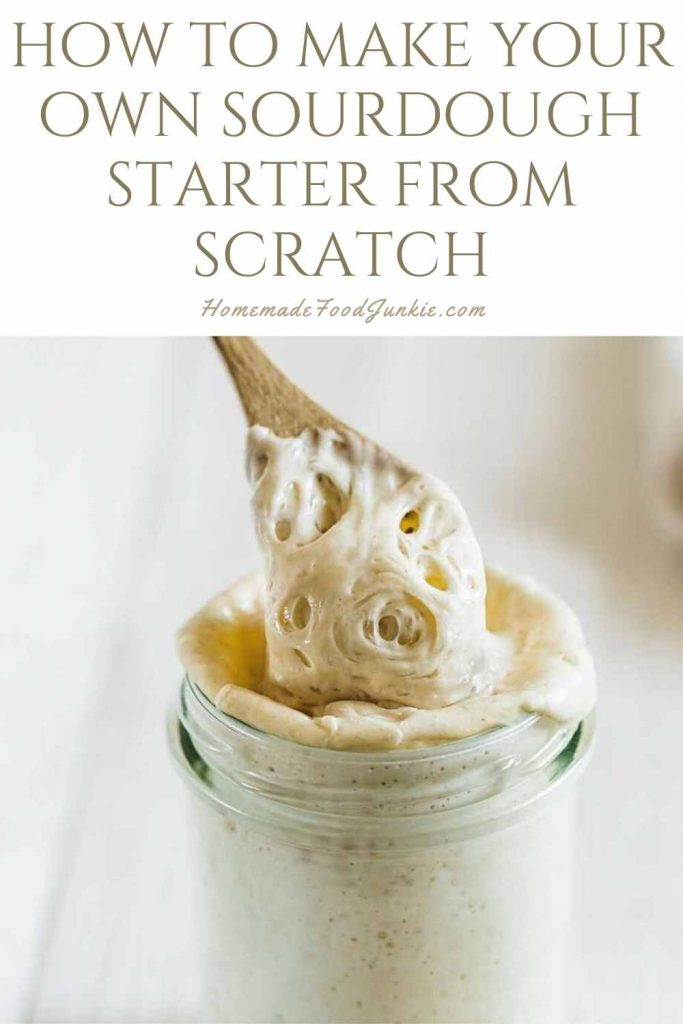
What is sourdough starter and how do you make one? A sourdough starter is a natural leaven made from flour and water that ferments over time. Wild yeast and beneficial bacteria naturally present in flour and your environment colonize the mixture, producing the bubbles that make bread rise and the acids that give sourdough its signature tangy flavor. This is why we call it sourdough. It’s tangy and does amazing wonderful things to baked goods.
It’s extremely simple to make sourdough starter from scratch. All you need is flour, water and time. Follow the simple process in this recipe to create a healthy sourdough starter that will grow and bubble as it gets stronger. Soon you’ll be creating fantastic breads and an endless amount of recipes that use up sourdough starter in the most delicious ways.
What Is a Sourdough Starter?
A sourdough starter is a natural leaven made from flour + water that ferments over time. Wild yeast and beneficial bacteria naturally present in flour and in your home environment natural yeasts populate the mixture, creating the bubbles (carbon dioxide) that help bread rise and the acids that create sourdough’s signature flavor.
If you’ve been wondering “what is sourdough starter and how do you make one?”—you’re in the right place. This guide shows you how to make a wild sourdough starter from scratch, how to maintain it, and how to get it ready for baking.
Start here if you’re new: This is the foundational starter guide for our sourdough baking. You’ll find all our sourdough tips, recipes and trouble shooter post here in the Sourdough Hub when you need them.
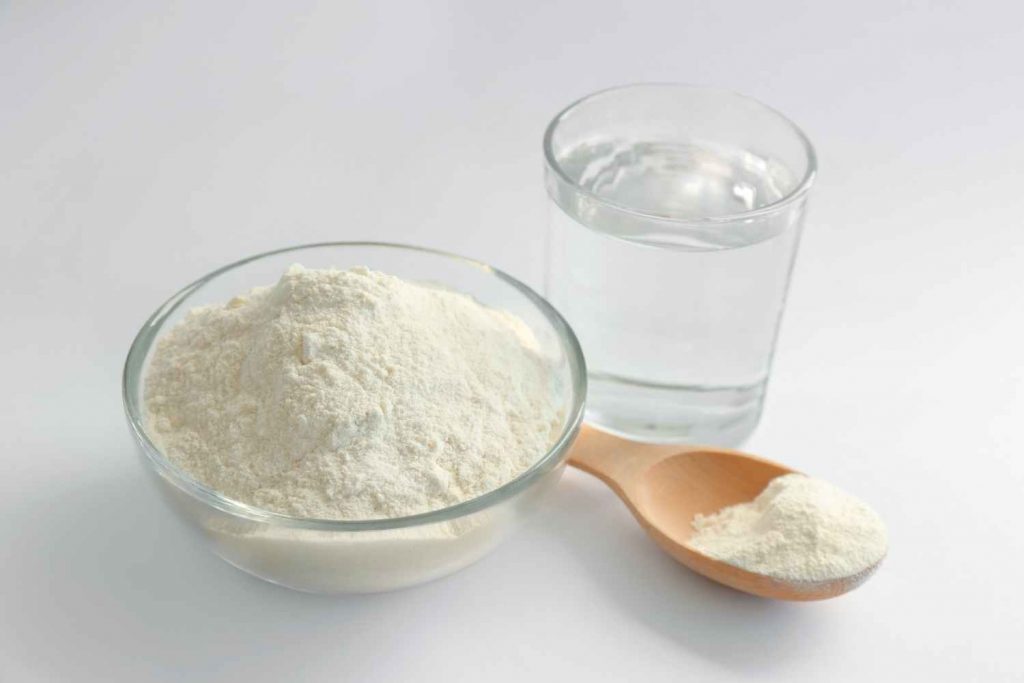
What You Need to Make Sourdough Starter From Scratch
You only need a few basic things, but getting the basics right saves days of frustration.
Flour options (and when to use whole wheat/rye)
Most beginners do best starting with unbleached all-purpose flour because it’s affordable and consistent. Whole wheat or rye can speed activity in a sluggish starter because they contain more enzymes and nutrients, but they can also make the early days feel “messier” (more smell, faster fermentation swings).
Beginner tip: If your starter seems sleepy around Day 3–5, do one or two feedings with whole wheat or rye to boost activity, then return to all-purpose.
Water + temperature tips
Use non-chlorinated water, (filtered is fine). Starters are noticeably slower in cool kitchens. Aim for a “warmish” spot—around typical room temp.
Jar + scale tips (why grams matter)
A clear jar makes it easy to track rise and fall. A kitchen scale makes your starter much more consistent because flour measured in cups can vary a lot depending on how it’s scooped.
How to Make Sourdough Starter
This is a slow process. It needs to be. Be patient and you will be well rewarded. And don’t forget I’m right here if you need help. Just ask in the comment section and I’ll reply. For the details, jump down to our recipe card. here is the general process and some tips.
Day 1
Mix flour and water until smooth (thick batter). Cover loosely so gas can escape but the surface doesn’t dry out.
Days 2–4
Discarding and feeding feels wasteful, but it’s part of building a healthy culture. Discarding:
- reduces excess acidity
- keeps the yeast/bacteria balanced
- gives the fresh flour something to ferment
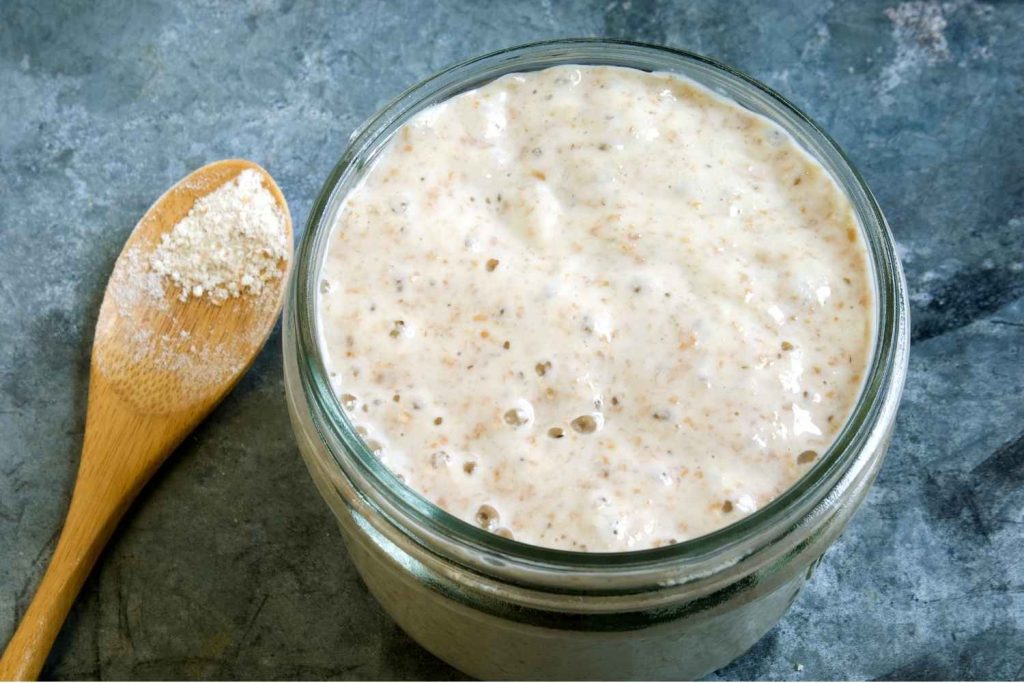
What you’re looking for: small bubbles, light expansion, and a shifting smell (from “wet flour” to slightly tangy).
Many starters show a burst of bubbling around days 2–3 and then suddenly appear to “die.” This is normal. Early bacterial activity creates temporary bubbles before the yeast population stabilizes. The starter may look quiet for a day or two while the microbial balance settles. Keep feeding it regularly and activity will return.
Days 5–7
This is where many beginners get confused because activity can look inconsistent. A starter may bubble vigorously one day and slow down the next. That’s normal while the culture stabilizes.
What you’re looking for by the end of this window:
- visible bubbles throughout the starter
- a noticeable rise after feeding
- a tangy aroma (not rotten)
Days 8–14 (and what “ready” really means)
On average it takes about two weeks to build a starter strong enough to bake with. That’s a decent estimate, but what matters most is behavior, not the calendar.
By this stage, a usable starter typically:
- rises to double its size and falls predictably
- shows strong bubbles
- doubles after feeding within a reasonable window at room temp
When Your Starter Is Ready to Bake
What “doubling” means
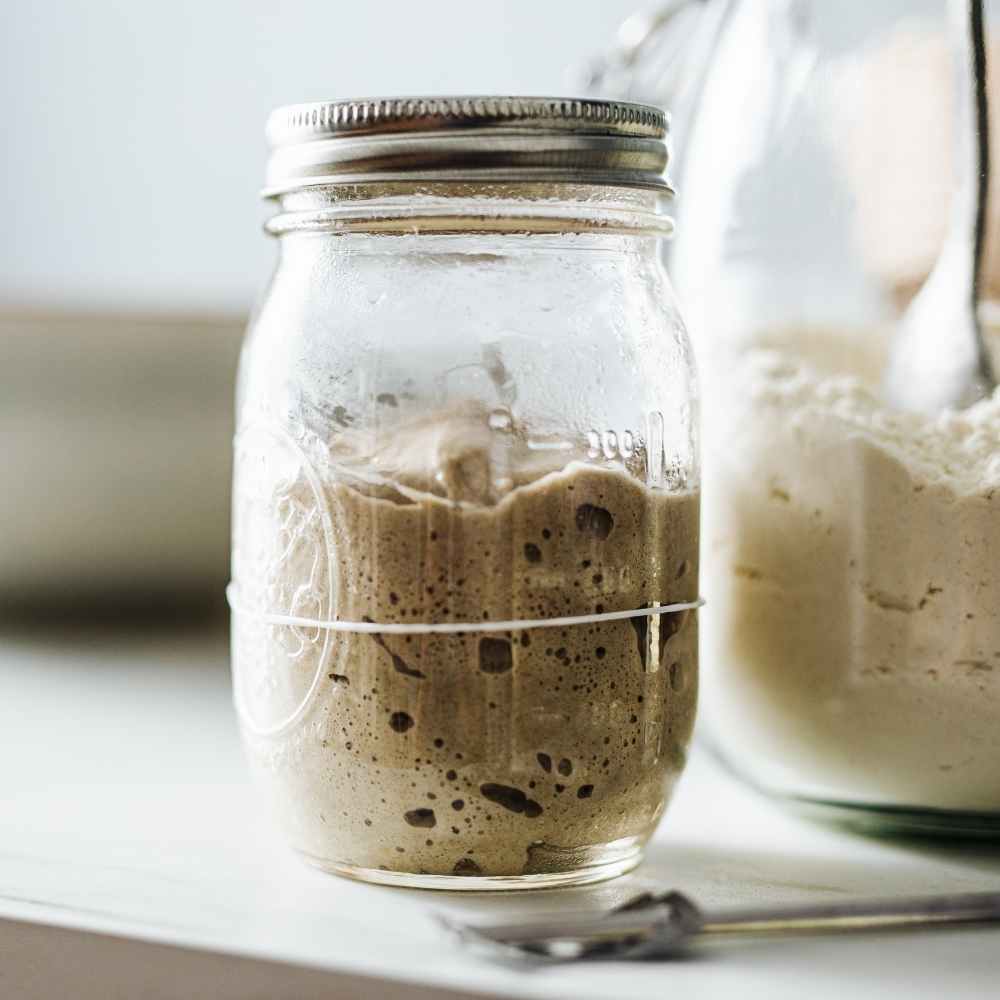
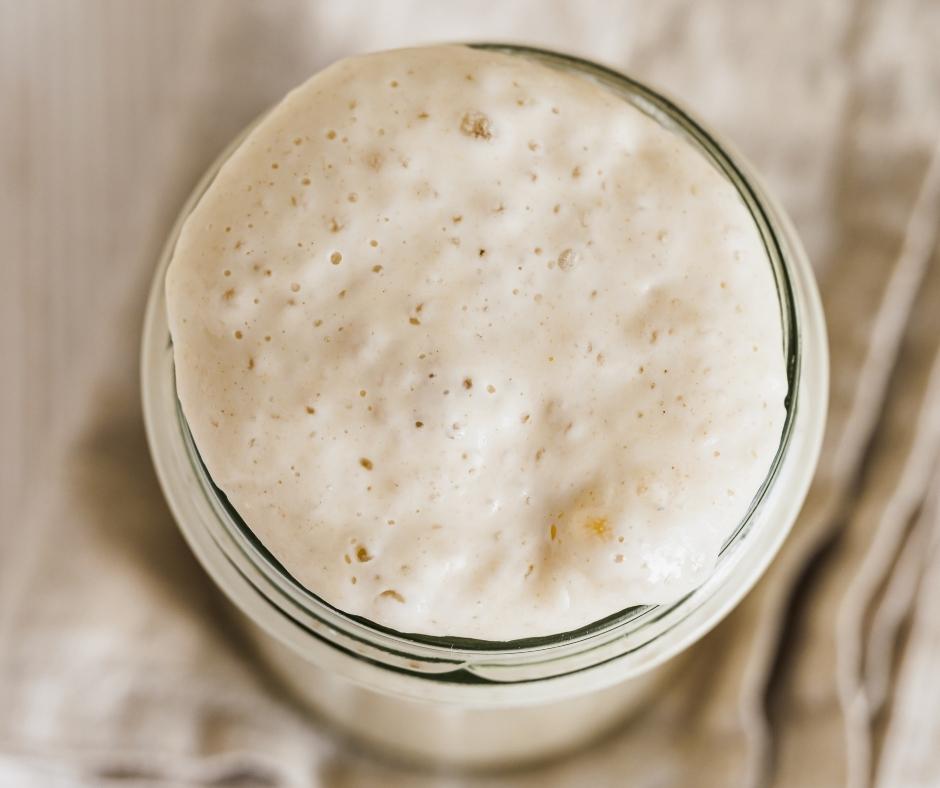
A starter is “ready” when it reliably rises after feeding and becomes airy enough to support dough fermentation. The simplest test is consistency. Feed it, mark the jar, and watch for a predictable rise and fall pattern. When you can feed your starter and it reliably doubles in size in 8 to 12 hours or less, it is strong enough to bake bread.
Why the float test is optional:
I use the float test as the final test for baking readiness. It almost never fails me. However, while
the float test is helpful, it’s not always reliable because texture and hydration affect buoyancy. This is especially true for young starters. They need to be doubling reliably.
A starter can sink and still be ready and it can float briefly and still be too weak to raise some breads well. The float test can be a helpful quick check, but it’s not foolproof.
Better readiness signal: Hydration and texture affect whether the starter floats. But floating is not as significant as the consistent rising and falling after feeding. That’s the signal to depend on.
Consistent rise after feedings + a lively, bubbly structure are your best indicator that your starter is ready to raise bread. Again even this is not fail safe. Watch your starter as it rises and falls after feeding. When the starter is at the top of its growth it is strongest and ready to use. These are your leading indicators for a healthy, strong starter.
Feed and Maintain a Sourdough Starter
Once the starter is active, maintenance becomes simple.
Counter vs fridge schedule
- If you bake often: keep it at room temp and feed regularly. But note; a warm young starter needs more feeding or it will quickly die. So keep an eye on it.
- If you bake occasionally: store in the fridge and feed weekly (then do 1–2 room-temp feedings before baking). This is what I do. My starter needs much less attention when I store it in the fridge and remember to feed it weekly. But watch your starter after re-feeding if it’s been stored in the fridge awhile. They can weaken and need more than one feeding to bake good bread. Make sure it is doubling reliably with lots of action before using for baking.
Feeding ratios For 100% hydration starter:
This starter is a 100% hydration starter, meaning equal weights of flour and water and starter when you feed it. This is pretty standard and most bread will rise well with it, so that is how we will maintain your starter. The next step is feeding and maintaining it.
- maintenance of this starter and preparing it for baking bread requires you keep it fed and strong.
- Before Baking with your starter feed it 1:1:1. This means equal parts flour, water and starter are mixed into a container and allowed to double in size before baking.
Read our complete post on How to properly feed and maintain your starter here.
How to prep starter for baking
Before mixing dough, feed your starter so it’s active and ready. Many bakers do this the night before a bake. Your “prepare starter for baking” section is useful; it simply needs to live under this heading so it’s not buried in Notes.
Our Long Cold-Rise, No-Knead Artisan Sourdough Method is very simple and achievable one you get your starter strong and keep it well maintained.
Troubleshooting: Slow Starter, No Bubbles, Bad Smells
Starters behave differently depending on flour type, temperature, and feeding schedule. Small adjustments usually solve most problems.
If your starter isn’t bubbling or rising as expected, don’t panic. The usual causes are:
- Temperature: cool kitchens slow fermentation dramatically
- Flour: bleached/low-protein flours can be sluggish
- Water: heavily chlorinated water can inhibit activity
- Feeding pattern: inconsistent feeding or ratios
Quick fixes:
- move starter to a warmer spot
- do 1–2 feedings with whole wheat or rye
- feed at the same time daily for a few days
What to Do With Sourdough Discard
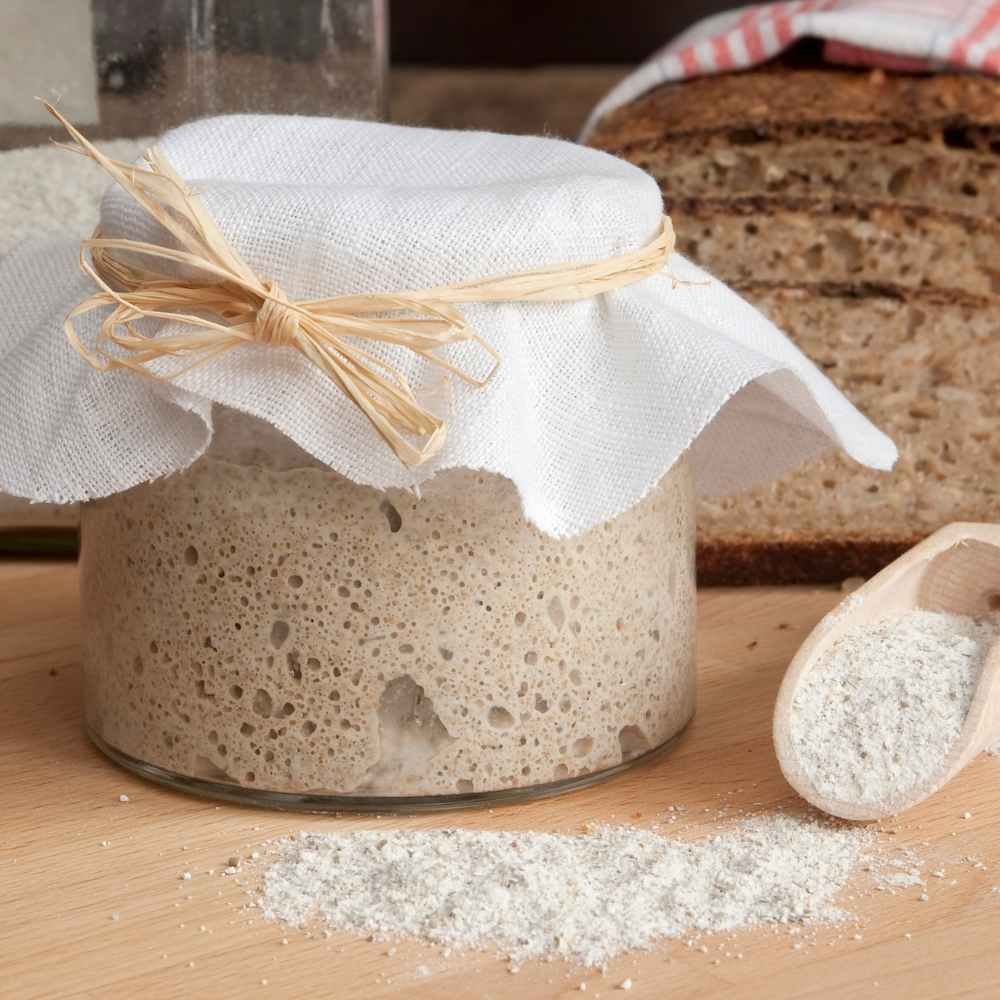
Discard is simply the portion you remove during feedings. In the early days, discard is usually not strong enough to raise bread, but it is excellent for no-rise discard recipes like waffles, pancakes, crackers, and more.
As you feed your sourdough starter, you’ll naturally create discard. Discard is simply unfed starter and does not need to be wasted.
While discard is usually not strong enough to raise bread, it works beautifully in recipes like those listed below. But be sure to search this blog for more discard recipes. We have many ways to use sourdough discard up.
Here are a few easy ways to use sourdough discard to get you started:
- Discard Sourdough pancakes
- Sourdough waffles
- Discard Sourdough crackers
- sourdough pizza crust
- Sourdough Discard Donuts
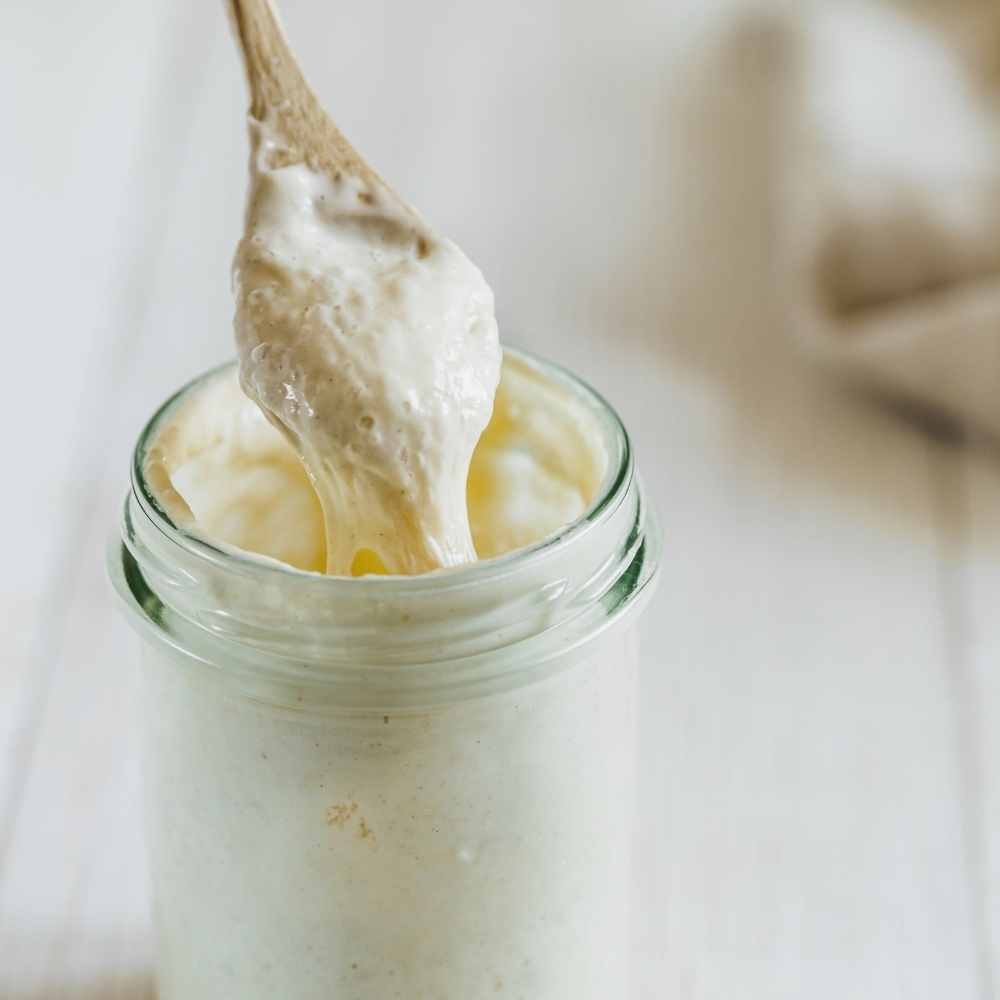
Search our sourdough section to find recipes you’ll enjoy that make use of the weak, discarded starter.
As you get further into the process your starter will strengthen and so will the discard. This gives you even more sourdough recipe options for sourdough discard.
A whole host of other baked good are in your future. It all begins here with a good sourdough starter. Here is your printable recipe card.
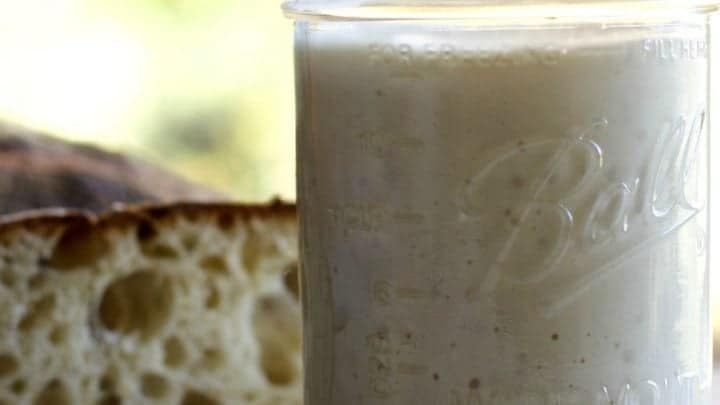
Sourdough Starter Recipe
A wild yeast sourdough starter collects the wild local yeast always found in your environment and flour and makes your own unique and flavorful starter. Once it gets bubbly you're all set to make the best sourdough recipes!
Ingredients
- 100 grams flour (1 cup of flour-4 ounces of flour)* see notes
- 100 grams lukewarm water, (1/2 Cup or 4 ounces of water)- avoid chlorinated tap water (Use chemical free bottled water if necessary)
Instructions
Tips for making a sourdough starter:
- Use a quart glass jar or a large plastic container. You will need a jar lid or Saran Wrap with a rubber band to tighten it over a jar. The plastic container should have a good air tight lid. You can also cover the container with a dampened tea towel.
- During the process of making the starter gases will expel from the container. Keep the lids loose enough to vent the gases but you need to cover the container or the starter will dry out too much.
- This is a 100% hydration starter.. By weight, you add equal amounts of water and flour. For best results please use a kitchen scale to weigh your ingredients for your starter. This is not strictly necessary for success, but most exact. You need to use the same ratio of flour to water for best results.
Day One:
- Combine the Flour and water in the container and mix well.
- Cover the container and allow to sit in a warm place (around 70 degrees F).
Day Two:
- Discard one half of your starter (about a 1/2 Cup).
- Feed your starter 100 grams of flour to 100 grams of warm water.
- Mix it together, cover and let sit 24 hours.
Day Three:
- You should see small bubbles appearing by now and the concoction will smell aromatic with a slight fruity aroma. This means wild yeast have found your mixture and are already working their magic.
- Feed your starter twice -12 hours apart- (or close as you can)
For EACH feeding: - Stir down the starter.
- Remove all but 100 grams of starter and discard it.
- Feed your starter 100 grams of flour and 100 grams of water.
- Cover loosely and let sit until next feeding.
Day Four:
- Discard all but 100 grams of starter and repeat your feeding of 100 grams each of flour and water.
- Stir, cover and let sit in a warm place.
Day Five to Seven:
By now you should see a bubbly starter with some action. The fermentation process is getting a good start.
Repeat feeding and discarding like day four.
- You should see the starter rising and falling about an inch on the jar as the day progresses.
- This means you have enough yeast they are visibly going through their lifecycle of eating and digesting the flour and water you feed them.
Day Eight to Fourteen:
- Do a dailly (or twice daily if your starter is not bubbling) feeding this way.
- Discard all but 100 grams of starter and repeat your feeding of 100 grams each of flour and water.
- Cover and let it sit.
- By day 14 your starter should double in size 8 to 12 hours after feeding at room temperature.
Tips to help Activate a Slow Starter:
If you do NOT see this rising and falling and bubbling action as expected. Try these tips:
- Repeat feeding every twelve hours as instructed in step four until your starter gets active.
- Try a warmer room and leave the container uncovered a bit to capture more yeasts.
- If you get to day seven and see no small bubbles forming in your jar try using whole wheat or rye flour for a few feedings. High enzyme content in these whole grain flours will help boost the starter and get it going.
Notes
*The ingredients listed are for one feeding. Repeat this process daily or twice daily as instructed. A ten pound bag of flour will get you through the process with flour to spare.
Day 5-7 look for these things:
The starter should be bubbled and webbed all the way through. It should have a distinct smell. Sort of sour and vinegary with a bit of alcohol headiness. It will get looser as it matures and the yeast eats the flour faster.
Continue to feed the starter daily to keep strengthening it. somewhere between day 7 and day 14 it should be getting strong enough to raise bread. The bread will not raise as well as it will after 30 days of strengthening but you are at the gates of success.
The final test of a starter: Does it double after feeding?
Once your started is strong it should reliably double in height in a straight sided container 8 to 12 hours after feeding. Once it has risen to it height its ready to bake.
The Float Test:
While not as reliable as the doubling I use it before I bake and always have good results. Put a teaspoon of starter into a glass of room temperature water. If it floats, it's ready to use. If it sinks or almost floats; Feed it again and give it another few hours and retest. It may take up to a day.
Maintain your starter:
Discard half of the starter everyday now and continue feeding it for 30 days. This will strengthen it and help you maintain an active starter. After the starter is reliably rising your breads well, you can reduce feedings to weekly. Just be sure to feed it 1:1:1 proportions before baking. We cover prepping your starter for baking in this post.
TO PREPARE A STARTER FOR BAKING:
- Once the starter is active and bubbling feed it this way to ready a starter for baking bread.
- You need EQUAL parts starter, High protein bread flour and water. Here's how I prep my starter.
- You can use smaller or larger amounts but keep the proportions 1:1:1.
- 8 to 12 hours before baking:
- In a quart sized bowl Mix together 100 grams starter (room temperature), 100 grams flour, 100 grams water (lukewarm)
- Loosely cover the bowl and set it in a warm place (70 degrees F).
- In 4 to 8 hours the starter should double in size and float in water at least 15 to 20 seconds without starting to dissolve.
Nutrition Information
Yield
16Serving Size
1Amount Per Serving Calories 23Total Fat 0gSaturated Fat 0gTrans Fat 0gUnsaturated Fat 0gCholesterol 0mgSodium 1mgCarbohydrates 5gFiber 0gSugar 0gProtein 1g
Next Step: Bake!
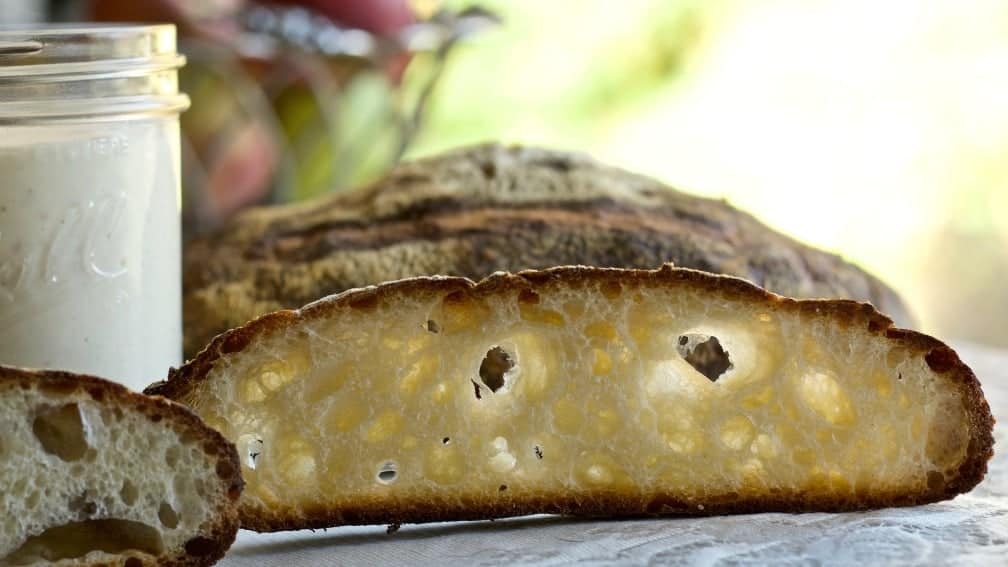
Once your starter is active, you’re ready to bake. If you’re new, start with one dependable loaf that teaches the method clearly. Our Beginner Artisan Sourdough bread Recipe / Tartine-style artisan loaf is a complete run through, step by step, of how to make a delicious, crusty loaf of sourdough with a creamy open crumb. It’s one of our most popular posts with hundreds of satisfied bakers who come back to make it time after time.
Here are some of our simple sourdough bread recipes. This is just a taste of what you can do with your fully active sourdough starter.
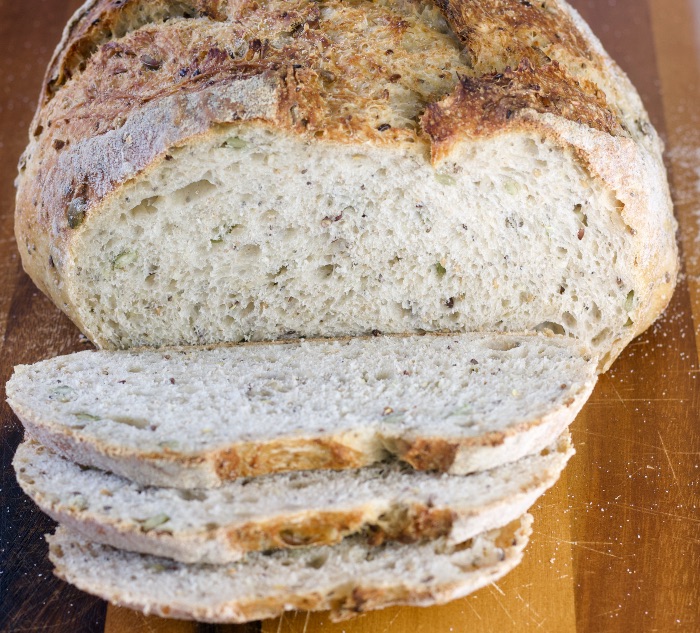
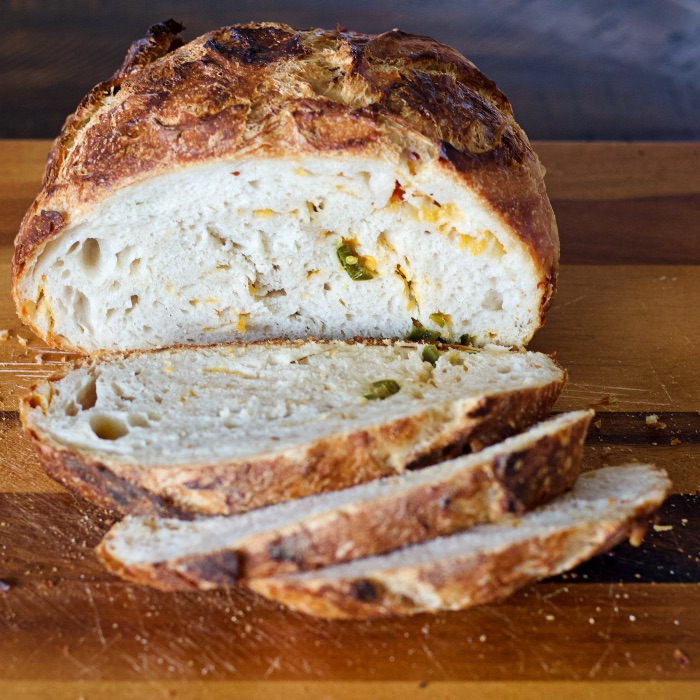
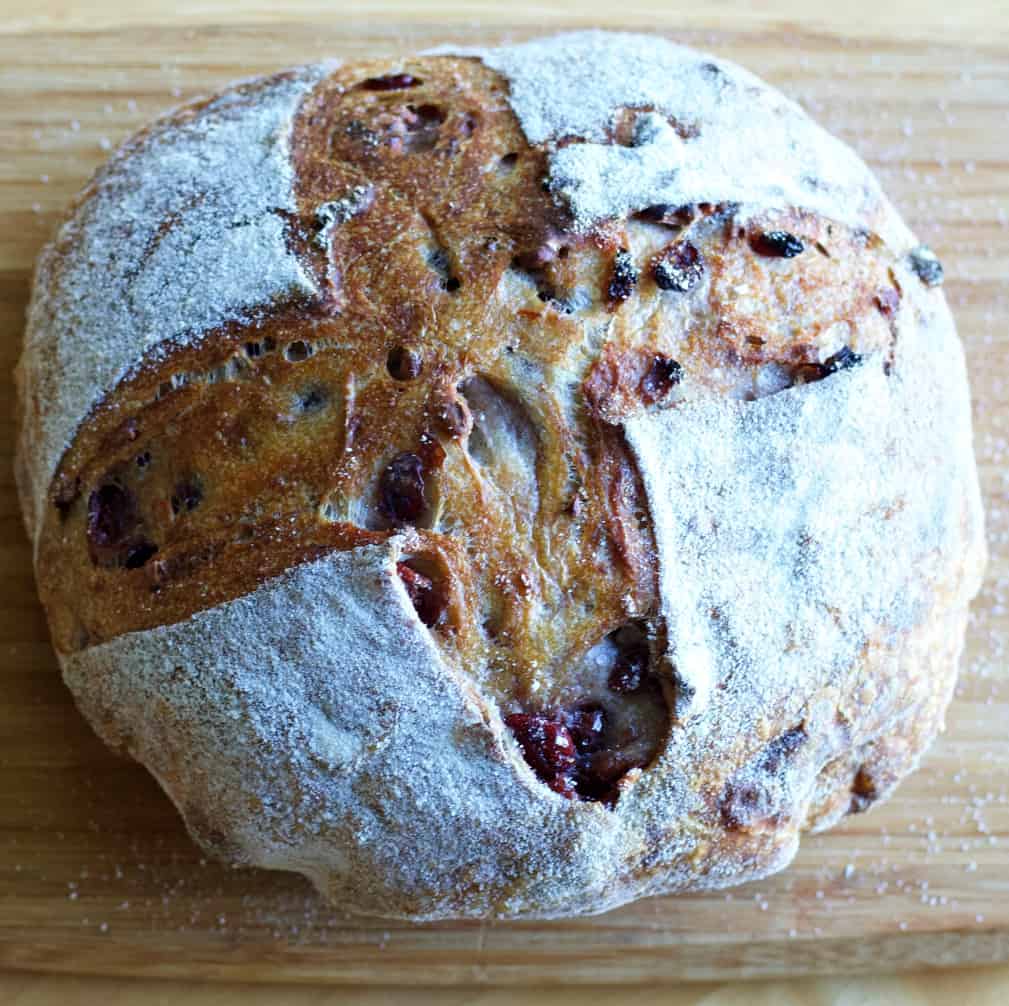
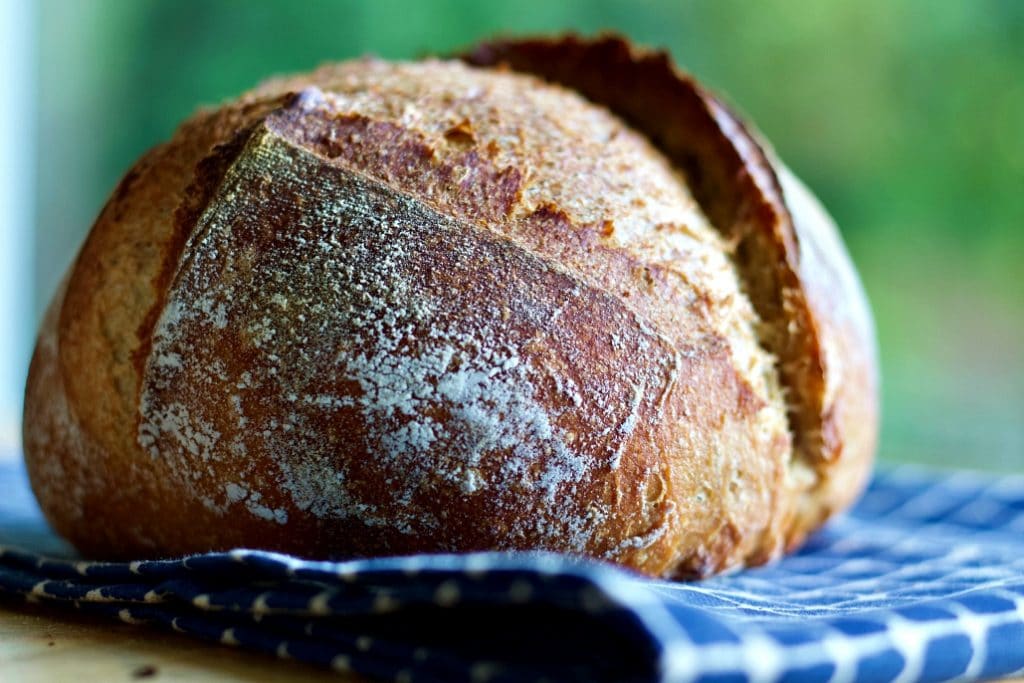
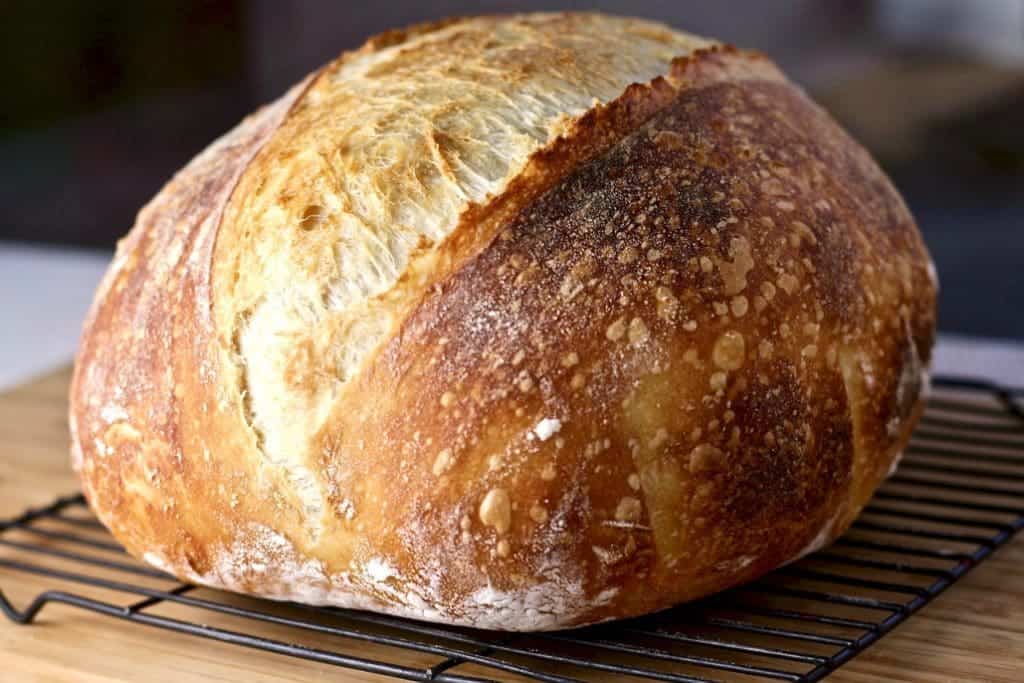
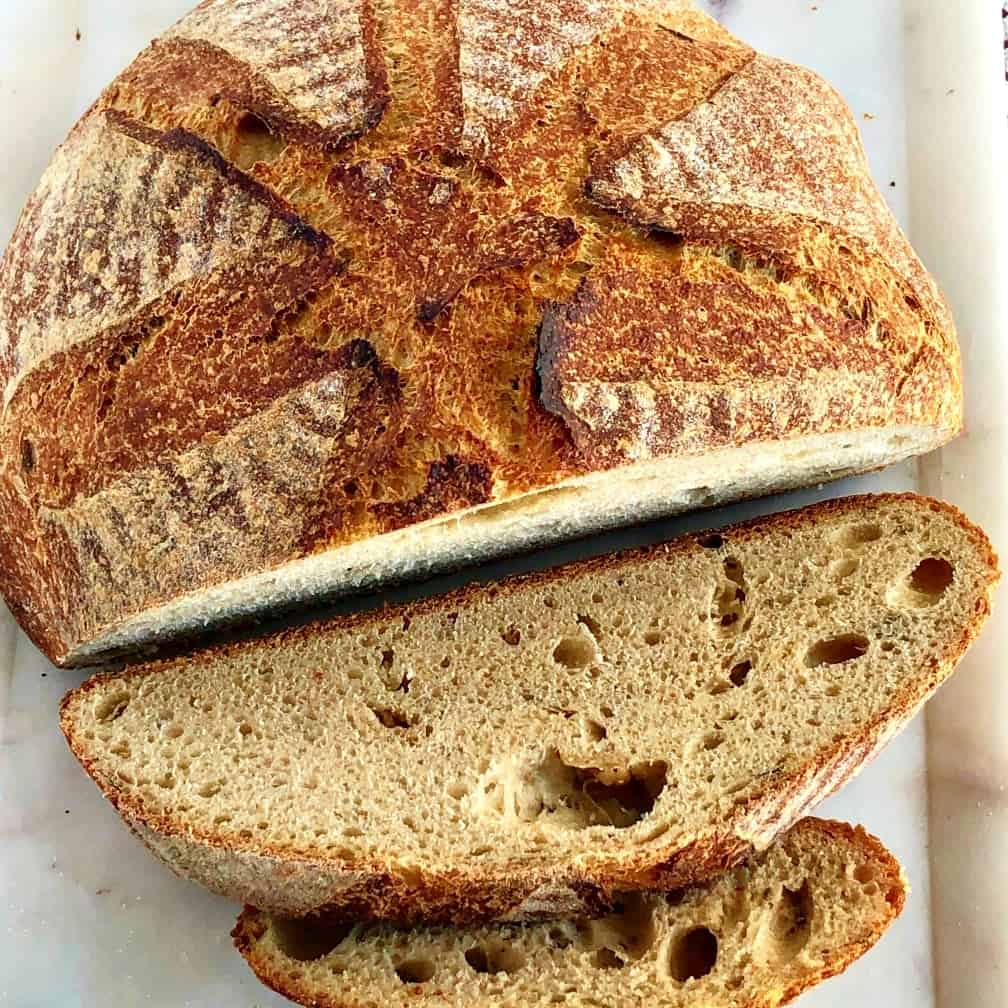
Most of the sourdough breads on this blog use this same long cold rise, no knead method. So once you have it mastered, you can literally bake SO many different bread recipes. Our Sourdough Soft Sandwich Bread is also highly acclaimed by hundreds of bakers. Sasha, our master baker offered this recipe years ago along with her Milk and Honey Sourdough Sandwich Loaf and her Soft Cinnamon Raisin Bread.
Further Reading:
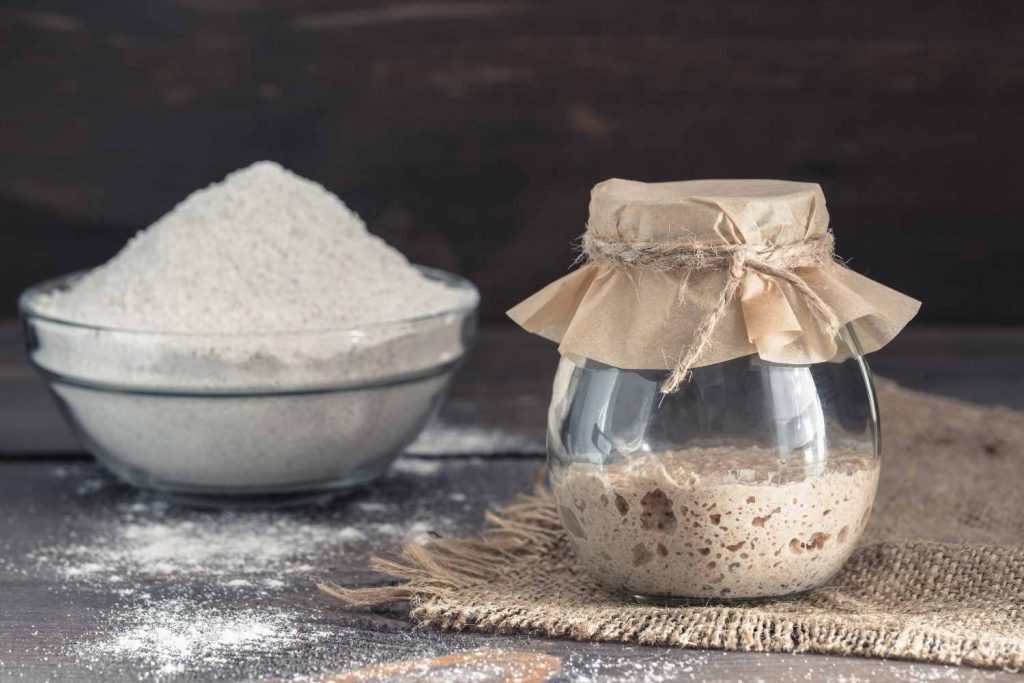
Note: Commercial yeast—often called baker’s yeast or domestic yeast—is the packaged yeast sold in grocery stores as active dry or instant yeast. It is a single cultivated strain of yeast, Saccharomyces cerevisiae, bred to produce fast, reliable rises in bread dough. While some sourdough recipes add a small amount of commercial yeast to speed up fermentation, I prefer not to use it in sourdough baking.
A traditional sourdough starter relies entirely on wild yeast and naturally occurring lactic acid bacteria living in the flour and environment. These microorganisms work together slowly to ferment the dough, creating the complex flavor, structure, and digestibility that make sourdough unique. For that reason, the starter method in this guide and our sourdough recipes use only flour and water to develop a true wild sourdough culture and fermentation process.
This simple wild yeast starter recipe gives you the basic starter you need to bake elegant sourdough loaves at home with the complex flavors that natural fermentation creates.
Flours Best For Sourdough Starter?
Any flour with a gluten content will ferment and make a sourdough starter. Unbleached All purpose flours work fine for building a new starter. They provide consistent results and are cheaper. However, You can also build entire starters on rye, einkorn, or whole wheat flours.
If your starter is weak and needs a boost, use a whole grain flour or rye flour for a feeding or two.
You can change the flour you use to feed your starter. As we discussed above this is often desirable when your starter is weak and needs a boost of enzyme action from whole wheat or rye to wake it up.
Can You make Sourdough Starter With a Gluten Free Flour?
Sourdough starters can be made gluten free. You will need a proper gluten free flour for this purpose. King Arthur Flours has the flour and the recipe for gluten free sourdough starter. If you want more information on sourdough flours and their properties read our sourdough flour types guide.
Any good quality flour with a protein content of 12 % or better will work well in most sourdough bread recipes with a strong starter.
Sourdough bread baking is very simple. But the subject of sourdough is deeply complex due to the science and history of this ancient method of bread baking.
Do Sourdough Starters Get Better with Age?
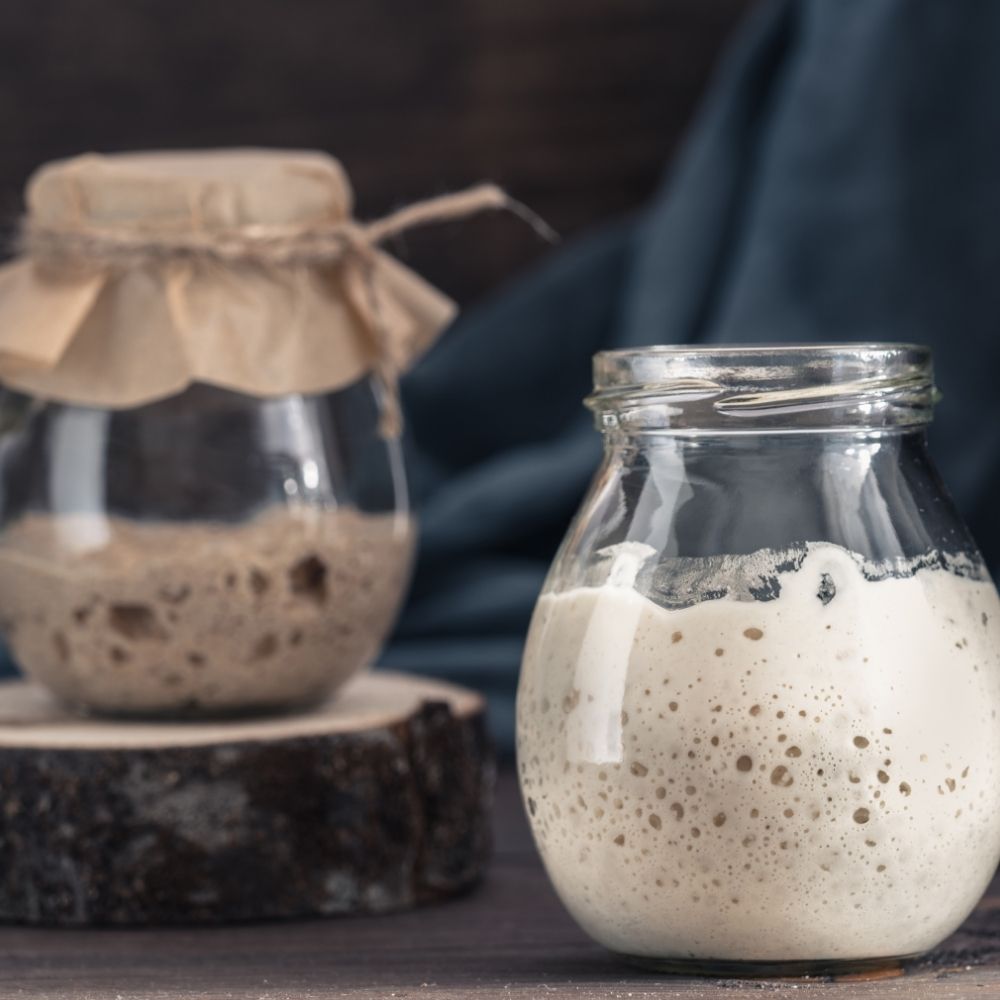
Sourdough starters do get better with age. If they are well maintained starters get stronger and provide your baked goods with better structure and flavor as they age.
Heirloom sourdough starters are passed down through the generations in some families. Some starters are hundreds of years old and still baking good bread today.
You are creating a live growing, long term kitchen companion when you make a sourdough starter. Some people name their starters and enjoy playing around with adding different ingredients to ferment in with them. Apples and potato water are both popular.
Can you Dry Out Sourdough Starter?
Yes! Sourdough starter dries out in the air quickly. You can spread the starter in a thin layer on parchment paper and let it dry. You won’t need much. Even a couple of tablespoons of dried starter can be revived into useable starter. Read Our Complete guide to drying, storing and reviving your starter in this post.
Can you Buy Ready Made Sourdough Starters?
You can buy ready made dried starters online from Etsy shops or Our baker friend Sasha linked below. These are fun to explore since they can be made in so many ways with ingredients like potato water and apple peelings.
If you are really lucky, someone will give you a piece of their starter to get you started. If it is already strong and active you just feed it and bake. Ask around your friend groups. You may be surprised who has a sourdough starter they will share or sell cheap.
Follow Us:
We enjoy meeting you on our social networks. Follow us on Facebook, Pinterest, Instagram . Tag us with your pictures of our recipes and comment on how it went for you. We would love to see what you do with them.
We often like, comment and share your posts of our recipes on our daily Instagram stories.
Ask questions and rate the recipe in the comments section below. Please share what you did with this recipe. We are always looking for more and better ways to make homemade food. Other cooks love your ideas!
Recent Posts:
If you are looking to buy sourdough starter rather than build your own CONTACT SASHA HUNTER. She sells her well established Apple Jack starter all over the U.S. It makes great bread.
If you are looking for bread info and inspiration check out Karen Kers Bread Bakers and Artisan Bakers FB group
King Arthur website is full of AMAZING information and tips on all kinds of baking, including sourdough
Further Reading:
- The Bread Baker’s Apprentice by Peter Reinhart
- The NEW Healthy Bread in five minutes a day by Jeff Hertzberg & Zoe Francois
- Artisan Pizza and Flatbread in Five minutes a day By J Hertzberg & Zoe Francois
- Tartine Bread by Chad Robertson
- Tartine Book 3 By Chad Robertson
RESOURCES:
I think a common theme with people asking about the float test, and people saying theirs doesn’t float is that it should be mentioned that the float test should be done when the starter is at it’s “peak” after feeding. I didn’t realize that when I first started and kept testing mine just before I’d feed it, I went nearly 2 weeks of feeding and testing at the wrong time. It matters a lot that it’s at its highest and not just any old time. Just the same as when it’s used, it needs to have been fed recently for most recipes.
Hi Monica, Thanks for adding this tips for our bakers. Have a great weekend!
Thanks for the response! My starter is rising but has stopped floating. I decided to wait to give it a chance to get stronger. Sorry, more questions: after day 5, do we feed it once or twice a day. Also, do we weigh the water at 100g as it says for making bread? or do we use liquid measure of 4 oz. Thank you so much for the support.
Hi Frances, It’s my pleasure to help you get your starter going. Since it has stopped floating I’d feed it twice a day in the proportions of 100 grams starter to 100 grams flour to 100 grams water (80 degrees F). Once it’s doubling every 5 to 12 hours try floating it again.
More things to try. Use a higher protein flour like King Arthur 12 % flour (read labels) or any bread flour with 5 grams or more protein if you can find it. And use one third (by weight) whole wheat or rye flour. They will help build strength in your starter. Normally I wouldn’t worry about the flour in starter so much but your starter may need a boost.
It’s getting close I’m sure. Also watch room temps. If they get above 80 degrees your starter may be exhausting itself before it strengthens. Try to cool it to 70 to 75 degrees F. if possible.
I’m on day 9 or 10 of my sourdough starter and it still doesn’t pass the float test. I’ve been feeding two times a day, my kitchen is roughly 68-70 degrees. Am I doing anything wrong or is there anything I can do to help it?
Hi Rachel, At this point let’s go beyond the float test. Does your starter double in size after 5 to 8 hours in a straight sided jar. (mason jar)? Are there bubbles and stringiness? (gluten strings)? If not I’d say your flour may be too weak to build a starter on it’s own. At this point if you have whole wheat or rye flour do a couple of feedings with it.
If you have bubbles and strands then your starter is out of balance and can’t float even though it is strong.
If you are getting ready to make bread BEFORE you float the starter feed it by weight:
100 grams warm water
100 grams flour
100 grams starter
If you don’t have a food scale I highly recommend you get one. Sourdough baking is a TON of fun but a bit of a science project. You need to measure by weight not volume.
I hope something here helps. Don’t give up!
Join the Perfect Sourdough Facebook Group for more help. The bakers in there have endless ideas on baking sourdough.
Have a great weekend.
I’m on day 5 and my starter is floating! Does this mean it’s ready to bake or do I continue feeding for another 9 days?
Hi Frances, That’s awesome! Is your starter also doubling in height in a straight sided jar in 50 to 8 hours? If so you are ready to bake. Can’t wait to hear your results.
A brand new starter will not give quite as much rise so keep that in mind. But you’ll love the bread anyway. As your starter gets stronger the bread rise will get better.
Be sure to feed your starter as described the night before baking. Have fun!
When I have an active starter and want to put it in the frig. Do I need to take it out and feed it periodically?
Hi Rachel, Yes. About once a week to keep it active. If you forget about it for a few weeks it will get very hungry and build a gray “hooch” on top. Just stir it in and feed the starter several times at room temp (unless your over 80 degree F. then put it back in the fridge.).
When you want to bake bread you might need to strengthen the starter if it’s been left too long by feeding it a few times. Your starter should be doubling in bulk every 5 to 8 hours before baking with it. And it needs to pass the float test.
Good morning ladies. I am enjoying making the sourdough bread. My first two attempts were not that great. I also tried pizza crust. It was also OK but not that great. So now I am trying your beginners sourdough loaf. I have a lot of starter. I have not been discarding any. Just trying to use it as it makes. I was hopping that these recipes would use more starter. Now I have several cups just waiting for something to do. Should I just put it in the fridge for later? I have been doing the 4 oz of flower and water. Just got a scale. Just the two of us so we don’t eat that much bread.
Hi Patrick,
We’ll be interested to hear how this recipe turns out for you. It produces a really good artisan bread with a crusty crust and moist tender open crumb. I have a batch cold proofing right now.
Sourdough starter does tend to stack up. When I first started baking sourdough I wouldn’t throw any out and didn’t have discard recipes. So I had a LOT of sourdough too. Like you there are just two of us now to feed. I was also overwhelmed. Here is what I learned:
First go take a look at our sourdough starter recipe. I revised the post to help reduce the amount of flour used since we are now in flour shortage. It’s smart to make only a little anyway once your starter is strong. Who needs gallons of starter? Who wants to throw away all that flour?
And yes you can just put the fed starter in the fridge when you don’t want to bake. I leave mine alone in the fridge for a week or more without feeding it.
The night before I want to make a sourdough recipe I feed it as described in the “starter” post. The rest I use in discard recipes or return the extra fed starter to the fridge.
We have SEVERAL excellent discard recipes in our sourdough section and we put up more all the time. You will find even more discard recipes by looking on the internet.
Some of my favorite sourdough recipes are made with the discard so play around with your discard. Consider it another useful ingredient in your kitchen.
I also learned to freeze sourdough breads. It freezes very well for up to two months in the freezer. It makes nice foodie gifts too.
Hope this helps! Happy Baking.
I must have over hydrated at the beginning. I am trying to make loves but it was way to sticky to roll out. So I put it in the bread pans and it is now rising. Guess this is part of the learning curve. In the large mixing bowl with everything in, I put it outside in the garage over night. It did not raise much after that. It has been in the pans for about 1 hour and not much is happening. I am hopping something will happen within the next hour. If not what should I do?
Hi Patrick, High hydration sourdough is VERY sticky. Try our soft sourdough loaf or the milk and honey sandwich bread for more robust dough. They are sticky but not so much.
Also measure by weight not volume. This will really help you dial in on the amount of hydration you are comfortable working with.
You can add more flour to your starter and you can use more flour when you actually manipulate the dough for sandwich bread.
The beginner tartine bread is a very delicate open crumb loaf. More suited to eating at the dinner table in slices warmed with butter. It also makes dynamite toast and panini. Kinda tricky for rolling out. I have done it but it is not as easy as our sandwich breads.
With experience you will learn what works best for you. That also applies to your starter. Feeding as described in this post will maintain it and your starter will strengthen over time. Building a starter from scratch takes time. Now you know why they are handed down through the generations. 🙂
Hi, I’m not sure if I’m doing this right or not, so I have some questions: when it says to discard when is it ok to use the discarded mixture in a recipe? Does it need to be older and/or pass the float test? I keep feeding and discarding, but all I ever get is small bubbles in the mixture, and it’s very thick. I’m hopeful I have something good going on but I’m not sure. Also, it doesn’t rise and fall like it says in some of the tutorials online. Is that ok/normal? Any help would be appreciated. Thanks much!
Hi Joan, You can use the discard in a recipe after it floats if it needs “fed” discard. For unfed discard recipes you can use the discard after the tiny bubble stage. (you may be there from the sounds of It). NOTE: As you starter ages it will get better, stronger and more flavorful. So it will give your discard recipes more than it can now. But if you don’t need a fed starter you can still use it.
The consistency should be like a pancake batter. NOT doughy but also not watery. HOWEVER, expect your starter to grow and change over time. This is a dynamic process. I understand it can be confusing but if you have tiny bubbles it has begun.
TRY THIS:
MARK the level of the starter and wait 5 hours. You should notice it has risen at least somewhat.
At this stage it’s pretty well ready to use in all “fed “discard recipes.
Best of luck. Please let me know how it goes.
So I’ve fed it for 3 days and have a big bowl full, its also very thick, like a wet pizza dough.. something doesn’t seem right here..
Hi Crys, are you using a digital scale to properly measure your ingredients by weight? This has a huge bearing on getting the consistency correct. it should not be as thick as dough. more like a pancake batter. NO WORRIES though. For the next few feedings adjust the feedings to more accurately reflect the recipe. It will loosen and ferment just fine. it’s already started but it probably is not too easy to stir and can’t build the bubbles you are looking for.
One Other possibility What type of flour are you using? They all work but a heavy whole wheat flour will be much heavier than all purpose bread flour. You can certainly use it but please use a scale to weigh or just stir in enough warm water to make you pancake batter consistency.
Don’t throw it out. it’s doing fine just needs some adjustments. If you don’t want that large of a quantity you can discard up to half and keep feeding it as instructed. But it is best to just use the amounts instructed and let it grow until it’s strong enough to bake with. After that discard and feed on a regular basis.
I can’t wait to see your first bake! Tag us on instagram with your pics. We would love to share your work. Happy Baking!
So its been 7 days, i started with 4oz of organic whole wheat flour and have been discarding half and adding 4oz each of AP flour and distilled water every day at 2:15. It is much looser now, and gets a liquid on top, but still smells lile flour amd water. I did the float test today and it sank lile a rock lol. My house is between 67-70° I’m hoping that’s why it’s taking longer. I started another one today spiked with brown sugar and a tsp of yeast as I’m in self isolation and getting impatient lol. Did i do something wrong to start? Should i start feeding it 3x a day? When you feed 3x a day are you discarding half each time?
I know your getting impatient Crys lol. I’m right there with you. I’ve been baking bread and rolls all week in quarantine.
Your wild starter is going to be fine. Eventually. For a few days go ahead and feed it two or three times a day without discarding. This should help build the fermentation. You SHOULD be seeing small bubbles form in the starter. This means the process has begun.
For the new starter. Take part of your old starter and use it to “spike” the new starter with wild yeast to help hurry the process. I’m sure this starter will grow faster. I’d still keep the old one to experiment. Especially if it has begun the process. Yeast and sugar will help but you need that fermentation too.
Hope this helps. In the meantime bake yeast breads. 🙂 Have a great day!
Hi. I’m new to sourdough baking. What does it mean when the recipe calls for starter with 100% hydration? Is it using 40 grams of starter, 40 grams of flour & 40 grams of water, mixing them the night before & use it to bake in the morning (after passing the float test)? Thanks for your help! Your bread looks good!
Hi Eddy, 1 to one to one is 100 percent hydration so that is the proportion you are using. It should work great once it’s active and floats. Happy Baking!
whats 1 to one to one?
Hi Aida. That is about proportions. So if you use 100 grams flour also use 100 grams water and starter. If you increase or reduce the amount of one ingredient just do the same to the others.
I didn’t know about discarding half so by day 5 my starter sunk like a lead balloon and was like thin soup. I discarded the whole thing and I’m starting over ?
Hi Beth, Oh No! Better luck this time. Yours does sound a bit questionable for a new green starter. This time Make sure you are using the best flour. Also this time of year it may be getting too warm. If you kitchen is at 80 degrees of more all the time try feeding it twice a day. Those little yeasties get hungry in warm weather. All the best!
Also give your starter two weeks before you give up on it. Five days is very early to expect your starter to be ready for baking.
Thank you do much. I think I just didn’t know what I was doing. So now it’s day 1 and I watched all 14 of the videos so I’m giving it another try.
I must be patient is my new mantra. I keep my house at 78 all day and 74 at night The starter is next to my fridge do I think the temp is okay. I will not hive up ??
Excellent. Best of Luck Beth. I’m sure it will go fine this time. We are here to help if you have more questions or concerns. Can’t wait till you get to try baking an authentic sourdough bread. It’s so worth it!
Just an update: I made 3 breads with my starter and they really taste good. Today I did the float test with two new starters ( and this was really my first attempt at floating since my first starter sank like a lead weight ?) and they were both gloating like Olympic swimmers!! I was as excited as I was when my oldest took her first steps. It is really an exciting thing. I’m addicted!!
Hi Beth, Oh YAY! I know that excitement. Sourdough is a wonderful hobby and way to eat. Thanks so much for the update. Happy Baking!
Hi I’m a little confused so I looked into your sourdough recipe and came here to learn about the starter
here you state:
TO PREPARE A STARTER FOR BAKING:
Once the starter is active and bubbling feed it this way to bake bread. You need EQUAL parts starter, High protein bread flour and water.
For example:
100 grams starter
100 grams flour
100 grams warm water
is this the final step before adding it to the sourdough recipe? Or is this a different bread recipe all together? Sorry if its a dumb question
Hi Miranda,
I’m sorry for the confusion. I’ll look into making this more clear in the post. This final process is what you do when you are preparing your starter for the bread recipe and need a good float.
Your starter can sit in your fridge after it’s active as I instruct in the post. You can occasionally feed it on the fly and be a bit sloppy about it. So your starter over time can get out of proportion. This is fine as long as you are only storing or using your starter for discard recipes.
For a successful bake you need to get the proper proportions correct as I mention above. I hope this helps! I’m happy you asked and please let me know if you have any other questions.
Hi I am trying to make my wild starter and I’m on day 8 and it’s not even remotely floating. It is bubbling and has the strong Ordors you described? Should I just toss it and start over or keep waiting
Hi Crystal, I think it’s getting going! Bubbles and smell (if its a slightly sour and/or yeasty smell) are good signs.
Tips To get a young starter ready to bake bread:
Try feeding it about two or three times a day in the ratio of one to one to one. For example 100 grams of starter to 100 grams of bread flour to 100 grams of warm water. BY WEIGHT. Volume weights will not work here. promise.
Also try using a whole wheat or rye flour for about half of the flour. These flours have enzymes that help the starter get going.
An 8 day old starter is still VERY young. Give it time and try the steps above. It should come to life this week. Keep it at room temperature (not over 90 Degrees F) and feed it.
Try the float test every day and see if it starts to lift in the glass of water. You should be able to see some lift by weeks end.
In the meantime you will develop a LOT of excess discard starter so look around for recipes to use it up. One of my favorites is white chocolate sourdough cookies they are so good! Also sourdough pie crust and plenty of other recipes on the blog to get goodness out of your discard. Don’t throw it out!
Let me know when you are ready to bake! If you have more questions I’m happy to help. Have a great day.
I am very interested in learning how you dry/dehydrate your sour dough starter
Hi Jackie, Sourdough starter is very easy to dry. Just smear it thinly on oiled parchment paper. It will dry in an a few hours or so in a warm dry well ventilated room. After the starter is thoroughly dried is will be easy to remove from the parchment paper. Seal the dried starter in an airtight container or vacuum sealed bag so no air gets to the starter. It stores in your freezer for several months. Hope that helps! Enjoy your Memorial Day weekend.
Hello, when you dry your starter how do you use it to make bread? Thank you for your time
Hi Debi, Here a link to a really useful complete article from King Arthurs Flour on how to reconstitute dried starter. It covers the whole process. I think you’ll find your answers here. Have a great day!
Hi, this is going to be my first time on this and my doubt is: should I use another type of clour (centeno flour or any other)?, or should be all purpose flor?. By the other hand, I use water from tap but is filtered (reducing bacterias). Would be fine to use this type of water or where do you find non-chlorine water?.
Hi Silvia, You can really use any flour you have on hand that has gluten in it. I use all purpose and slightly warm warm to start. I add in whole grain flours too. They will all ferment. But differently so you have to get some experience there. Your kitchen temperature also has a lot to do with how long it takes to get the wild yeast growing.
Your filtered tap water is fine. You can let your tap water sit for 24 hours and the chlorine will evaporate off. Otherwise any bottled spring water from a good organic source will work. But I think you will be fine just using your filtered unchlorinated water. Give it time and Let us know how this works out for you!
thank you for all the wonderful information
I followed all the instructions and have successfully made a starter and today Im gonna try and make the bread.
I have been feeding my starter regularly each morning sometime between 5am & 7am
So Im a little confused when to feed the starter on the day you want to make the bread.
I fed my starter this morning as usual, then had some errands to run.
Then around 11:00 I tested my starter today and it was active, passed the float test
So I put together the ingredients for the Autolyse stage using 200g of my active starter SO here’s my question, when do I feed it again.
Do I just leave the remaining active starter to ferment rest of the day and feed in the morning at the usual time
OR do I feed the remaining starter right away getting the volume back up to the normal amount?
then feed it a second time tomorrow morning?
Hi Victoria, Yay on your getting started on the sourdough journey! I can’t wait to hear how the bread turns out for you. As far as the starter feeding goes….it depends on what you plan to do with it.
If you are planning to bake back to back bread batches then keep it fed at least once a day. and up to three times a day for a quick boost to the float stage.
If you plan to rest the starter for a while. Store it in your fridge in an airtight container and feed it once a week. Then when you plan to make bread bring it out of the fridge and feed it every 12 hours or so until it passes the float test again. Remember many sourdough discard recipes like pizza dough and Our sourdough pie crust, sourdough pumpkin muffin, and sourdough waffles use up any pesky discard starter you create in the process. Hope that helps. Best of luck!
ok, thank your response
sorry, I sent you a second email on the exact subject, I thought that I didn’t do it correctly the first time
No problem 🙂
Hi! I have been trying to make sourdough since years but never have been too successful, even taken a class..my fault is that I try to make it 100% whole wheat or gluten free..decided to retry making a good sourdough from scratch using 100% whole wheat flour… now I live in a part of India where current temperatures are reaching 104f and will soar higher..my batch is getting very bubbly and sour , I feed it twice a a day and today is day 4-it didn’t pass the float test-it doubles in size, has big holes and is smelling quite sour..day 1 it had a small pink streak, so i removed the top layer and started feeding it twice a day and now it looks like bacteria is contained..my question-what do I do about the heat? Also it’s getting very bubbly and smells sour but no sign of floating..any tips for whole wheat flour starters and hot climates? Thank you!
Hi Meghna, Yes you are setting yourself up to a high challenge for sure. The high heat, your beginner status and the ingredients you are using means you have to do some studying. Happy to help. If your house is air conditioned to under 80 degrees F. You should be able to grow a decent starter. If your room temperature is over 80 degrees F you need to get the temperature of your starter down.
TIPS: You can use an ice pack to cool your starter in it’s container so it does not eat too fast.Feed your starter 3 to 4 times a day and keep it on the thick side. Your wild yeasts are hungry at those temperatures.The sour smell and bubbles, especially if it’s thin mean your starter is hungry. Whole wheat also has a lot of enzymes and will make you starter even more active. Slow down the fermentation with a lower heat and add in some all purpose flour to slow down the process. It’s working too fast right now. I recommend you join the Perfect Sourdough Facebook Group if you have FB. Is a group full of bakers of all climates and experience from everywhere in the world. LOTS of great Indian bakers in there. Best of luck!
Your ingredients just say water and flour! But directions say the following: “Stir until the brew is mixed well and not very lumpy. Cover loosely. Not a complete cover so the yeast can get in”. My question is how much yeast do you use??
Hello Jacquie,
There is NO additional commercial yeast added to this starter. ALL the yeast gets in through the air (it’s there) AND from the yeast already available in your flour. That is wild yeast. This is a bit of a ‘magic’ recipe. The yeast will be attracted to the starter and slowly build its population in your perfect (for yeast) flour and water brew. It slowly ferments and that’s how it builds and matures. I’m so sorry for any confusion in how I stated this in the recipe. Have a great week end!
Thank you so much for clearing me up on that one! Now I can get started on my very favorite bread. Have a great day 🙂
Same to you Jacquie. If you have further questions along the way please let me know. I’m happy to help.
This is my first time making this so, is my starter still good it if has a pink tint to it?
Hi Pam, I have never had a pinkish top to my starter. So i went hunting and found this thread in a bread forum for you. It is possible this is ok…and then agin not. The best advice I see is to carefully scoop off the top layer and use some from the bottom of the container to restart your starter. It may be mold or it may have been contaminated with bacteria. This thread may help you decide what’s going on in your starter jar. Thanks so much for asking your question here. We would love to know how this turns out for you. Bottom line. Don’t bake with this starter until it is rebalanced. Good luck!
Thanks for the quick response. I decided to toss it and start over. Not willing to take any chances. I’ve always done starters with yeast, but not this way so that is why I was asking since I’ve never seen it in my other starters..well going to try again..
Thank you
Hi Pam, just a thought. If your house is VERY warm due to summer temps bacteria can get a foothold in starter quite easily. Also frequent feeding and aration of the starter can help keep it properly fermenting. Try to keep the starter at 75 degrees or so for prime fermentation. If it gets into the 85 to 95 degree F range bacteria are quite happy to populate the batch. Good luck!
I have been using a purchased starter for a while now. I would like to try this wild yeast one. After the 1 st 24 hours you start feeding the starter. I assume you pour 1/2 of the original starter out befor you feed it. I this is not correct, please let me know. Thanks, Barbara
Ho Barbara, Yes to contain the quantity of the starter you must discard at each feeding. Otherwise you will create a TON of starter 🙂 Thanks for the question and please let me know how it goes and if you have further questions. Have a great day!
My kitchen is very cold, around 56-61 degrees. I started a starter about 4 days ago and have placed it in my living room where it is warmer, about 72 degrees. It seems to be active but slow, smells and looks fine. Would it be suffering because you would find more wild yeast in a kitchen rather than a living room? Could the temperature not be right or should I just put it back in my cold kitchen?
Hi Moxxi, A cold kitchen will definitely inhibit the yeast growth. I think your living room temps are just fine. There are other factors to consider in growing your starter. TIME: It takes up to two weeks to grow a proper starter from scratch with wild yeast. Molds: If your containers have even the slightest contamination by competing molds or bacteria it may be inhibiting your starter yeast and bacteria from forming. If the starter has an alcoholic or fruity smell that is fine. That means it’s going great and just needs daily (or twice daily) feedings to keep it fed in your warm place. Growing a wild yeast starter is so worth it. I love my sourdough breads from this starter. They have incredible texture and flavor. Keep going!
Here is a video series link by Teresa Greenway on how to make your sourdough starter. She takes you through every single step of this process. You might find that helpful.
https://www.youtube.com/playlist?list=PLDqMWhgSTguGZFILq0CwgMyIZ-GgAkT3z
Very nice! Love this!!!
Thank you Karen. I’m so inspired by your Artisan bread FB group. I really appreciate the expertise there. So helpful.