
Easy Whole Wheat Sourdough Bread Recipe
As an Amazon Associate and member of other affiliate programs we earn a small commission from qualifying purchases through our affiliate link. For more information read our Entire Affiliate Disclosure.
This Tartine style no knead Whole Wheat Sourdough Bread recipe is wonderfully nutritious and delicious. The long cold rise aids the fermentation of the dough and improves digestibility, making it a great choice for many. Sourdough also contains higher amounts of vitamins, minerals and antioxidants that commercial breads.
With our tips you will have great success in baking Whole Wheat Sourdough Bread using either white or red wheat berries. Please also check out our baking guides. You will find them all in our Sourdough Baking hub.
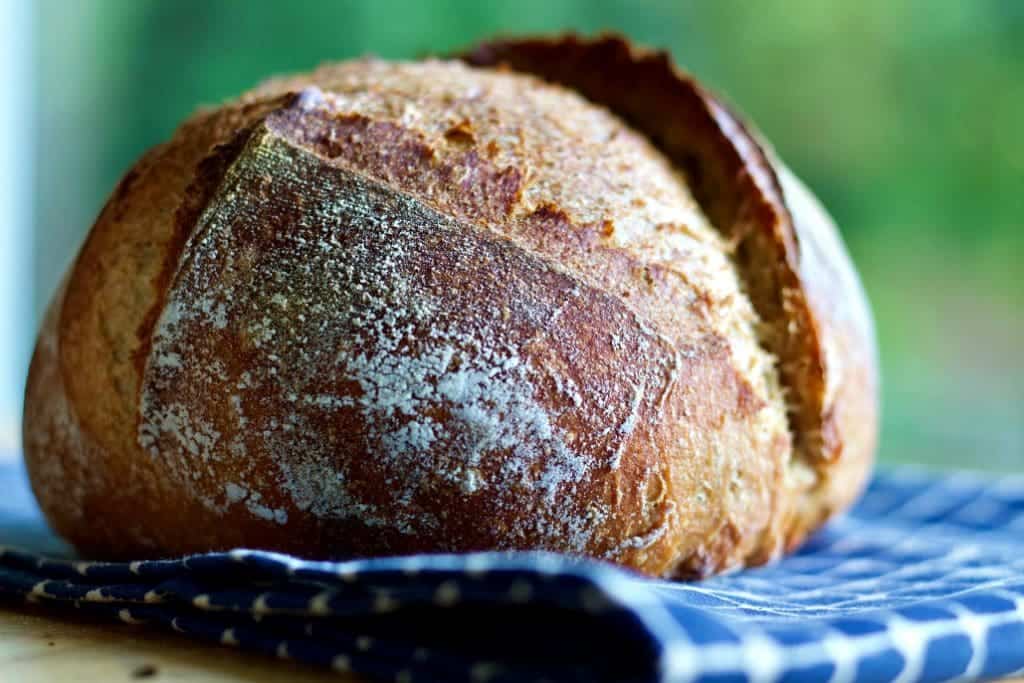
How does Whole Wheat affect Sourdough?
Using whole wheat flour will add more flavor, fiber and protein to your bread loaves. The color will be noticeably darker and the structure may become a bit denser, but won’t negatively affect the crumb of your loaf.
Some folks prefer the flavor that whole wheat brings, as it will increase the nuttiness and richness of the bread. Others prefer only adding a percentage of whole wheat flour into the dough, rather than making a fully whole wheat dough.
Technique Video
The video shows you the techniques used in making the tartine style sourdough recipe and every step in order. The video dough is not a whole wheat flour bread but it a great technique video for all sourdough breads.
It’s all the same process for the Whole Wheat Sourdough Bread method, except for the slap and fold method which is described further down this post.
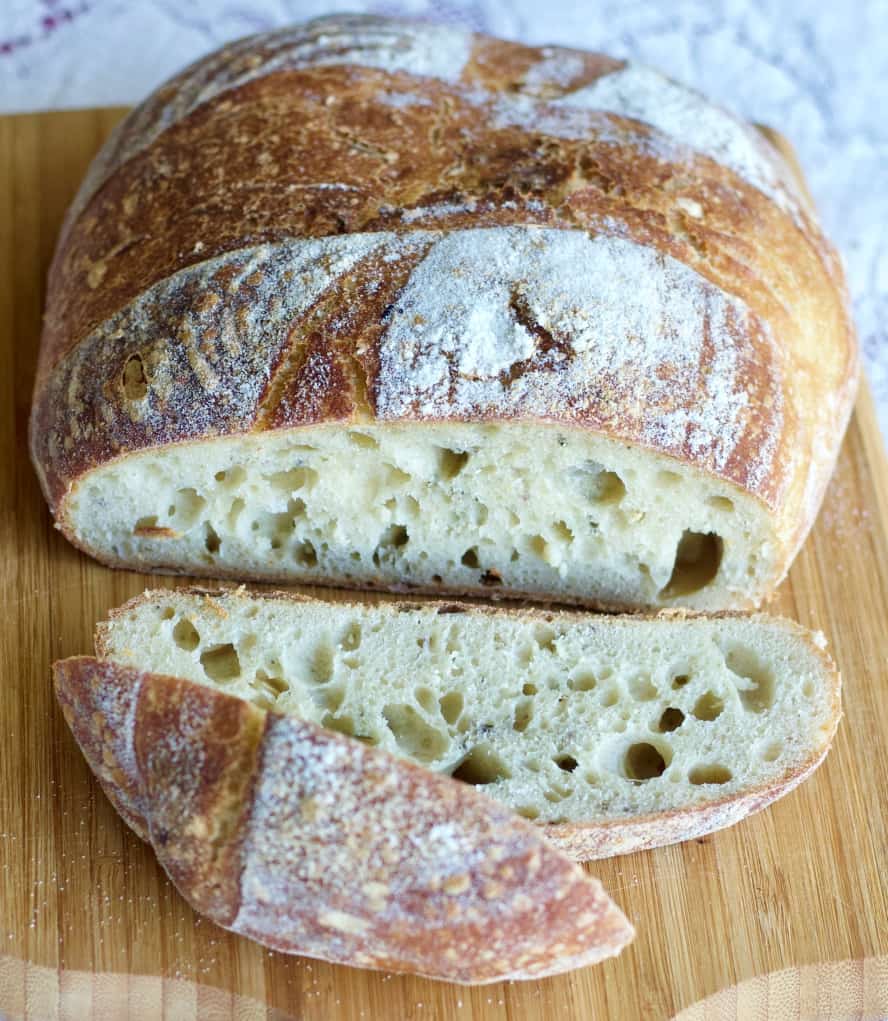
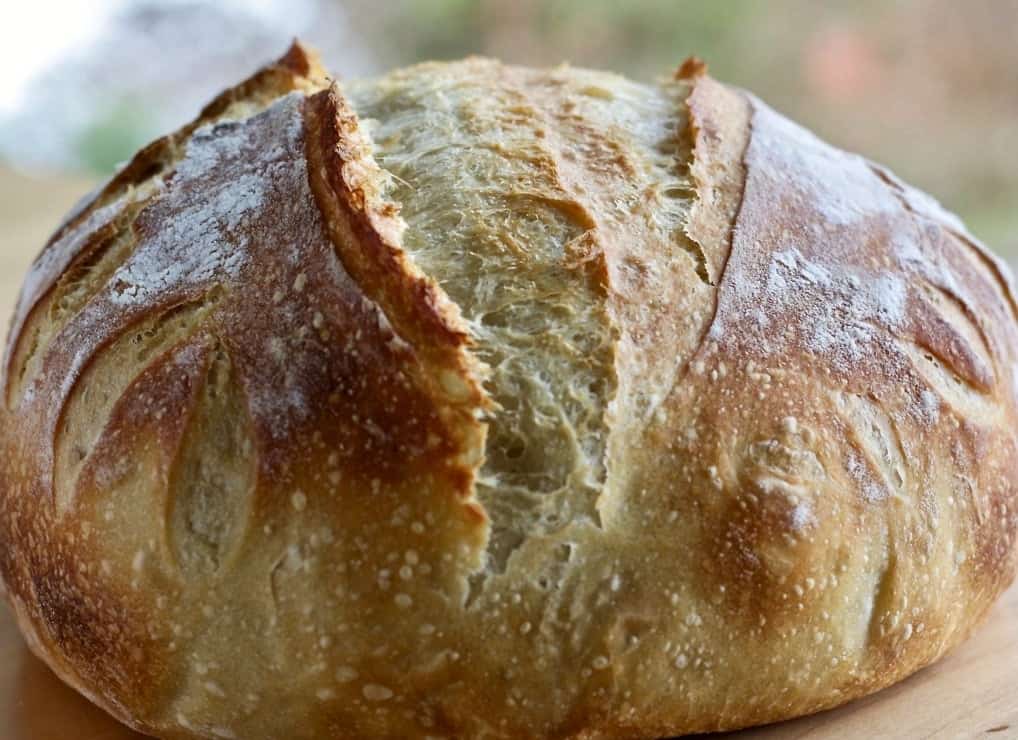
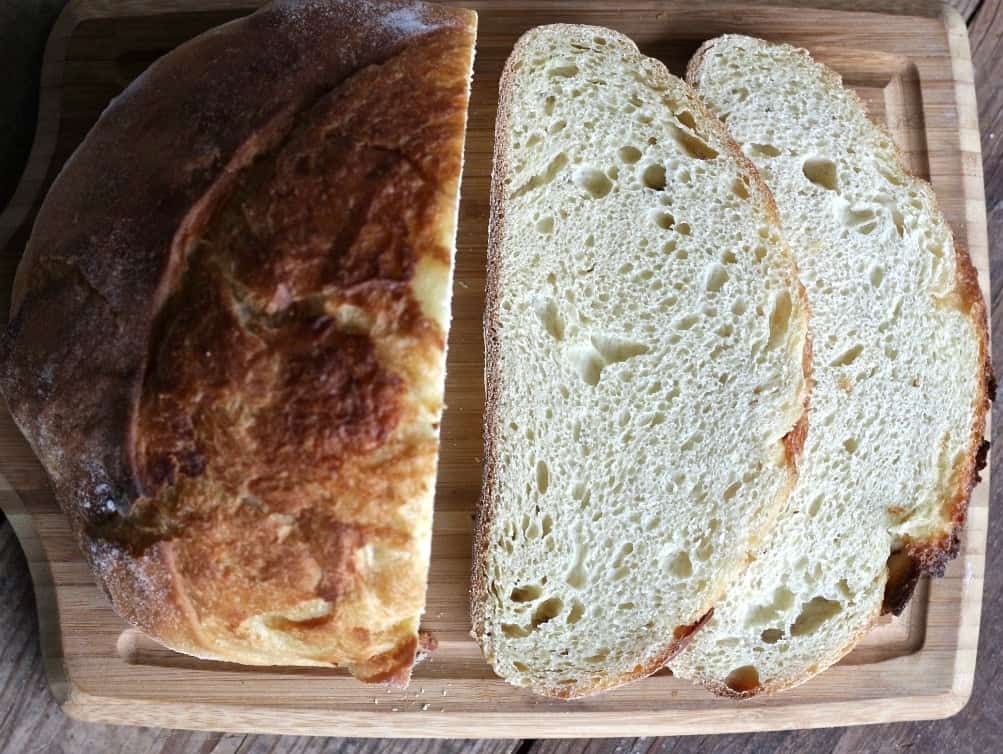
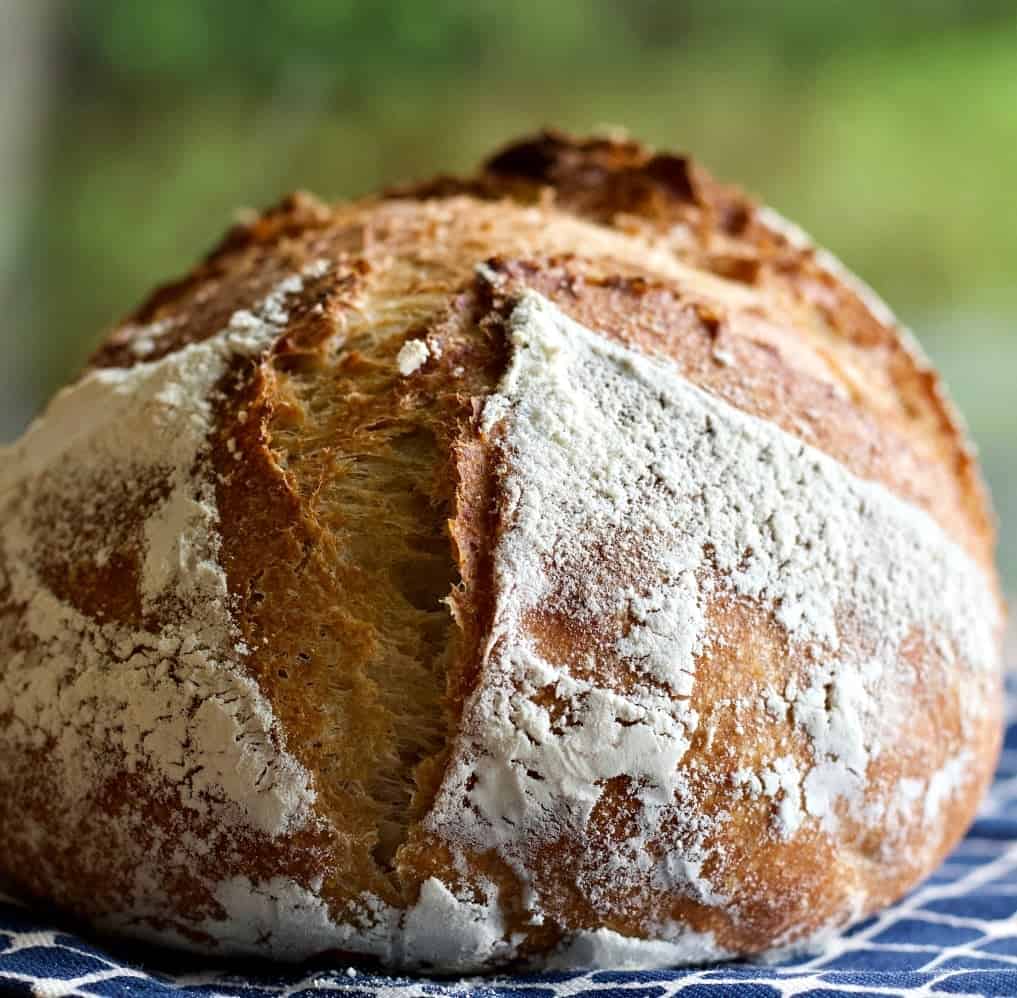
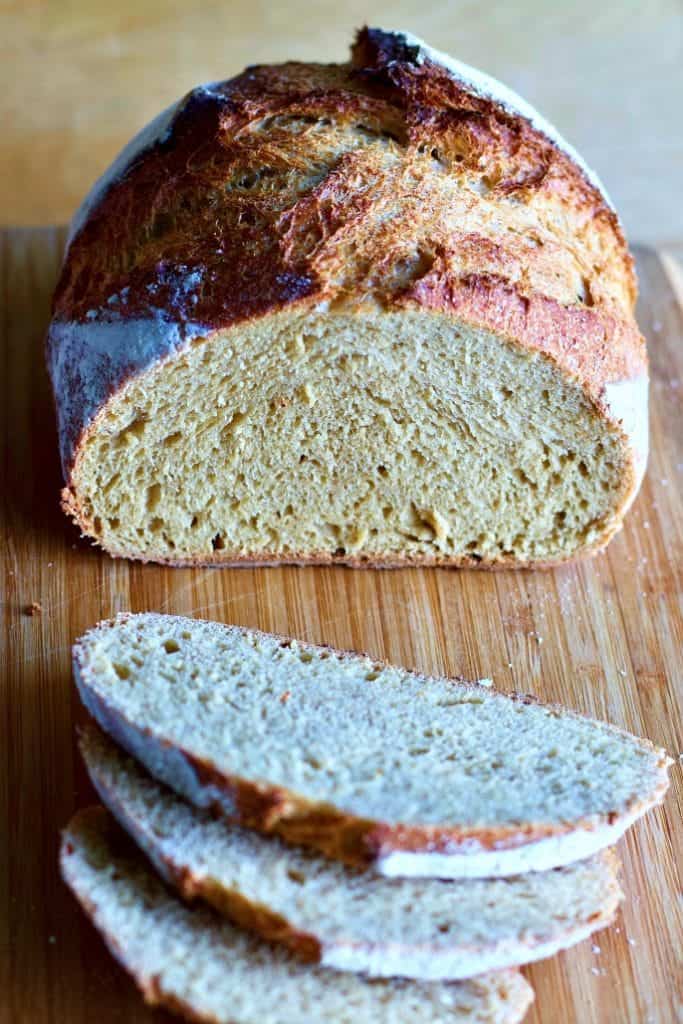
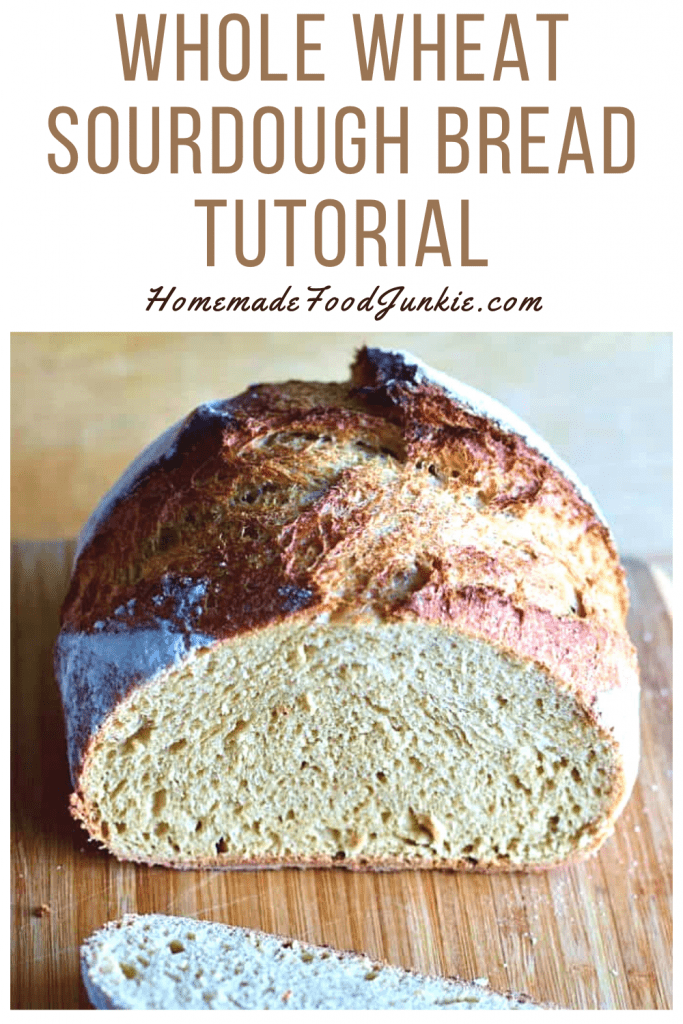
This white whole wheat loaf is beautiful with a nice amount of rise, moist flavorful crumb and it’s extremely nutritious.
More Homemade Food Junkie Sourdough Bread Recipes you may enjoy. Just click the link at the bottom of the picture to open a new recipe.
What is the healthiest Sourdough Bread to eat?
Sourdough bread itself is a very healthy bread made with minimal ingredients and containing a lower gluten level than most breads. For an even healthier sourdough bread choose one made with a combination of white and whole wheat flours.
The whole wheat flours will increase the protein levels, the fiber and the vitamins; while the white flour keeps the loaves lighter in texture and crumb. A sourdough loaf made entirely from whole wheat flour will be amazingly healthy, it just may be a bit more challenging to work with for beginner bakers, and it may present a slightly denser crumb than you prefer.
What is the difference in white or red Whole Wheat Flours?
White Whole Wheat Flour
- White whole wheat flour is a variety of 100 percent whole wheat. Just like any other whole wheat flour it is grown from wheat berries and made into whole wheat flour.
- White whole wheat flour is planted, grown and milled without extra steps or additives. No bleaching or mixing in other flours.
- It is exactly like brown whole wheat flour nutritionally.
- White is just a different color wheat and it can be easier to work with.
- The crumb of white whole wheat bread is dense compared to an all purpose bread flour but less dense than hard red berry whole wheat flours.
- White whole wheat flour makes baking with whole wheat flour easier. The crumb is about mid way between the lightness of all purpose bread flour and the heavier red winter wheat flours.
Montana Prairie Gold white whole wheat flour is a great way to lighten the whole wheat loaf and give it a softer, moister crumb.
White Whole Wheat Flour is simply naturally lighter in texture making it easier to work with. It’s full of the same nutrients classic red wheat flour has.
For this Whole Wheat Sourdough Bread recipe you can use any combination of white and red whole wheat flour, but the handling of the dough will be impacted.
Red Whole Wheat Flour
Whole Wheat Flour made with hard red winter wheat berries is the most often used flour for whole wheat recipes. It is darker in color and can create a denser loaf of bread. Working with hard red winter berry whole wheat flour in a long rise sourdough bread is challenging.
- The heavier Whole Wheat Flours are stickier than all purpose white bread flours.
- They don’t develop gluten easily or raise as well as 100 percent white whole wheat sourdough bread, and will demand a longer rise time.
- Loaves will have a denser crumb and a stronger nuttier flavor.
- When making your own flour using red wheat berries we recommend setting your mill grain to the finest setting.
Whole Wheat Sourdough Bread Recipe
Now we know why white whole wheat flour is a good choice for the beginner artisan whole wheat bread baker. Let’s get started learning the method for this bread recipe. It’s very easy, it just takes some time.
TIP: Fresh milled flours offer the finest properties for baking. Whole wheat flours quickly go rancid, so use freshly milled flour for best results.
If you are a beginner we suggest:
- Start by watching the video to learn the techniques.
- Then read the printable recipe card to familiarize yourself with the method.
- Finally, read the tips you’ll find below. They are specific to this recipe. If you are still confused about something please feel free to ask us.
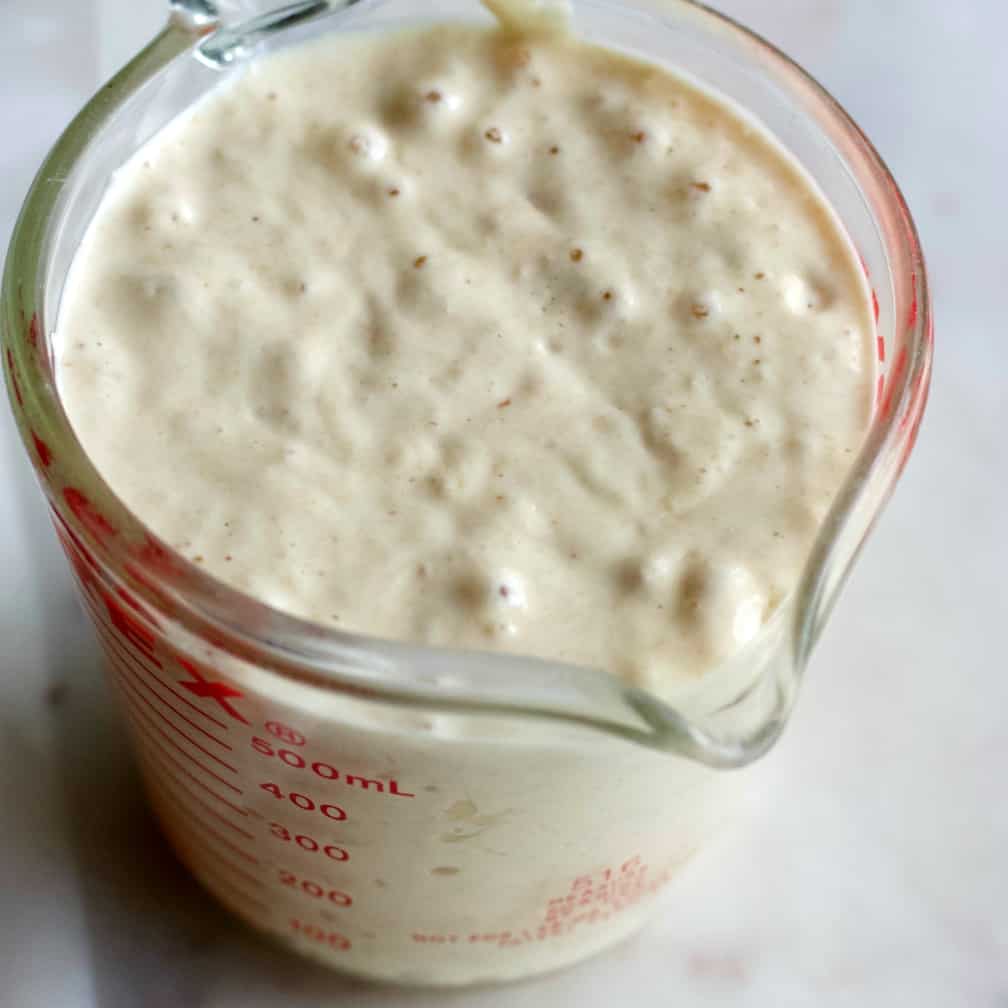
WILD YEAST STARTER
Wild yeast starters provide a much better, fuller, more complex flavor and texture compared to commercial yeasts. Your starter provides the lift, flavor and has a lot to do with your finished texture and crumb. A good starter is crucial to your whole wheat sourdough bread success.
Refer to this post on How To Make Wild Yeast Starter for more information and help if you need to make a starter from scratch. Dont want to make your own? buy it From our friend Sasha
- TIP: Do not begin your bread recipe until your active starter passes the float test.
- To float test your starter drop one teaspoonful into a cup of tepid water.
- It should bounce right up and retain its form.
- If you do have an inactive or lazy starter be sure to feed it.
- Feed it now and check it in a few hours then retest. That may be all it needs.
Feeding your Starter
The night before, or several hours before you begin your recipe, take your starter out of the fridge and feed it. I usually use 100 grams for the amounts I feed for this recipe. In equal amounts by weight. Mix together in a medium sized bowl.
- starter
- flour
- water
Let it sit at room temperature for several hours to overnight. It should pass the float test before using it for this recipe.
The Slap and Fold Technique
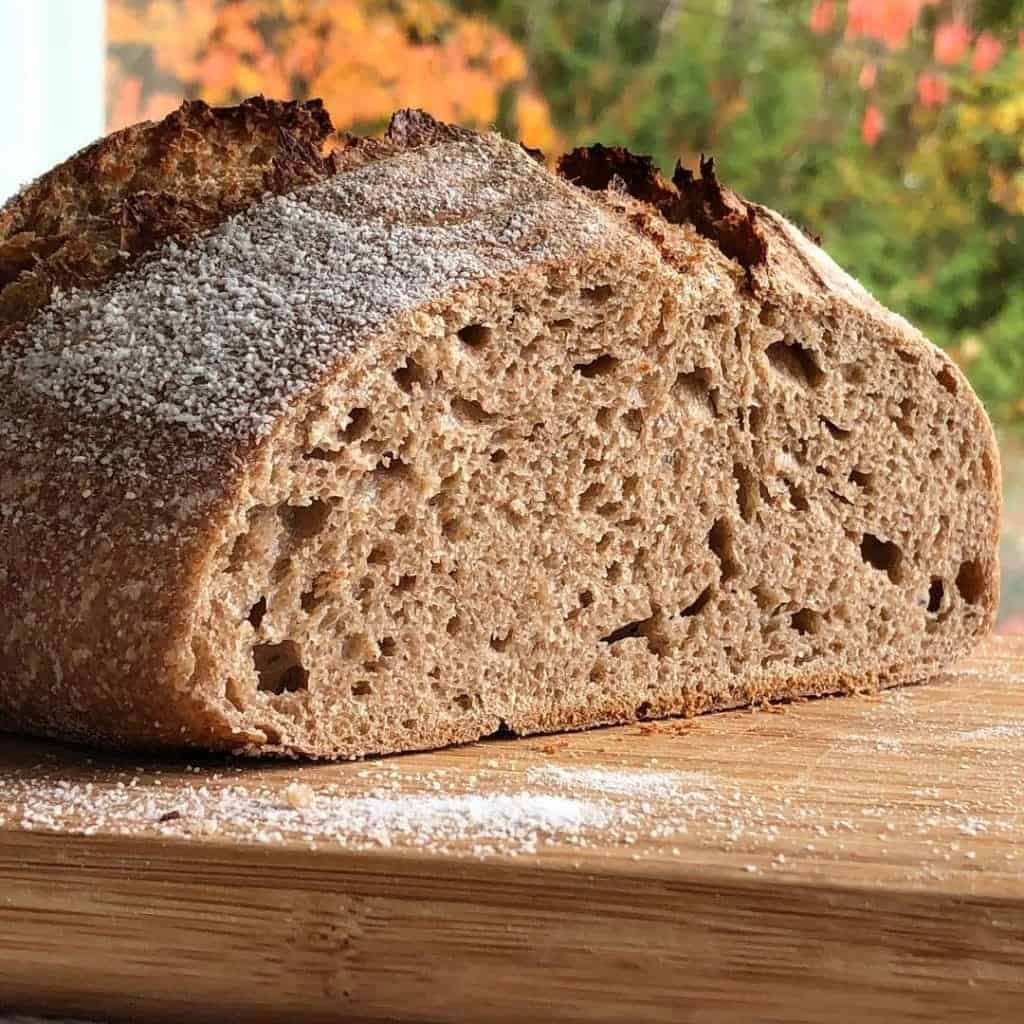
Using whole wheat flour will make the stretch and fold process a bit more difficult because the dough will be more resistant to stretching. This method will de-gass the dough somewhat which will give it the denser crumb you see pictured. However, it’s a great way to develop gluten for a sandwich bread that you want a close crumb on anyway.
- Pick up the dough with one hand and let it hang in the air until it stretches a bit.
- Slap it on the counter. It should be a stretched out piece of sticky dough.
- Release it from your counter with the dough blade and fold it over.
- Pick it back up by a different side and repeat until the dough has been counter slapped four times.
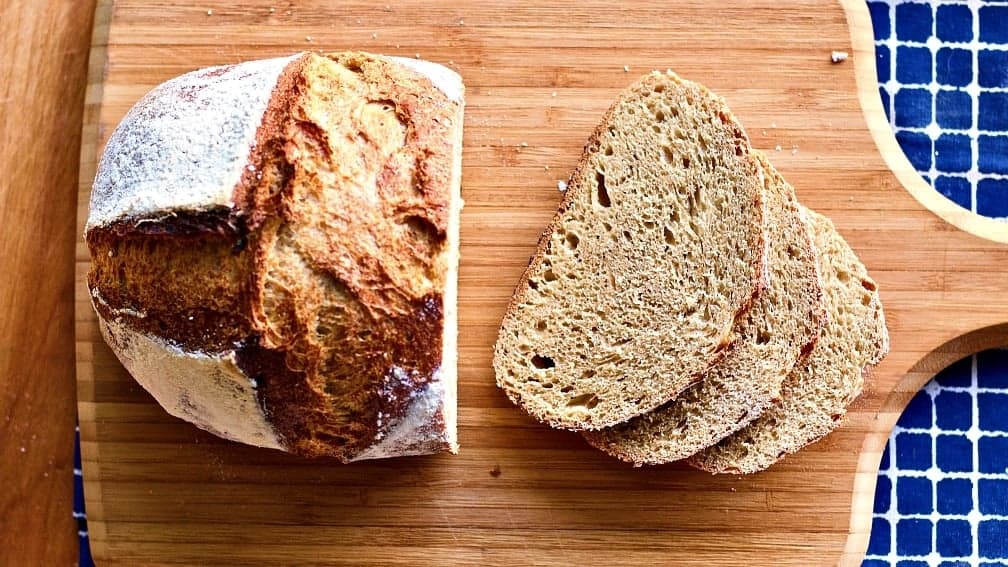
To achieve a lighter crumb
Beware too much liquid with the heavier red winter wheat flours. Start with 200 grams of starter and see if that works best for you. If it’s too dry add the extra starter after you have mixed it at the autolyse stage.
Stick to the gentler stretch and fold if you want a highly aerated loaf with lots of artisan like holes.
If the gluten does not develop and the dough is continuing to break after 4 folds add another stretch and fold until you get a stretchy dough. Adding more stretch and folds will help the gluten develop.
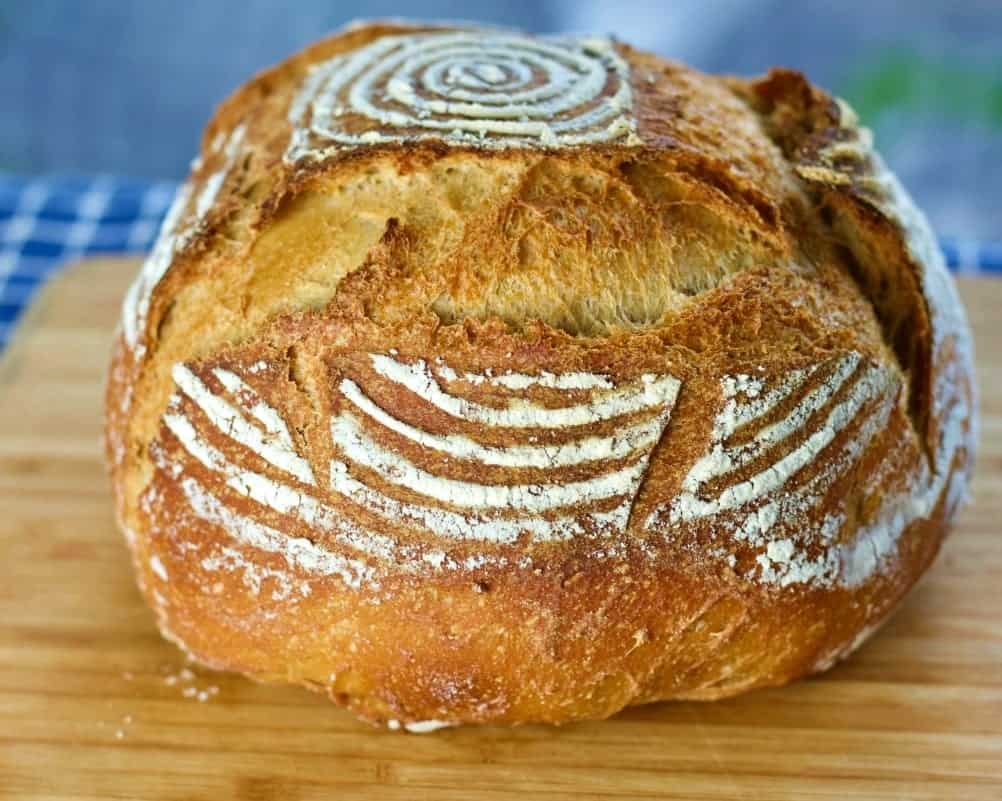
Scoring the loaves
Proper scoring helps the bread attain its optimal bread rise, which will give you the best crumb. It takes practice.
- When the oven and dutch oven are preheated remove the dough from the fridge.
- Set it on your parchment paper on the counter.
- Using a sharp lame or very sharp knife make deep grooves evenly around your boule.
- You can use any pattern you desire. The way you score the dough will determine its shape and lift to a large degree.
Helpful Suggestions
- Measure ingredients by weight. Flours especially need weight rather than volume measures for the most consistent results.
- We recommend a food scale like this G Dealer scale.
- You will need a dutch oven or other high heat oven safe skillet with a lid to bake your bread in. Chad Robertson prefers a Cast Iron Skillet Combo. A popular choice is the Le Creuset Oval Dutch Oven or a similar style.
- A good quality Dough Scraper Set is very helpful when working with high hydration doughs. The bowl scraper is genius. This is a sticky dough and the bowl scraper slides that dough around like a dream.
- Bannetons are for the final long rise often done in the fridge. They come with handy cloth liners that fit to help keep the dough well formed. The finished bread has lovely ridges in it. If you remove the cloth liners and heavily flour the baskets your loaf will look very artisan.
- A Lame Knife for scoring your loaves is also really helpful in releasing the dough to rise properly.
Your Printable Whole Wheat Sourdough Bread Recipe card.
I suggest for this lengthy recipe you print out the recipe and refer back to it while reading the post tips.

Beginner Sourdough Whole Wheat Artisan Bread
Make your own delicious bakery quality artisan sourdough breads at home. This recipe is a good start for new sourdough bakers. It's a long process but an easy one. These breads are so worth it!
Ingredients
- 525 grams water-80 degree F. -NO chlorine , 2.22 Cups
- 250 grams Very active starter - make sure it floats , 1 1/4 Cup
- 20 grams Sea salt , 1 Tablespoon
- 700 grams WHITE whole wheat Flour, about 5 1/2 Cups
Instructions
MAKE THE STARTER
- Make the STARTER AHEAD (This can take up to a week or more) AND DO NOT USE UNTIL IT IS ACTIVE ENOUGH TO FLOAT A TEASPOON ON A CUP OF WATER. Continue the recipe
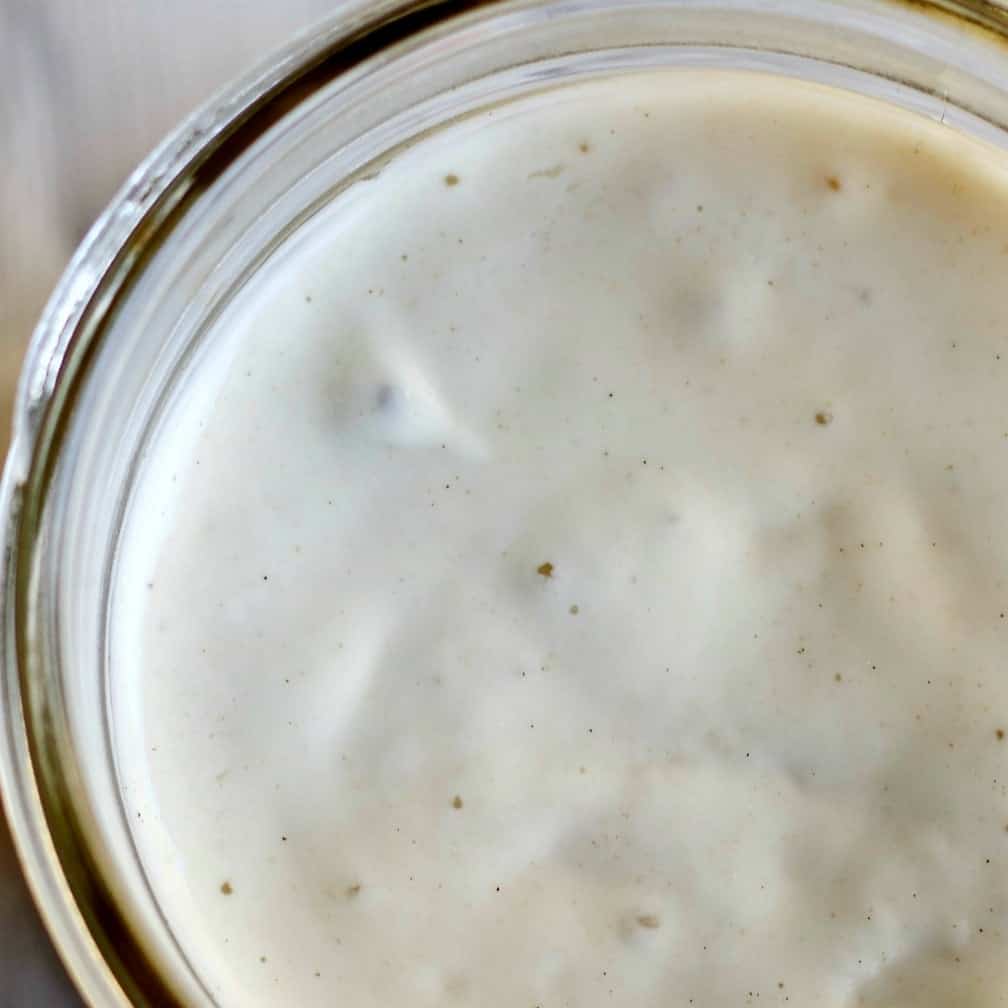
- Leaven Float Test
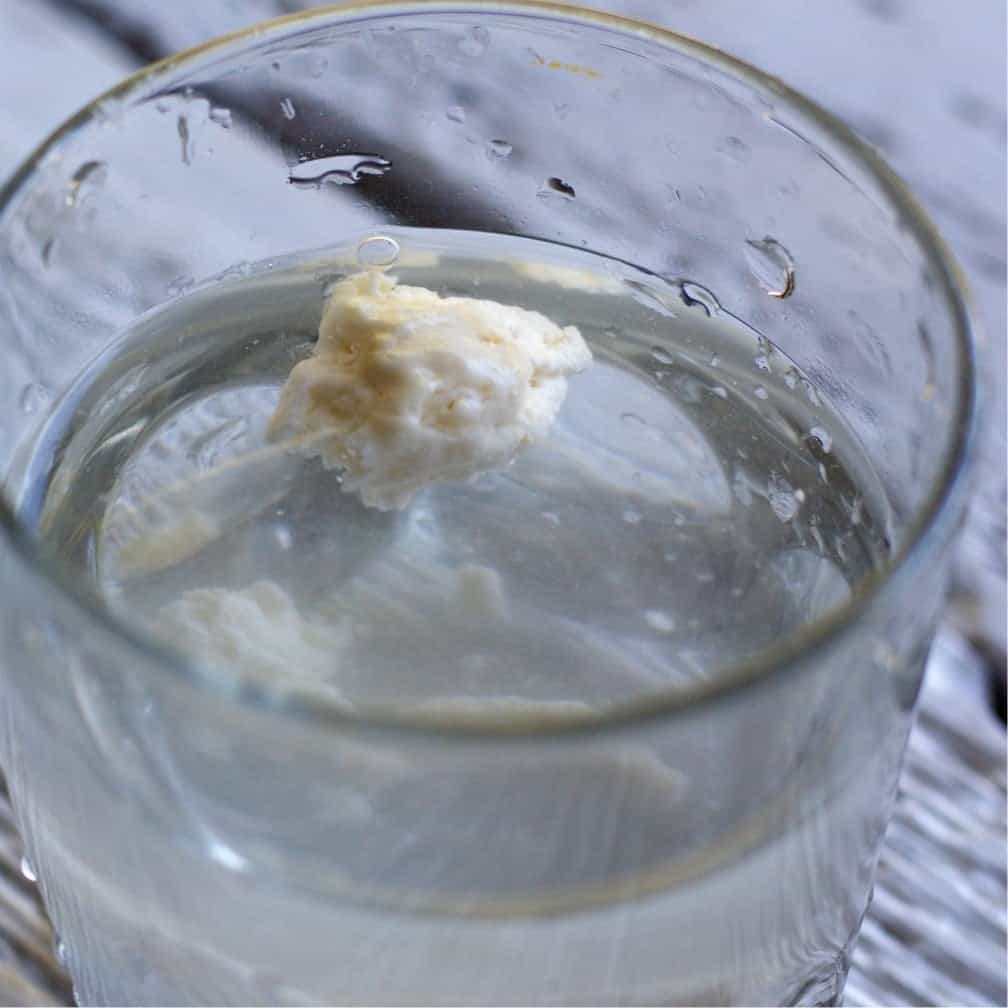
MAKE THE DOUGH
- Pour the water into a large bowl.
- Add the ripe starter to the water and mix thoroughly with a whisk or by hand until the floating cloud of starter is mixed completely into the water
- Add the flour to the leavened water and mix with the dough bowl scraper or other spatula. At the end use wet hands to form a shaggy dough ball.
AUTOLYSE: Technically, we do a Fermentalyse, since we add the starter with the water and flour. This jump starts fermentation.
- Let mix rest about an hour. This stage can be extended without worry up to four hours at 75 degrees F.
- Now add the salt to the bread dough. Use your hands to pinch and stretch the dough gently until the salt is mixed into the dough. (see video for my technique)
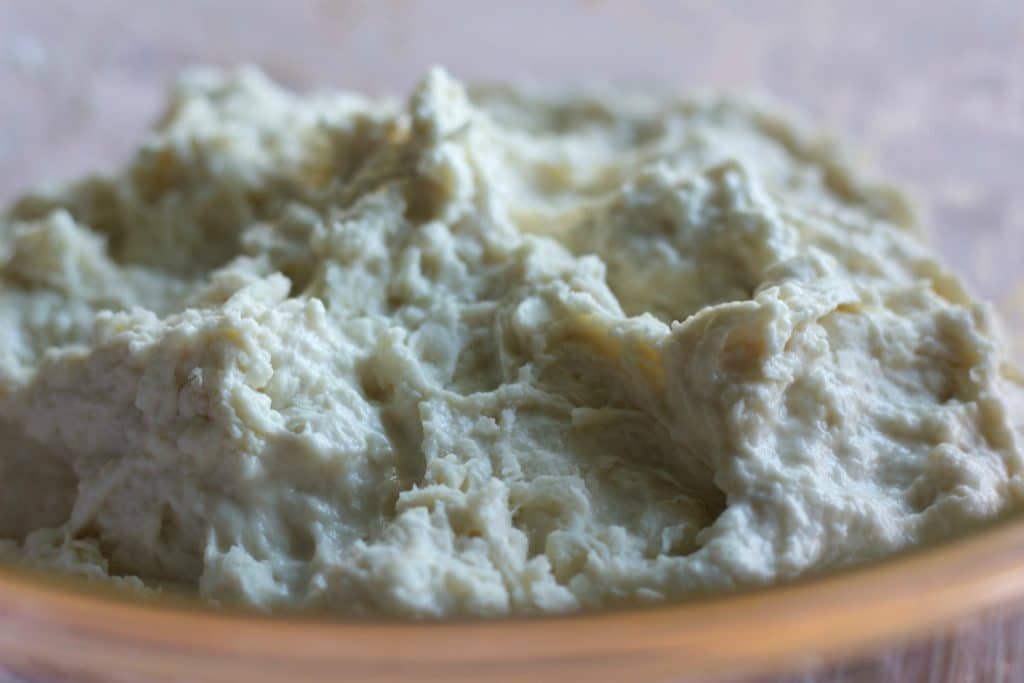
STRETCH AND FOLD (OR SLAP AND FOLD)
- Using your wet hands pull the dough from under the dough ball up and stretch it gently as you pull it over the dough ball top. Release. Repeat this process as you give the bowl quarter turns until the dough is stretched and pulled from each quarter of the bowl. (SEE video for a demo of this technique).
- Over the next 2 1/2 hours repeat the stretch and fold every 30 minutes. Whole wheat flour can be VERY resistant to this technique. If you prefer use the SLAP and FOLD technique.
- The dough should become an elastic resilient dough that passes the window pane test. BUT whole wheat flour may need more time in the stretch and fold(Or slap and fold) to build gluten sufficient to pass this test.
BULK RISE:
- Allow the dough to bulk rise IN THE BOWL at room temperature an hour or SO until it rises by 30 percent or so.
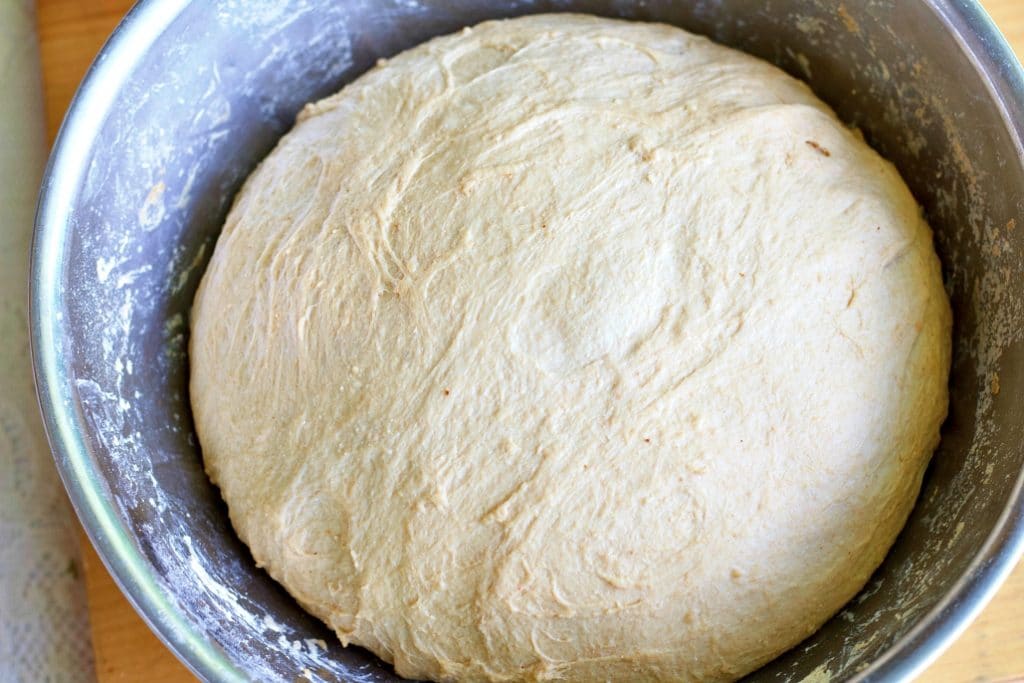
- Cover the bowl of dough with a plastic bag and set it in the fridge for 15 to 18 hours (Or overnight). It should continue to rise slowly so give it room in the bowl. Whole wheat flour will rise even more slowly than all purpose bread flours.
- Remove the dough from the fridge and let it sit on the counter in the bowl for two hours or until the dough reaches room temperature (or pretty close). The dough will soften and gently rise (a tiny bit) and relax as it warms.
DIVIDE AND BENCH REST THE DOUGH:
- On a clean unfloured counter pour out the dough into a large mass. Flour the top of the dough lightly but evenly.
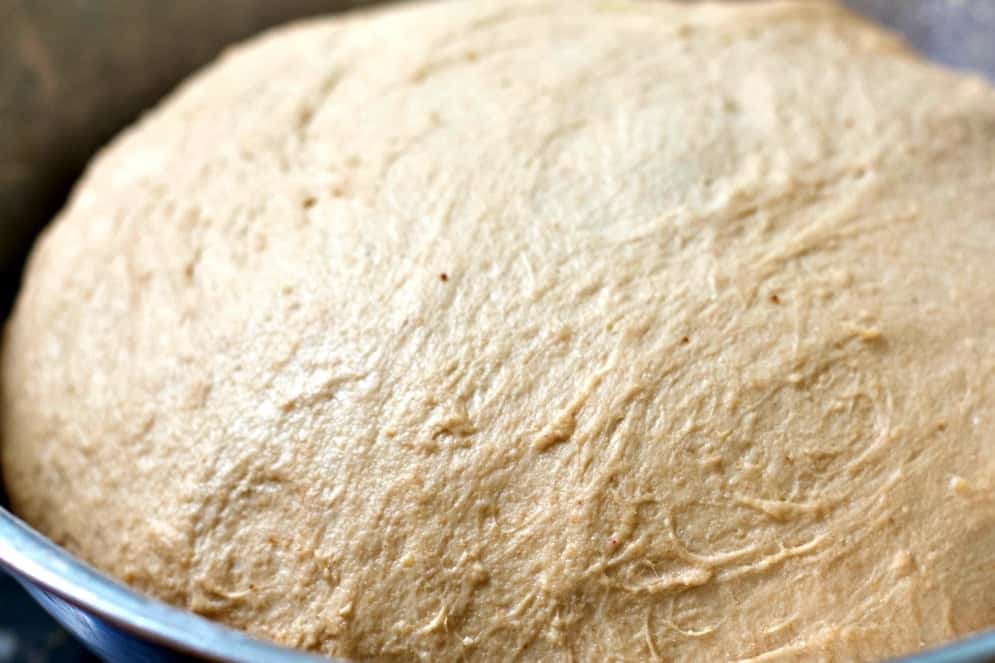
- Divide the dough mass in half with your metal dough scraper.
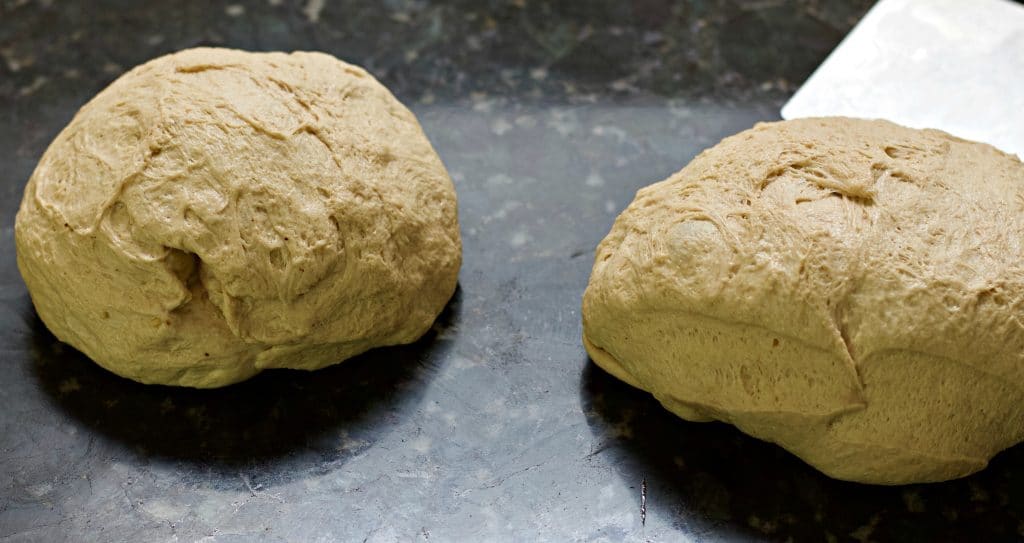
- BEING CAREFUL NOT TO OVERWORK THE DOUGH-Form each half into a dough ball. The most efficient way to do this is to use the counter as your pivot point. Scrape in a circle around the dough (leave it unturned, flour side up). The unfloured counter will hold the dough center and create tension as you circle the dough with the scraper forming a ball. Repeat to form two dough balls. The DOUGH edge should be round and the dough ball should have some form and resilience to it.
- Let the dough balls rest for 30 minutes or so. They will spread out but should not fall off at the edge of the pancake. If they do, reform the loaves and bench rest them again to build the structure of the dough better.
FINAL SHAPE AND RISE:
- Gently slide the dough scraper under one of your dough balls and flip it over so it rests on the floured side.
- Now gently stretch and pull the dough over from the bottom to 1/3 up the loaf. Stretch and pull the dough from the sides to the dough middle. For the final stretch take the dough from the top of the ball and pull it all the way down to the bottom. Form a seam. Pinching the seam if necessary.
- Place the dough seam side up in your rice floured, cloth lined banneton or bowl.
- Rise in the fridge 2 to four hours until completely chilled. The loaves will not rise much at this point.
Baking Instructions:
- Set a baking stone (if you have one) on your oven bottom rack. Set your dutch oven with it's lid on next rack up (lower third of oven). PREHEAT oven to 450 degrees F. for at least 30 minutes.
- Keep the formed loaf in your banneton in the fridge until you actually need to place it in your preheated dutch oven. Cold dough will aide the oven spring. (which means the loaves will rise better).
- Remove one banneton from the fridge. Place the dough in your preheated dutch oven. Do this by flipping the loaf into the dutch oven as gently as possible seam side down. OR:
- Alternate method: Place high heat safe parchment paper over the banneton. Turn the banneton upside down so the dough falls gently onto the parchment paper.
SCORING THE LOAF:
- FOR OPTIMAL RISE: Score the loaf with your lame knife or a razor blade or sharp scissors. Scoring helps the dough rise better if you score the loaf at least an inch deep. And use cross cuts (The pound sign works well)
- Now pick up the scored loaf with the edges of the parchment paper, if using, and gently and carefully place it into your VERY hot dutch oven.
- Put the lid on the dutch oven and return it covered to your preheated oven.
- Bake 30 minutes at 450 degrees.
- Now REMOVE the lid (and parchment paper if using). Steam should come out. Hopefully the bread is a light golden color with a nice rise and set crust. Bake an additional 10 minutes UNCOVERED or until the loaf thumps hollowly and the surface gets dark(Caramelized darker than you are used to maybe) and the scored areas look shiny. (To prevent over browning turn the parchment paper (or foil) upside down over the loaf as it finishes in the oven.)
- Remove the dutch oven. Place the finished loaf on a cooling rack. Do NOT cut it for at least an hour to set the crumb.
- Return the dutch oven (with it's lid on) to the oven at 450 degrees F and preheat for 15 minutes. Repeat the process with the remaining loaf.
- To tell if your bread is properly done. It should sound hollow when thumped. The crust should look shiny and Caramelized at the scored sections. Whole wheat loafs are dense. The crumb may be open or closed depending on how you handled it.
Notes
WATCH your dough as it goes through the stages of fermentation.
This dough can easily over ferment at high room (Or oven proofing) temperatures. If your dough gets slack, unworkable and won't form or rise it is probably over fermented. At this point I suggest you Make pizza with it instead of loaf bread .To avoid over fermentation keep the room temperature (or oven) at 80 degrees or less. Whatever flour you are using will influence this process. Learn to work with the dough you are creating.
This bread freezes VERY well.
After it is completely cooled double wrap it tightly with plastic wrap and set in the freezer. Defrost at room temperature wrapped or unwrapped. Slice and eat.
For best results store your sourdough bread loaves in a bread box
(I use my dutch oven with the lid slightly cocked). That beautiful crunchy Sourdough crust gets soft in an airtight container or plastic sack. Once cut just set the bread cut side down to protect the crumb. These loaves hold very well for at least three days. Freeze the other finished loaf if you can't eat it right away.
Banneton Tips:
High Hydration dough tends TO STICK to the liner cloths and banneton ridges.
- Scrub rice flour (or cornmeal) into the cloth or banneton sides. Once the dough is in the banneton I add a bit more rice flour around the side of the loaf to keep it from sticking during the rise.
- IF your dough sticks a bit to the banneton cloth, use a sharp knife to pull it away and add some flour to the sticking spot. Now it should invert without too much trouble.
- For really tough sticks, cut the dough away from the cloth and repair it carefully by pressing the dough to reshape it before baking.
- Careful of burns if you are doing this in a hot pot.
- Don't despair. I have had some pretty mangled loaves come out of the oven beautifully!
Nutrition Information
Yield
20Serving Size
1Amount Per Serving Calories 112Total Fat 1gSaturated Fat 0gTrans Fat 0gUnsaturated Fat 0gCholesterol 0mgSodium 389mgCarbohydrates 24gFiber 4gSugar 0gProtein 4g
Sourdough Troubleshooting:
If your bread doesn’t turn out the way you expect, start with our comprehensive Sourdough Troubleshooting guide: If you have questions, please ask them in the comments section below this post. we will answer. Happy Baking!
Or jump to the specific issue you’re seeing:
- Bread turns out dense –Why Is My Sourdough Bread Dense?
- Sourdough flour Types– How Different Flours affect your loaf
- Dough spreads instead of rising – How to Shape Sourdough Bread
- Score won’t open – How to Score Sourdough Bread
- Crust is soft or pale – How Steam Baking Sourdough Affects Oven Spring and Crust
King Arthur Has more info on White Whole Wheat flours
Recommended Reference Books On Sourdough Bread Baking:
- Tartine By Chad Robertson
- Tartine 3 By Chad Robertson
- The Bread Baker’s Apprentice by Peter Reinhart
Follow Us:
We enjoy meeting you on our social networks. Follow us on Facebook, Pinterest, Instagram . Tag us with your pictures of our recipes and comment on how it went for you. We would love to see what you do with them.
We often like, comment and share your posts of our recipes on our daily Instagram stories.
Ask questions and rate the recipe in the comments section below. Please share what you did with this recipe. We are always looking for more and better ways to make homemade food. Other cooks love your ideas!
Recent Posts:
I made it for the first time this week, and it turned out pretty good! The flavor was great. My only issue is that the bottom was burnt. I used the dutch oven combo with the skillet lid that you had a link to (ironically I had the exact one in my camping equipment already). Do you think I need to lower the temperature because of the dark color? Thanks for your recipe!
Hi Shayla, I’m glad you had good results with this recipe. It’s frustrating the bottom of your loaf burnt. That is learning your oven and the recipe together.
Here are some ideas: Convect bake if your have the option to distribute the heat more evenly around the dutch oven. You can try lowering the temperature by 25 degrees. I’d also try setting the dutch oven on a baking sheet, pizza stone or putting a water bath under it on the next shelf down.
Keep going on sourdough. You are off to a great start!
I lowered the temp to 425 and put a baking sheet underneath the Dutch oven, and it turned out perfect! Thank you for the tips! I have now made it several times, and it is my husband’s favorite!
That’s wonderful to hear. Thanks so much for letting me know. I’m so happy your husband loves it. Happy Baking!
Hi Diane,
First time bread baker here. I’ve tried a few different recipes up to this point (pandemic baking!) and haven’t had much luck. I’m delighted I found your recipe, it’s clearly laid out and the video is how I learn best.
Does the size of the dutch oven matter? For example, my last loaf (single loaf) was baked in a 6.5 qt dutch oven. It didn’t come out very well in terms of rise, crust, etc. I know I had other problems with the recipe I was using for this loaf, but wondered if pan size mattered?
I won’t be defeated, however. I’m pulling out my starter from the fridge and will be following your recipe to the “T” well, except for the flour. In only have whole wheat, unless I could use bread flour as stand in for the white whole wheat?
Thanks for your help!
Hi Kelly, Welcome. Your dutch oven size will not be a problem. I use both a 6.5 and a 5 quart dutch oven for baking sourdough. They both are exactly the same dutch oven brand. Both work fine.
Most likely your challenge will be the flour. Red Whole wheat is very different from white whole wheat or bread flour. But You can certainly use the hard red winter wheat flour. I have done that as well several times. The results are pictured in the post and it comes out great. Very flavorful and tasty.
Is your starter well established and very active? That is a must for this bread. Whole wheat makes a denser loaf and needs a strong starter to rise the bread.
Also the dough will be sticky and stiff. That’s why I suggest the slap and fold if the stretch and folds don’t work. Just be patient and follow the instructions exactly.
Best of luck. I’m here to answer questions if you need further help.
Hi – so this is my first attempt to making sourdough starter and bread (pandemic experiment) and I may have take a few missteps. First, I only had whole wheat and gluten free flour. After a week of the starter one evening it completely spilled out over the sides of my jar. I stirred it and put it in a larger one. It never really rose much after that, but still bubbled and smelled like yeast. It did pass the drop test in water this morning, so thought I would go for it. In my excitement, I sadly added the salt after I added the flour, it didn’t have that hour to rest. I am in the process of folding it every 30 minutes
But thought I might check in with you first to see if I just blew it. Thank you! I will keep trying no matter what, it’s a fun experience so far!
Hi Karen, Well if your starter passed the float test. I’d say you have a good chance of success. The other variable is your flour. Which in this time of shortage I know it’s difficult to find a high protein bread flour. Thing is your bread will probably bake ok.
I have been right where you are. If it’s possible to make a mistake with this recipe I have made it. Just keep going forward. Try to follow the rest of the recipe exactly. And use the longer cold rise time rather than shorter.
Look closely at the video to make sure you understand the sequence of the steps and the techniques. This is a pretty flexible sourdough recipe. But the more closely you follow it the better.
Even if the rise is not perfect and you can’t form the loaves as you wish right now it will still taste great. Can’t wait to see your results!
I didn’t have high hopes for this. Never made sourdough or even bread before. I used the cheapest generic whole wheat from the grocery store (it was all they had). The starter took 3 weeks before it would double in size. I had thought maybe it just wouldn’t work. I folowed your very detailed directions and they were very helpful for a novice. I kind of thought I was wasting my time with how many steps there are. I’m usually not that detail oriented, especially with cooking, but I followed them suspecting I was going to end up with a lump of nothing at the end. But it worked. My wife said “this is like the fresh bread you get in Paris”. The kids love it too. Thank you so much. So happy with how this turned out. You have a great site and I will be back for more (especially when I can get other kinds of flour).
Hi Colin, Thank you SO much for encouraging comment. It’s wonderful to know our post was helpful and your bread turned out great with the ingredients you could find. You made my day. 🙂
Just finished eating my warm bread and it is fabulous! Love the sourdough flavor and your instructions were very specific!!! Thank you for sharing your recipe!!!
Hi Karen, You are so welcome! Thanks for coming by to tell us the recipe worked well for you. have a great day!
Hello I am still in the process of getting an active starter but was reading up your recipe and watching you video. Can you please tell me how I can manage room temperature of 85f to prevent over proofing or fermentation ..current summer temperatures here are already 104f..any tips would help..so you recommend keeping it in a room with air con on? Or reducing time it is kept in the kitchen counter to proof?
Hi Meghna,
The high heat of summer is going to be a challenge for you. Sourdough gets extremely active over 80 degrees F which means the proofing will happen much faster than desirable. At 100 degrees your yeasts will start to die and your bread won’t proof or rise at all.
When you do start to bake your sourdough try avoiding any room temperature proofing in those high temperatures. You will have to play around with this. For example try this recipe by using cold water to start. You can set the bread in your fridge while doing the autolyse and stretch and folds if your room is too hot. UNLESS you have air conditioned rooms under 80 degrees.
Your bulk rises and final proof will all need to be done in the fridge if your room temperature is too high. Only remove to your counter to work with the dough as instructed and check the dough progress. You can increase the fridge time to 24 hours and eliminate room temperature proofing.
Keep a digital thermometer handy and check the dough temp. You ideally want it around 70 degrees F. Hope this helps. Best of luck!
Oh thank you so much for these tips..makes a lot of sense!… will try this out after reading your post a couple of more times and then will let you know how it goes! Thank you!
Your welcome and best of luck!
Hi
In addition to my previous post I forgot to mention that I missed making the levain, just fed my whole wheat active starter, it passed the float test and I halved your recipe, i.e. 125 gms starter, 350 gms whole wheat flour and 262 gms water. Could this have impacted my dough and result as described in my earlier post? Cheers, Nithya
I think if your starter floated it was probably active enough to work for you. Whole wheat dough is dense and stiff. That is why I slap and fold it rather than stretch and fold. It may just have needed more time to develop to pass the window pane or finger dent test.
I have had many times when my whole wheat bread didn’t pass those test and I baked it anyway. It is definitely heavier and denser with less rise than it should have but it makes good toast.:) White whole wheat is much easier to work with.
You mentioned your bread was tangy. That is because you did not make the levain but used an older active starter. The longer your starter ages before you bake with it the tangier the flavor will be. Have a great day!
Hi
Thank you for a detailed step-wise recipe. Today was my first attempt at making sourdough using 100% whole wheat flour (red wheat I guess). The bread was tangy, I didn’t arrive at a nice brown crust, it was pale, but porous when cut. Also my dough didn’t pass the windowpane or finger dent test. I don’t have a Dutch oven, so baked on a cookie sheet and covered with a cake tin. Baked at 450 F for 15 minutes and reduced to 400 F in the lower rack 3, the base was burnt. Can you please help me with pointers to improve. I don’t get white whole wheat flour and I don’t want to use all purpose flour. Will addition of wheat gluten to red wheat flour help in texture, taste and a better result? What can be substituted for a Dutch oven please? Thank you. Best, Nithya
Hi Nithya,
Let’s start with the flour. Hard red wheat is most commonly used and available. However as you discovered it is difficult for beginner bakers to work with and get the best results. When the bread flour gets easier to find look for WHITE whole wheat flour. It is nutritionally identical to hard red winter wheat but is less dense and somewhat easier to work with. The loaves will be lighter too. But heavier than a white flour.
The actual results you describe in your bake are most probably because you could not use a dutch oven. Setting your dough directly on a baking sheet is not enough protection from the high heat we call for in this recipe. If you have no other option Try doubling the baking sheets and setting the dough on double parchment. Cover the dough with a heavy roasting pan lid if you have one. Also spray the dough and oven with water to produce steam for at least the first 15 minutes. Use a water bath under the loaf to help create steam and protect the loaf bottom. You can also start with a lower temperature. Try 400 degrees for 20 minutes. Then uncover the loaf and LEAVE it on the middle rack at 350 degrees for another 20 minutes. It is done when your thermometer reads 206 degrees in the cent of the loaf. Extend the baking time as necessary. This is NOT ideal. your best results will happen in an actual dutch oven following the baking instructions as listed in the recipe. You may see a denser bread with less rise.
There are many ways to do alternates to a dutch oven but the results will reflect your chosen method.
The dutch oven most closely substitutes for an actual bakers hearth. It is a heavy pot made of cast iron and surrounds the bread completely so the bread can steam. Then when you remove the lid the bread crumb is already formed and the rise is completed. The bread is allowed to continue baking without the lid so it can completely bake and brown.
If you have no desire to purchase a dutch oven try to find one at thrift shops, garage sales, friends and family….
Dutch oven Substitute Ideas:
If you have a baking stone put it in the rack below the one you are baking on to help bake it properly. Or use the stone as a baking surface. Put the dough on parchment on the stone and find a cover that will seal the dough as best it can. Again spray the dough and your oven to get some steam to the loaf as it bakes. Use a water bath on the rack under the stone if you are baking on it.
Wheat gluten MAY help to overcome some of the challenges you face. But I have no idea the proper amount to use. If you do try it and have a better outcome I’d like to know. I hope this has helped you. Keep on baking!
Thanks for the recipe !
I think I did something wrong… My bread was very gummy. What could have gone wrong ?
Hi Victoria, Yep, it should not be gummy. If your loaf is dense and gummy it may have been over proofed which would make it dense and difficult to bake thoroughly.
Bread baking with sourdough is different from yeast breads and whole wheat flours are different from working with white flours.
When you try this recipe next time watch how the dough develops. When the window pane test is passed do the bulk rise and refrigerate.
When you do the bench rest the next day the dough should have a lot of body and not be making a pancake.
Watch the video on the techniques to help you get the steps down. This process is very different from baking yeast breads and using a white bread flour.
I hope this helps! Please let me know if you have further questions. I’m here to help you make successful whole wheat loaf. All the best.
I have Hard Red wheat and Soft White wheat berries, Which do you recommend that I use?
I’ve used both in a different recipe and the hard wheat turned out very dense, the soft white wheat dough was like pancake batter, I added more flour every 30min until it was like muffin batter. I ended up cooking that dough in an oven safe bowel, I turned out good.
I’m not finding many recipes using all fresh ground flour and I’m not sure on the ratio to use and how to adjust recipes from all purpus flour to fresh ground
Hi Kayla,
Thanks for reaching out! I have made bread with fresh ground flours for decades. It’s not an exact science. However with the correct berries you should have no trouble with this recipe.
I usually make this recipe using all hard white wheat berries. I grind my own wheat berries ON THE FINEST setting for my flour mill.
Hard red berries will give you a dense loaf. If you want to use them I would add 50 percent high protein white bread flour to lighten the loaf.
The soft white wheat berries you have are NOT meant for bread. I use them for cookies and pastry.
What you need is HARD white wheat berries. I buy mine on Amazon from Palouse. I make this recipe exactly as it’s written with these berries and the loaf is much lighter than with the hard red wheat berries. And the flavor is fantastic!
You can also add in a good bread flour like Montana brand that has 5 grams of protein or more. Stay away from lower protein flours. They can’t give you the gluten development you need for a good rise. Many bread flours are only 4 grams of protein. It makes a difference.
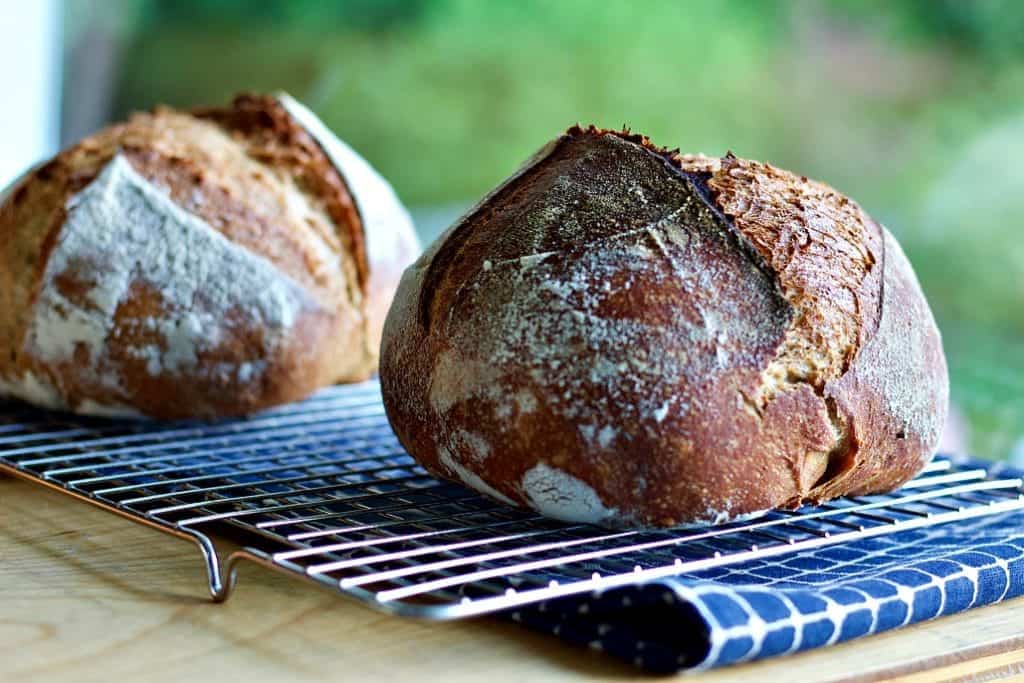
As far as the ratio of flours…I use 100 percent hard white wheat usually. I would add the bread flour up to 50 percent with the hard red wheat flours. although the breads pictured in this post are 100 percent whole wheat.They are delicious and the crumb is great. Hope that helps. Happy Baking!
Where is the oft mentioned video? I cannot find it on this page although it is mentioned numeroustimes.
Hi Joe, I’m not sure why it’s not auto playing in the side bar for you. Here is the link to it on our youtube channel. Have a great day and happy baking!
I tried your recipe and the results were wonderful! I had to use a bit of all purpose flour to get my starter active enough and able to float. Have you done an all whole wheat fed starter and had success with the float test?
Also, if I’d like to make three or four small loaves instead of two larger, how would I adjust the baking times? I’d love to be able to share more and I think a bit smaller would be a better gifting size!
Thank you!
Hi Lauren, I’m so sorry for the late reply. We just found your comment in our spam filter. I’m happy to hear this recipe is working so well for you.
Whole wheat flour does make a good starter. But I do find mixing it with a high protein all purpose flour keeps it a bit more stable. Fresh ground whole wheat has lots of enzyme activity which is very good for getting the starter active. I use it to perk up my starter when it’s getting hangry. Whole wheat by itself will float when its well balanced. Feed it one to one to one the night before you want to use it and set it on your counter. Otherwise keep it in your fridge and feed it once or twice weekly so it doesn’t get too hungry.
You can divide this recipe into smaller loaves and bake them uncovered (use a foil tent if they get too brown.) about 20 minutes with a steamy oven. or spray the loaves with water before baking. Use a digital thermometer to check the loaves. They should bake to 210 degrees. So just keep checking. It all depends on the loaf size of course.
Happy Holidays!
Why do we need the baking Stone??
Hi Josh,
The baking stone helps crisp the crust. If you don’t have one it will still be fine sourdough. Just another help in the baking process. When you take the lid off spray the loaf with water and that will also add crispness to the crust. If you do nothing except remove the lids and bake the loaf it will still be crisp if properly baked so just follow the instructions. These are tips. Not required. Hope this helps. Happy baking!
Thanks!
I used your recipe and guide to craft my first 100% whole wheat sourdough bread. My starter is young, but the crumb came out ok. My daughter, who loves crusty bread, but hates whole wheat everything (she’s a super taster, so is sensitive to bitterness) really liked this bread. My wife’s the next test, but she’s out of town.
Loved this bread.
Thanks again.
Hi Alejandro, Thank you SO much for giving us your feedback on this recipe. I know what your daughter means about bitter whole wheat bread. But the fermenting process this sourdough recipe uses helps a lot to breakdown the flour to produce an excellent flavor. I’m so happy it worked out well for your family. Hopefully your wife will also enjoy your efforts. 🙂
Why so much salt? Is it imperative chemically to the recipe or it can be left out or ,at least reduced to 2 Teaspoons?
20 grams is 20,000 milligrams!!! That is one gram of salt per slice for 20 slices! I don’t think that salty Cod has that
much salt per unit weight.
No lipids and no sugar? please explain. I would very much appreciate any comments/answers.
Made starter from White Whole wheat that I grind myself. Will try the bread tomorrow with zero salt.
You have done a tremendous job on presenting this recipe. Thank you
Hi Terry,
I’m so happy to hear this article was helpful to you! This is a pretty normal amount of salt in the sourdough recipes I have run into.
Salt does help the process of bread development and the flavor. You may enjoy this informative article by Weekend Bakery for an in depth look at salt and how it impacts your gluten development.
The short answer is yes you can reduce the salt and probably have ok results. Eliminating salt entirely (and yes I have forgotten salt in this recipe) will definitely impact the way the dough ferments and develops. And it will taste kinda flat. But the flavor of the whole wheat flours is so good the flavor is not the bigger impact IMO.
I’d LOVE you to share how your bread turns out. It’s so great to have other baker input on our recipes. Happy Baking!
Great guide! My first loaf turned out wonderfully! I’m curious what does the pizza stone do? L
Hi David,
I’m SO happy you had great results with this whole wheat sourdough bread. The pizza stone helps to crisp the crust a bit in an open baked good like boules or pizza baked directly on it. For a dutch oven bread like this one it also crisps the crust a bit when the lid is open. In MY oven, which runs hot it also helps prevent over browning the bottom of the loaf.
Hope this helps. Have a great day and thanks again for sharing your experience with this recipe. Please rate it too!
Do you have any pointers for tweaking the flour ratio for people without a scale? I’m using kamut, and i think i didn’t get enough. My dough is pretty limp. I plan to increase it next time, but wonder what to look for to let me know i have enough before it’s too late to add more.
Hi Julie, Ahhh. Kamut flour is very different from the all purpose flour called for in this recipe. I’m not sure how it’s going to work in this recipe. Here is a quick article from King Arthur flour on Kamut.
IF you get the recipe through the stage and it just won’t rise I suggest you make it a pizza crust. It should be delicious. This recipe is not vetted for kamut so I don’t hold much hope for its success. Please let me know how it goes or you. All the best!
Sorry I missed that you were making the whole wheat recipe. I’m still sure the kamut will have trouble with the rise. Good luck!
Hi,
I have never made bread before (aside from pizza crust) and am trying this for the first time. So i am a completely new to bread. Pretty sure i got the measurements right but the dough seemed dry and stiff. Not wet and shaggy as the video shows. I am using whole wheat white. Any suggestions? Thank you!
Hi Tatiana, The video is for the process and technique. The actual recipe the video demonstrates is our all purpose beginner sourdough bread. If you follow the whole wheat recipe exactly you should have good results. HOWEVER, Whole wheat flour is much more dense and resistant than all purpose. And it yields a denser loaf. But deliciously flavorful.
I recommend extending the autolyze stage to see if that helps loosen the dough. Gluten development will help soften the dough. It will get stretchier and it developed through the process.
If you get to the slap and fold stage and the dough will not fold over well, here’s a tip. SLAP it hard on the counter instead of trying to stretch it.. Just pick the dough up by the end and throw it down on the counter while holding the end. That will help loosen the gluten strands for you. Slap it and stretch and repeat four times like you see the stretch and fold done. Wait the 30 minutes and slap it again. Repeat. By the fourth time the gluten should be developing which will loosen the loaf. Repeat until the window pane test is passed and follow the recipe as directed.
Best of luck! Please let us know how this goes for you. We are here to help if you have any more questions along the way.
Happy Holidays!
Turned out absolutely delicious. My husband loved it. Thank you for the tips and recipe! Merry Christmas and Happy Holidays to you too!
I’m so happy it worked well for you! Thanks for letting us know 🙂 You should feel very proud of accomplishing this. Your bread baking is off to a great start!
Thank you so much , for this great video. My wheat flour , sourdough starter is ready. I can’t wait to try , it will be my first time. 🙂
Hi Cathy, I am SO EXCITED for you! Please let me know if you need help. And I’d love to see your results. Tag me with a picture in either our instagram or FB account please. Best of luck!
HI..
all was going good..my dough is just so stiff! I did 5 rotations of slap and fold still not very much stretch 🙁 any idea what may have happened? Do I have to refrigerate can I leave on counter overnight? Do you have a no knees whole wheat dutch over variation? Sorry so many questions!
Hi kristina, Have you accomplished the window pane stretch yet? If not let the dough bulk rise on the counter for an hour. Then see if it relaxes enough to window pane. If not Slap and fold it again and do the long cold rise. You can let it sit in the fridge up to 24 hours. I’m assuming you’re using hard red wheat flour? They do produce a stiffer dough than white whole wheat flour. But carry on and follow the recipe. And DO put it in the fridge or it will overproof. Let me know how it goes!
Thank you so much for this wonderful beginner’s sourdough recipe! I have used it several times and although it tasted great, it would not rise much and was dense. Seems my starter was not mature enough but tonight I got amazing results. It is everything it should be: has holes, is creamy and has a beautiful crust. Your recipe is great and the video makes it so much easier to follow.
Hi Maria, I had a similar journey into my first perfect sourdough loaf. I also discovered the starter has a LOT to do with a successful rise in sourdough. Thank you for sharing what worked for you. I’m so glad you found this post, recipe and video helpful!